| TheWoodcrafter.net |
 Copyright © 2004. |
| My Basic Projects |
| The Retro Section |
| Jr. Woodcrafter |
| My Work (Pics) |
| Detailed Plans |
| About |
| Lathe Work |
| Safety |
| Hints |
| Pic Gallery |
| Links |
| Search |
| Home |
| Birdhouses |
| Guest Book |
| Contact Us |
|
|
||||||||
|
Using a Wood Lathe
| Lesson 11 - Spiral Turning |
|
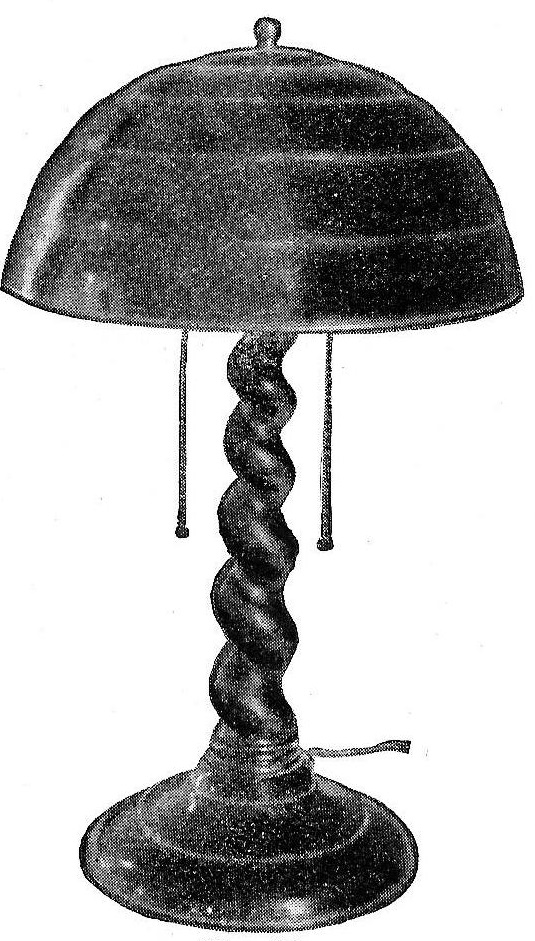
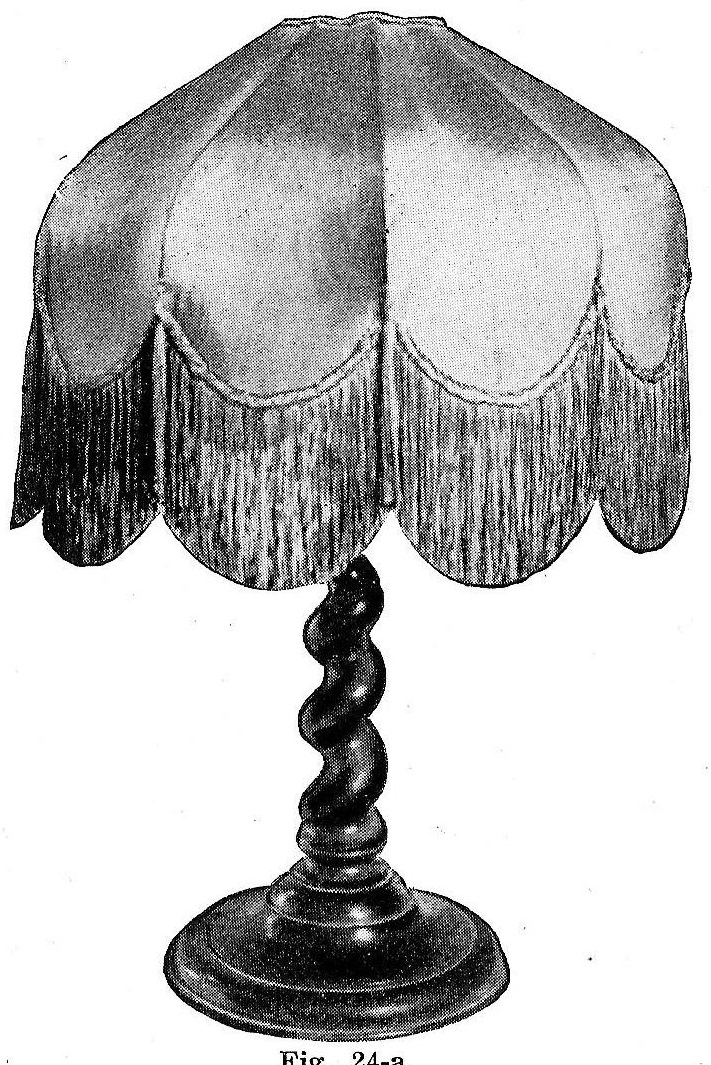
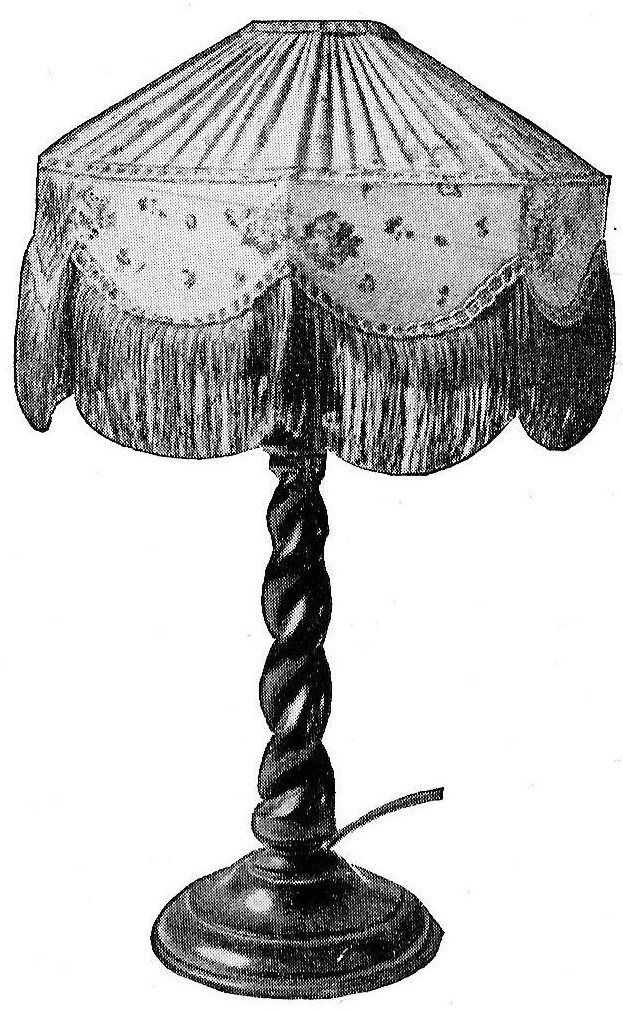
Spiral Turning SINGLE SPIRAL. TAPERED SHAFT
To lay off a single spiral for the electric lamp shown in Figs. 24 and 24a proceed as follows:
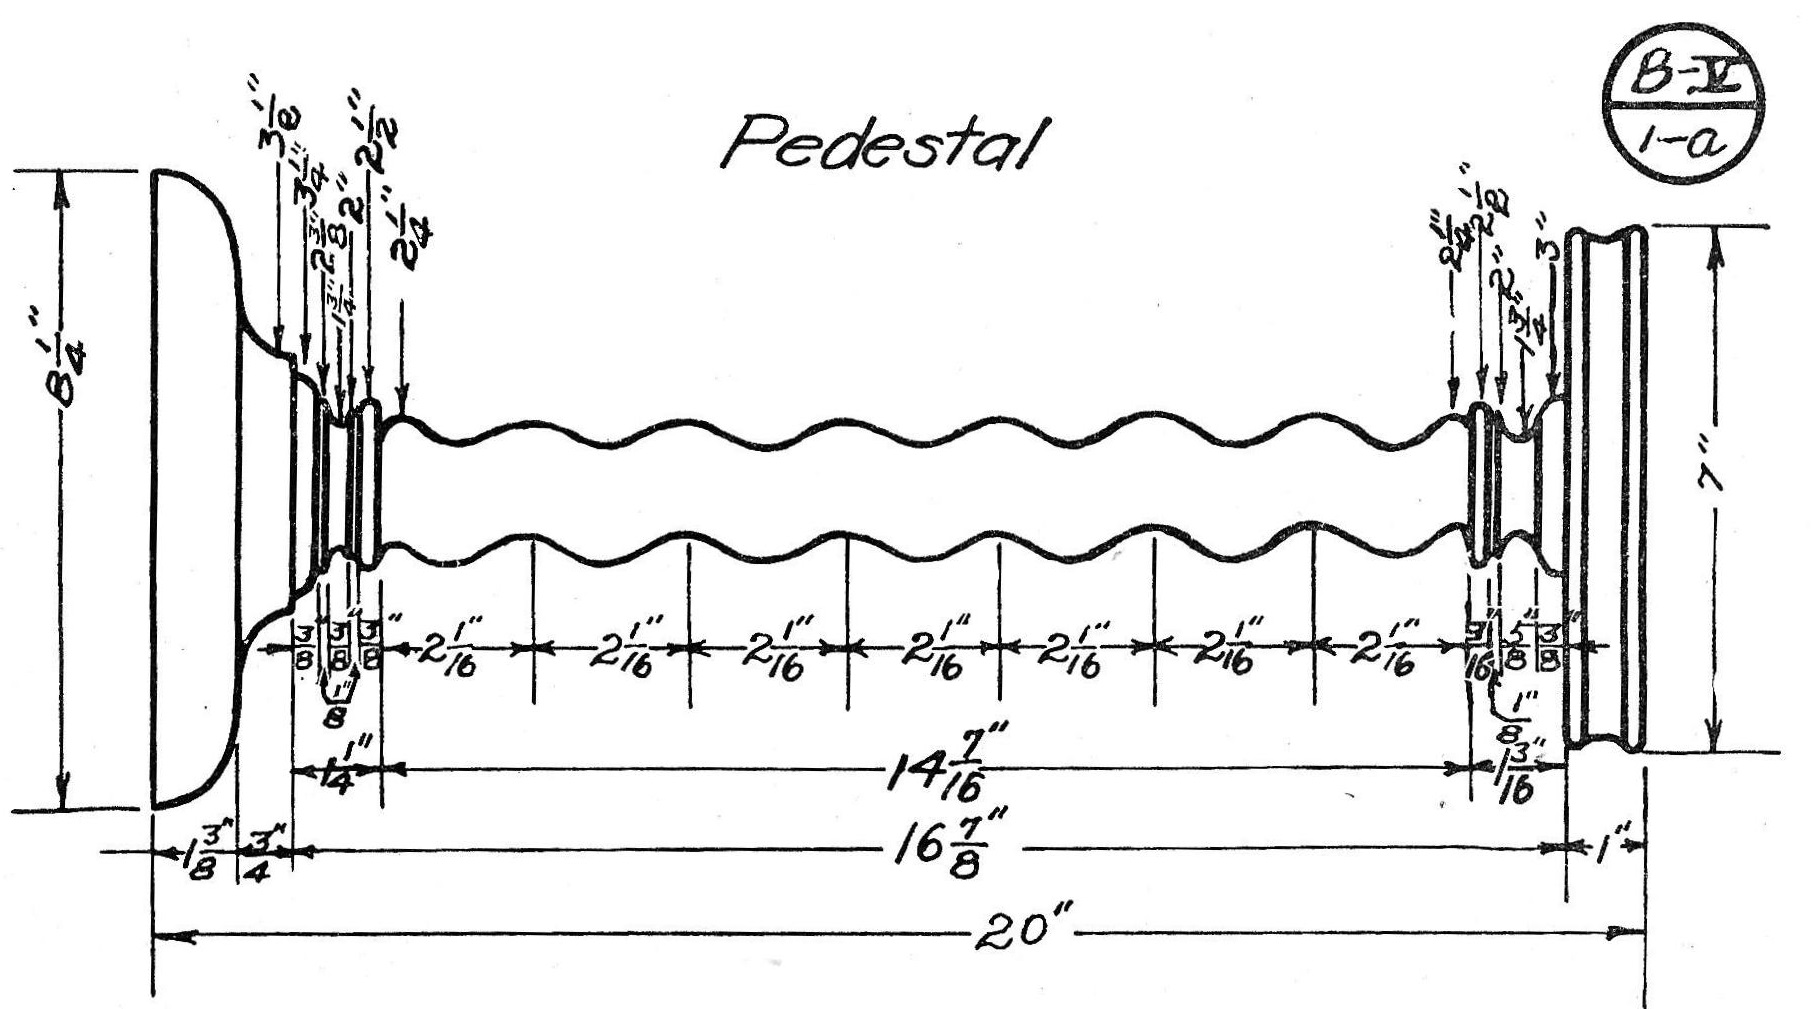
1. Select your wood and bore a hole through it. Plug the hole and center the piece in the lathe. This insures getting the hole exactly in the center, and it will not be cut into while the cutting of the groove of the spiral proceeds. A groove may also be cut in two pieces of stock and glued together to form a hole through the stock. 2. Turn a cylinder 2½” in diameter, tapering it to 11½” at the one end; this part should be 12-1/8” long. Both ends should be left larger than 2½” as the lower and upper designs must be cut here.
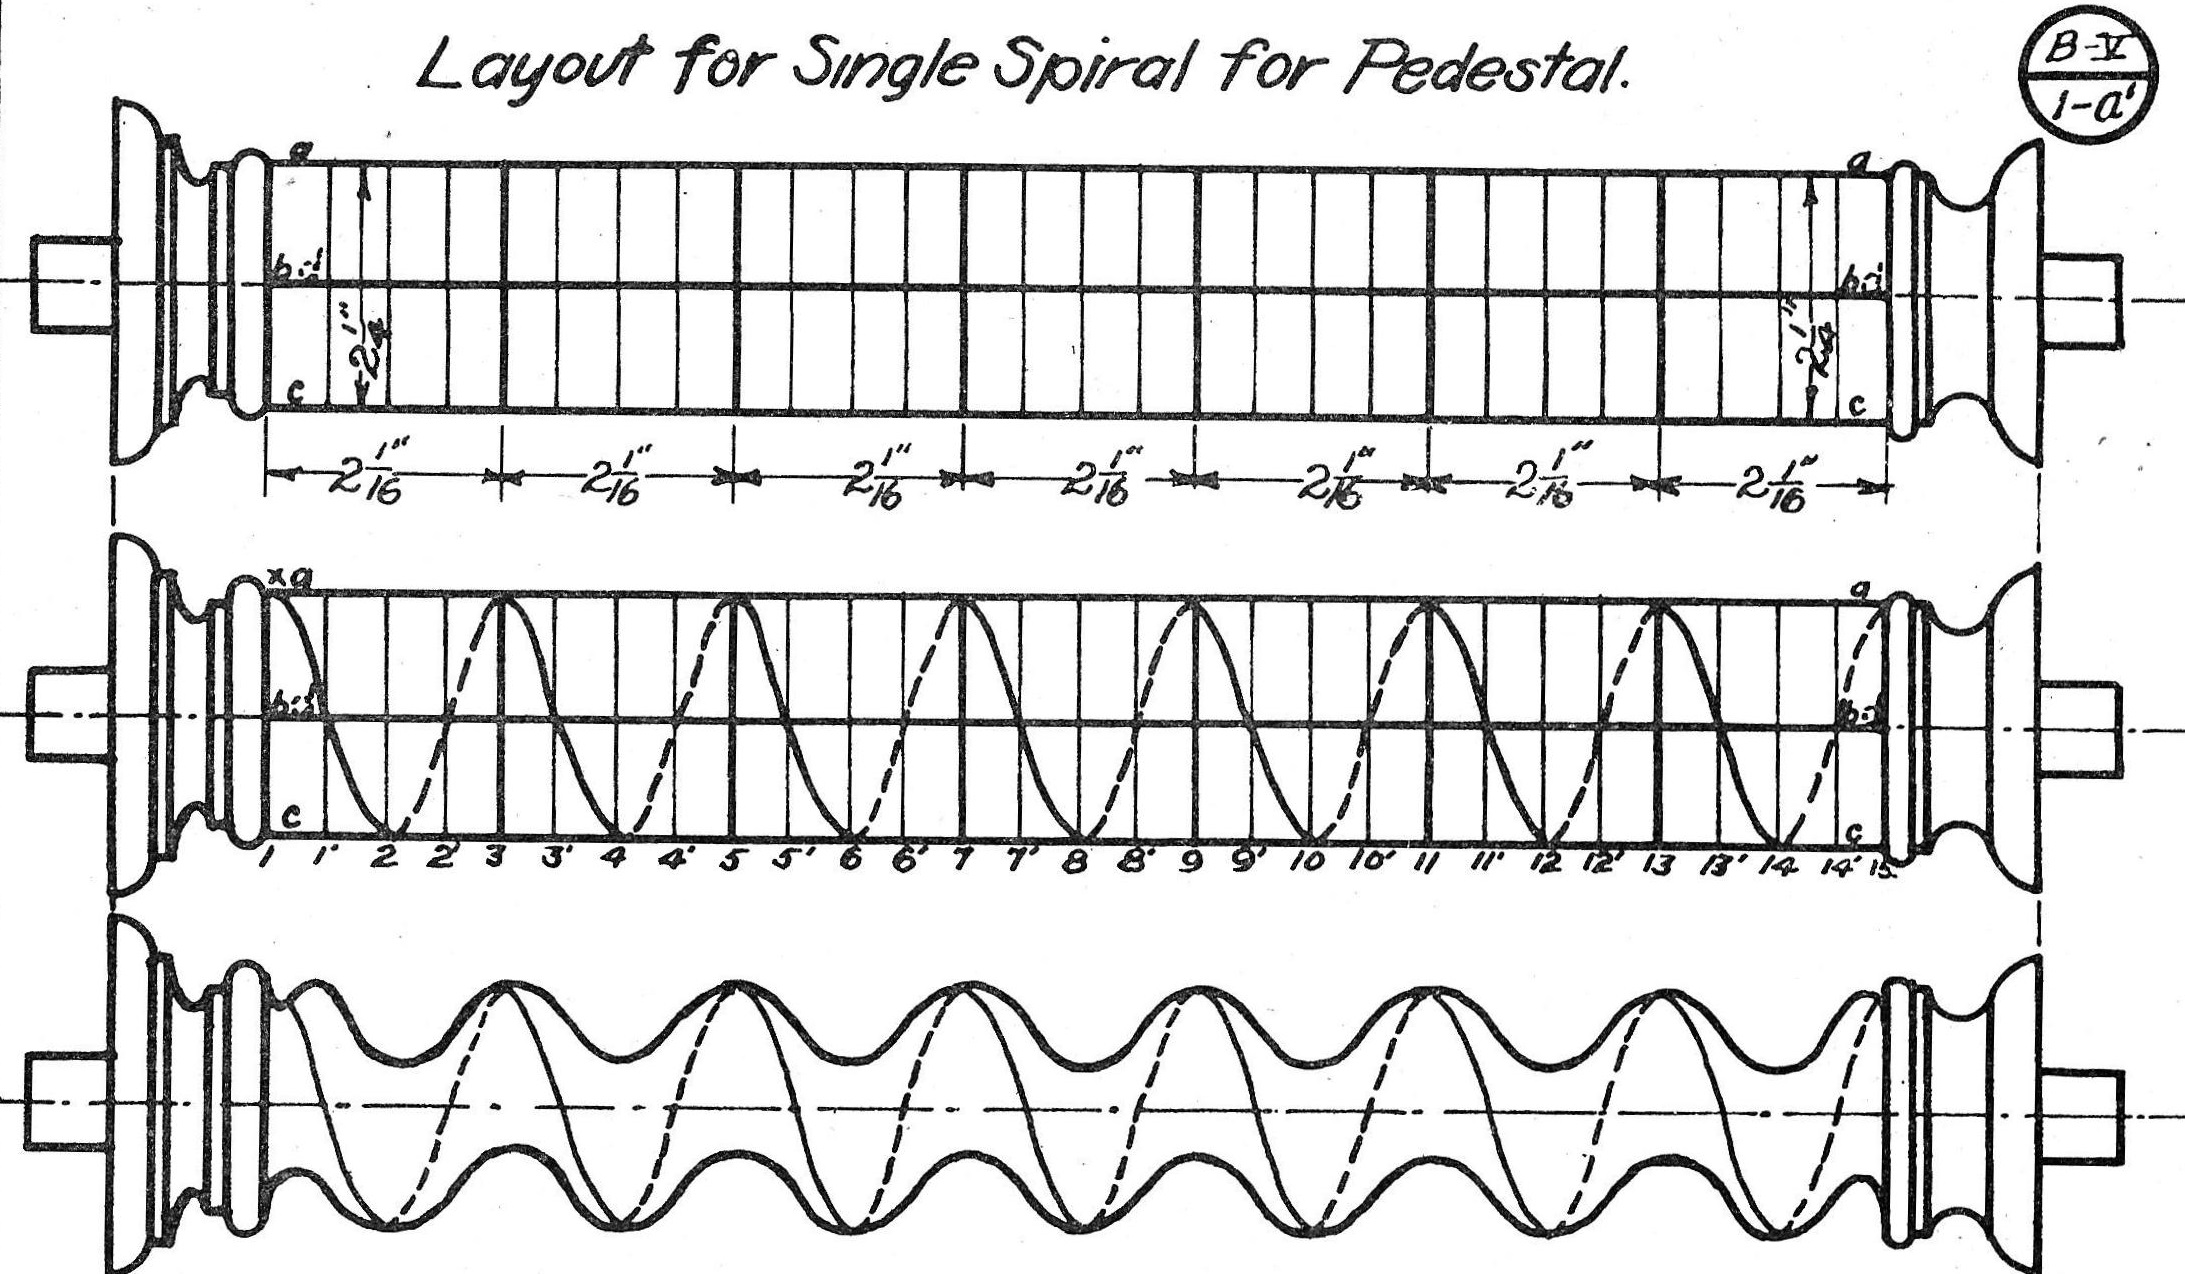
3. Let the spindle revolve in the lathe and draw circles as shown in the layout (Plate B-V—2-a’). The number of circles will vary with the taper. Since seven turns are needed in the present spiral, 28 circles will be 'necessary—four circles for each turn of the spiral as shown in the middle diagram. A good proportion to follow is to measure the diameter of the spindle at circle 2 and lay off this distance from circle 1 to circle 3 then measure the diameter at circle 4 and lay off this diameter from circle 3 to circle 5 and so on until all circles have been made. Then divide these large divisions into four equal parts. 4. Draw four lines the entire length of the spindle, each 90° apart as shown by the heavy lines in the middle diagram. The heavy circles of the same diagram represent the complete turns of the spiral. |
5. Lay out the line representing the ridge of the spiral as shown in the middle diagram. Begin on circle 1, where the ‘straight line crosses it, draw to circle 1’ at the point where the next straight line crosses it, then to 2-2’—3-3’ and so on until the end is reached. This forms the ridge of the spiral as shown in diagram 3. Next it may be more convenient to draw another line rep~ resenting the groove. In this case begin at point X in the middle diagram, opposite the point where first started, and continue in the preceding manner, making this line parallel to the other line. 6. Saw on the line last made, being careful not to saw too deeply. The depth must be ¼” less than half the diameter of the spindle where the cut is made. This saw cut forms the groove of the spiral. The groove is then cut out by hand with a chisel or knife, by working down the wood on both sides of the saw cut. After the spirals have been roughed out, a rasp is used to ?nish shaping them. The work is then sandpapered smooth, While the spindle is revolved slowly in the lathe. 7. Cut designs on the ends of the cylinder and polish.
|

Lesson 11 - Double Spiral Tapered Shaft