| TheWoodcrafter.net |
 Copyright © 2004. |
| My Basic Projects |
| The Retro Section |
| Jr. Woodcrafter |
| My Work (Pics) |
| Detailed Plans |
| About |
| Lathe Work |
| Safety |
| Hints |
| Pic Gallery |
| Links |
| Search |
| Home |
| Birdhouses |
| Guest Book |
| Contact Us |

|
|
|||||||||
|
Using a Wood Lathe
| Lesson 11 - Spiral Turning |
|
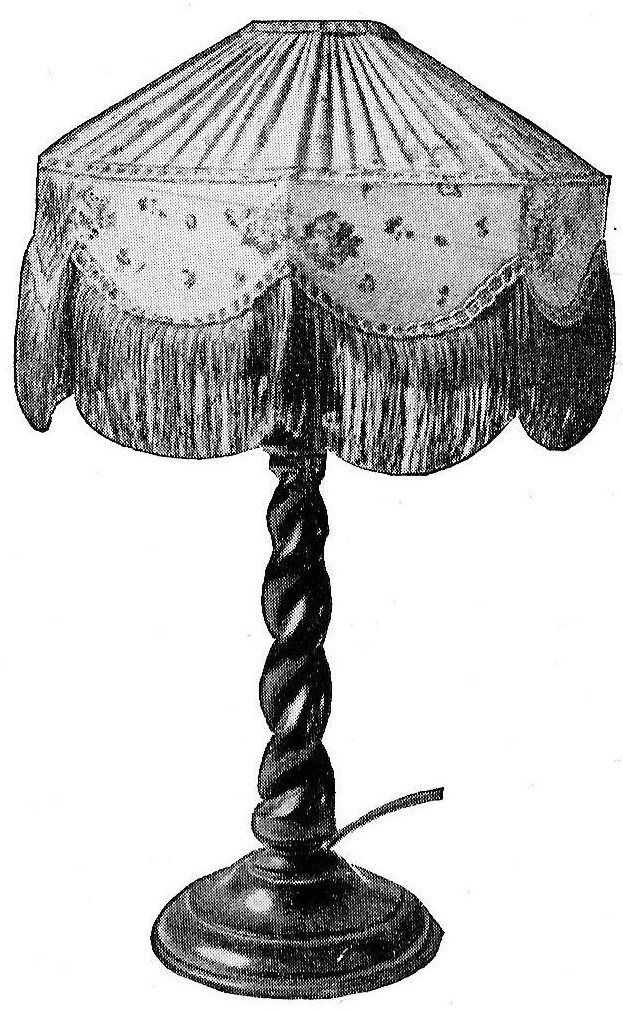
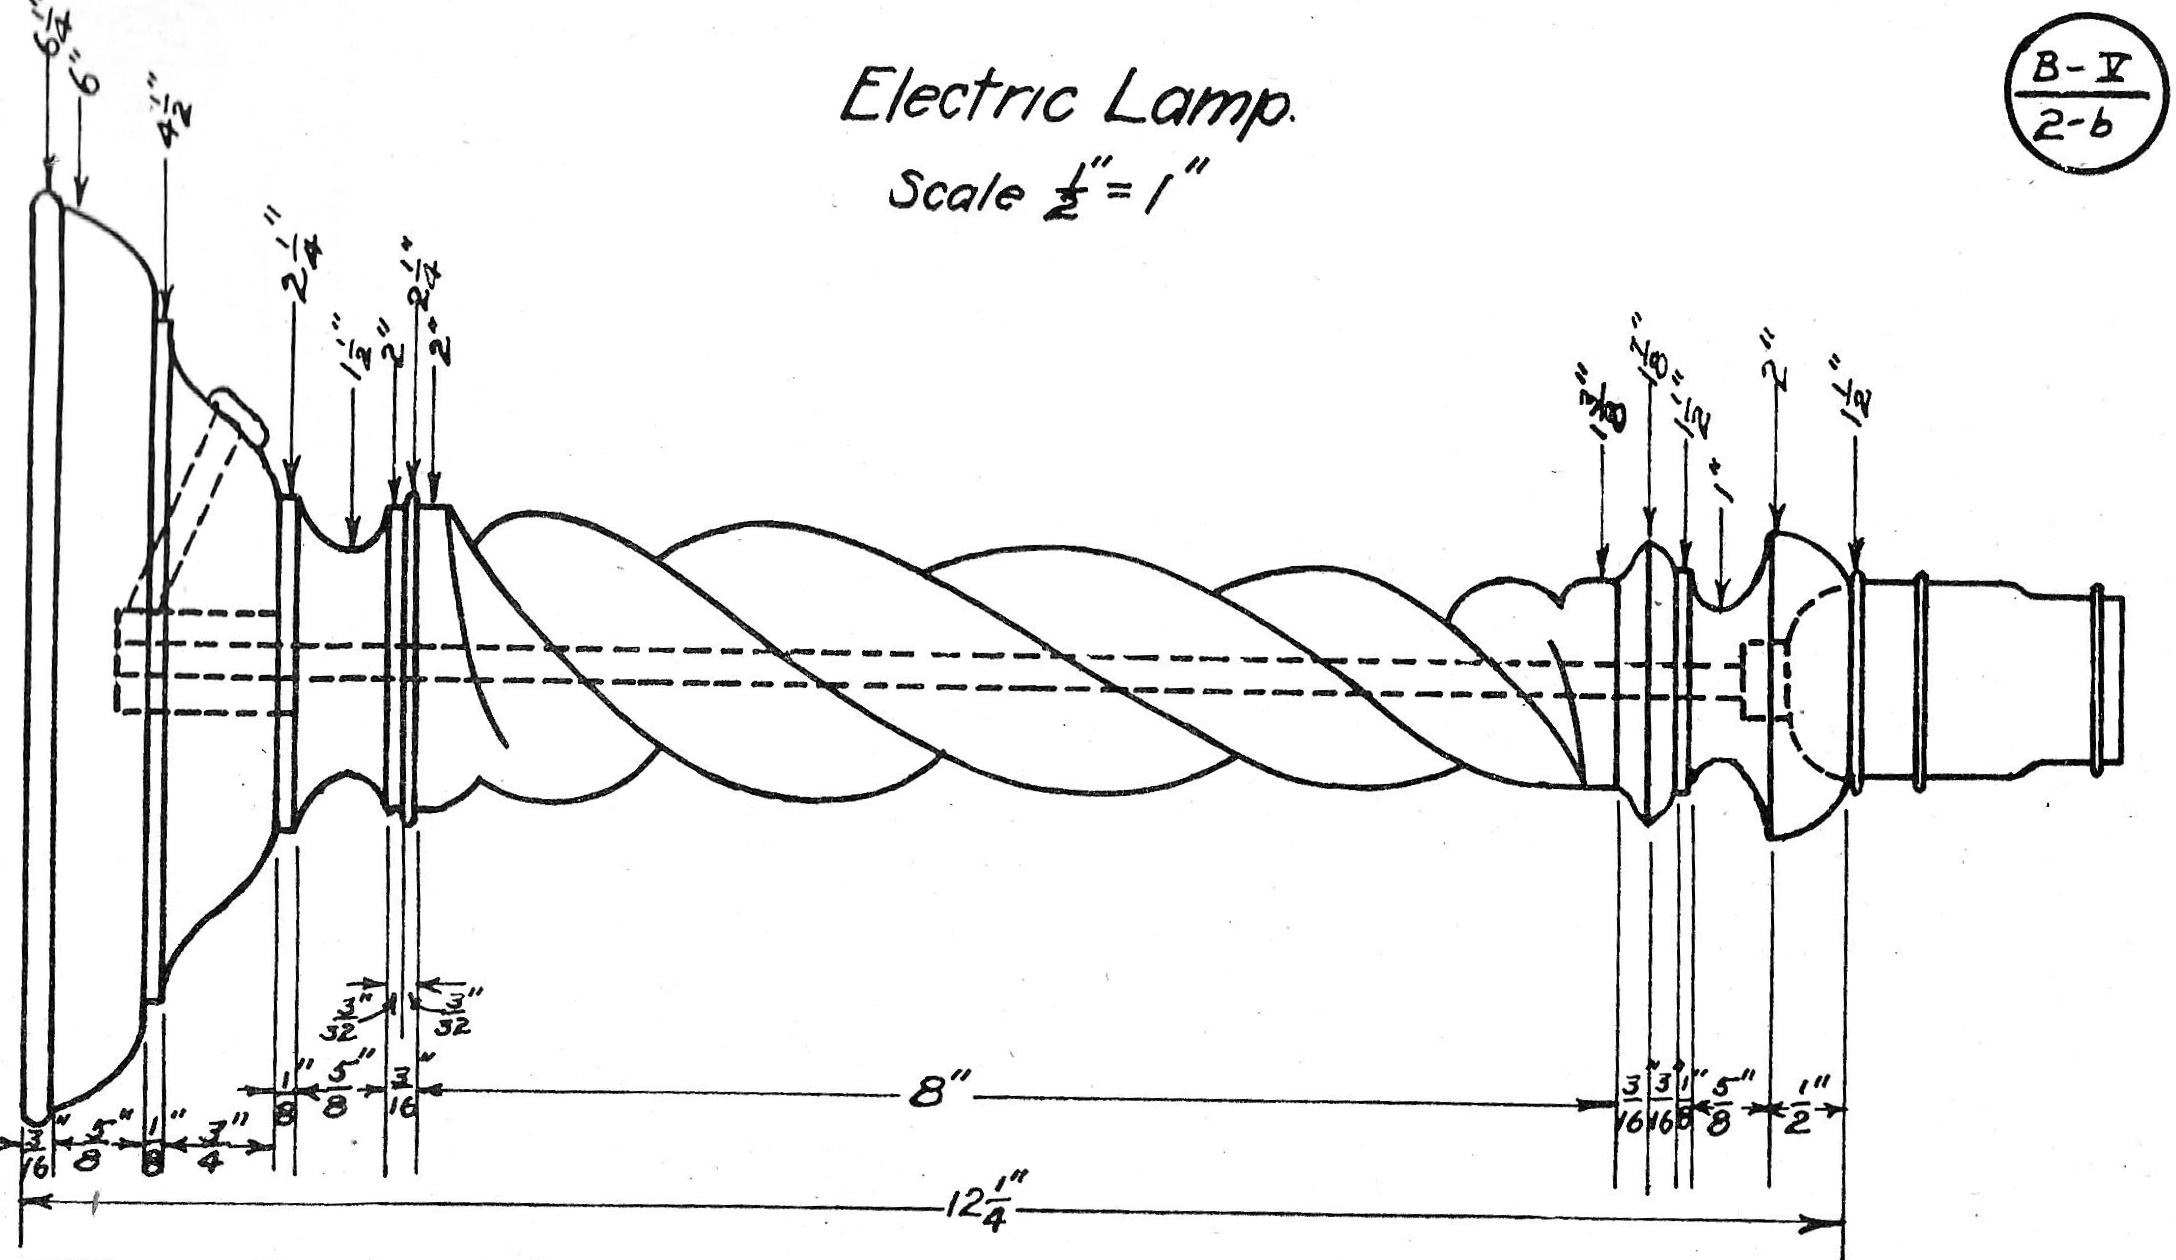
Spiral Turning DOUBLE SPIRAL. TAPERED SHAFT
To work out a double spiral for the electric lamp illustrated in Fig. 25 proceed as follows: 1. Turn up the spindle in the usual manner. Since the base of the shaft is larger than the top, the spiral must also be in proportion and lines A-A’, B-B’, C-C’, D-D’, and E-E’, are drawn around the shaft. To get the approximate spacing from circles A-A to B-B measure the diameter at A-A’ plus about 3/16" and lay off from A-A’ to B-B’. Then take the diameter of B-B’ plus about 3/16” and lay off from A-A’ to B-B’. Then take the diameter at B-B’ plus about 3/16" and lay off from circle B-B’ to C-C’ and so on. If the shaft is tapered more, a different proportion must be used. Also if it is desired .52 to have the twist wind around the shaft three times, a variation must be made in the number of circles. 2. If it is desired to have the twist wind around the shaft twice, draw circles 1-1', 2-2’, 3-3’, and 4-4’ and the spaces will grow proportionately smaller at the small end.
|
3. Draw four lines running lengthwise on the spindle and 90° apart as shown in the middle figure in heavy lines (Plate B-V—-2-b’).
4. Begin at A and draw a curved line to where the 90° line crosses circle 1-1’. From there extend the line to where the next 90° line crosses circle B-B’ at point B’. Continue in this manner until the other end of the shaft is reached. Begin at A’ and draw a line on the opposite side of the shaft. These two lines running around and along the shaft form the grooves while the portion in between forms the beads of the double spiral. 5. Saw to the desired depth, being ¼“ less than half the diameter at the point where cut. With a chisel or knife form the grooves and beads. It is necessary to be careful about not ending the grooves too abruptly. (See point 6 in Plates B-V—1-a, a’.) Smooth with a rasp and sandpaper while the lathe is revolving slowly. 6. Cut the design on the ends and polish.
|


Lesson 11 - Double Groove Spiral Straight Shaft