| TheWoodcrafter.net |
 Copyright © 2004. |
| My Basic Projects |
| The Retro Section |
| Jr. Woodcrafter |
| My Work |
| Detailed Plans |
| About |
| Lathe Work |
| Safety |
| Hints |
| Pic Gallery |
| Links |
| Search |
| Home |
| Birdhouses |
| Guest Book |
| Contact Us |
|
|
||||||||
|
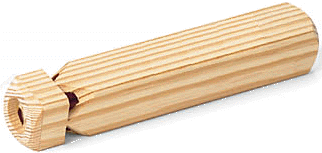
 Here
is the first project I finished for the page. You do not need to print these in scale as all dimensions are given. |
Detailed
Instructions
***********
WARNING***********
Read my page on safety
before building this item.
Materials needed:
10" long pine 2" x 2"
4" long 7/16" dowel
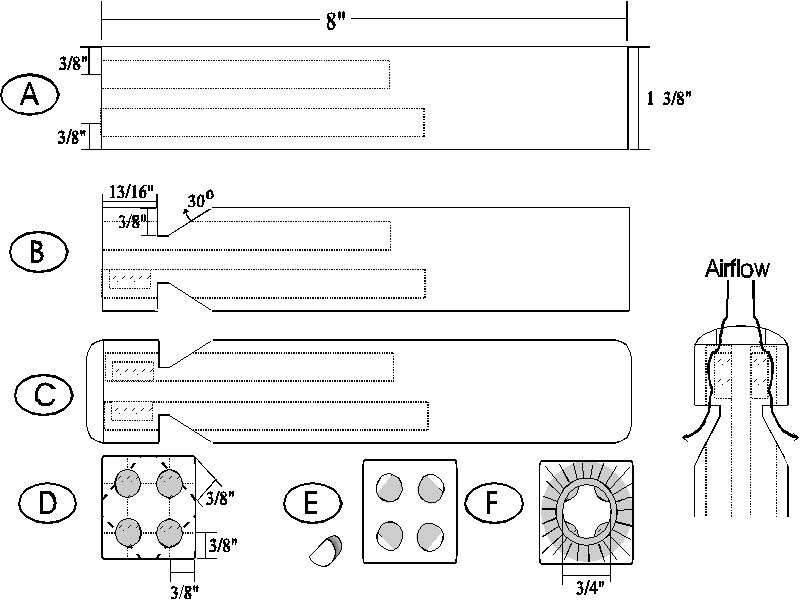
There is a single drawing with six scale drawings (A - F)
of various stages and views of the project. A simple
piece of pine 2x2 is fine but a better grade of pine
works best.
Construction is very simple:
Construction is very simple:
1. Cut eight inches from the 2" x 2" pine. Save
the short piece for later.
2. Using a lathe or drill press, drill four 7/16"
holes in the top of the whistle. Each hole is located
3/8" from adjacent sides (see A & D). These
holes must be true, straight, and smooth.
3. The four holes are drilled to four lengths: 7
1/4", 4 1/4", 6 1/4", 4 3/4".
4. Cut the angled notches into the four corners of the
side (see B, C, D). Each notch is located 3/8" from
adjacent corner edge (see D).
5. Cut four 1/2" lengths of the 7/16" dowel.
6. Sand each piece of dowel flat on one side as indicated
in picture E. About one third of the thickness must be
removed. These will serve as reeds in the whistle.
7. Glue the reeds (pieces of dowel) into the holes
1/8" in from the top.
8. Test the whistle when the reeds dry.
9. Drill a 3/4" diameter hole 1/4" deep into
the exact center of the small piece of 2" x 2"
pine left over in the first step.
10. Glue this piece onto the top of the whistle being
careful to align both pieces perfectly with each other.
The end with the hole goes against the top of the
whistle. Be careful not to get extra glue into the open
area.
11. After the top has dried completely, shape the
mouthpiece in one of the two following ways.
12. With a lathe, make a round cut down to a 3/4"
thickness 1/4" from the joint then cut off the
whistle.
13. Cut the top off leaving exactly 1/4" attached
then sand the mouth piece into shape.
14. Sand all over and bevel all edges. Do not finish the
wood: leave it natural.
