| TheWoodcrafter.net |
 Copyright © 2004. |
| My Basic Projects |
| The Retro Section |
| Jr. Woodcrafter |
| My Work |
| Detailed Plans |
| About |
| Lathe Work |
| Safety |
| Hints |
| Pic Gallery |
| Links |
| Search |
| Home |
| Birdhouses |
| Guest Book |
| Contact Us |
|
|
||||||||
|
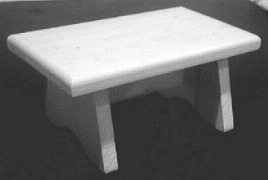
Foot Stool
|
 |
||
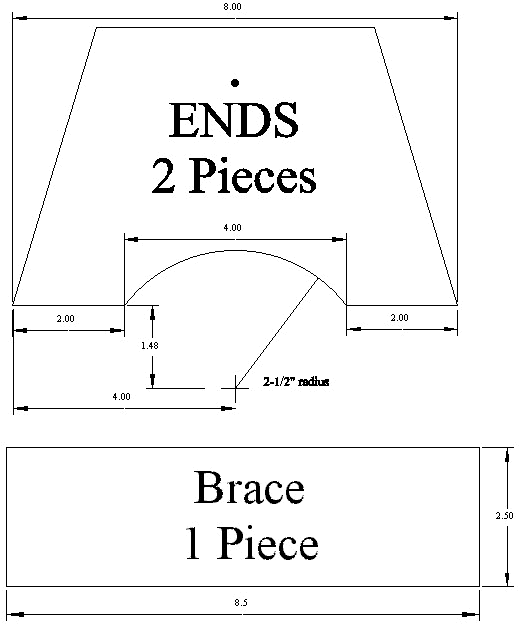 |
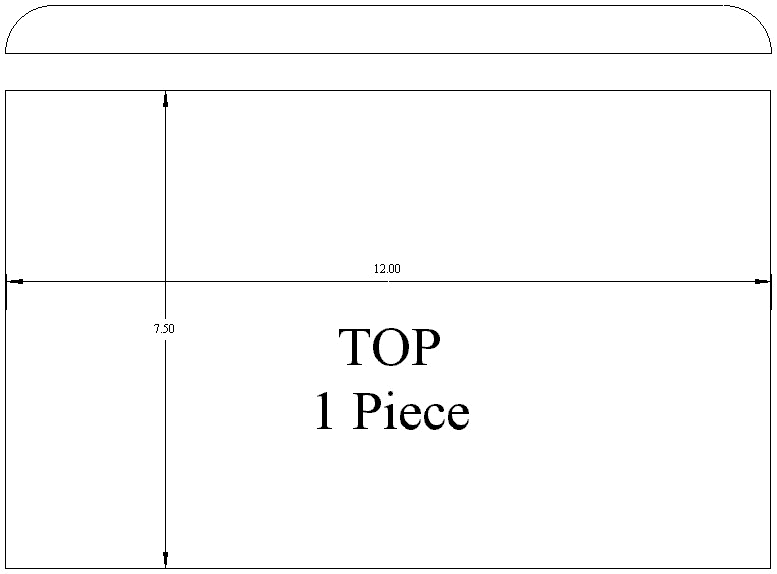
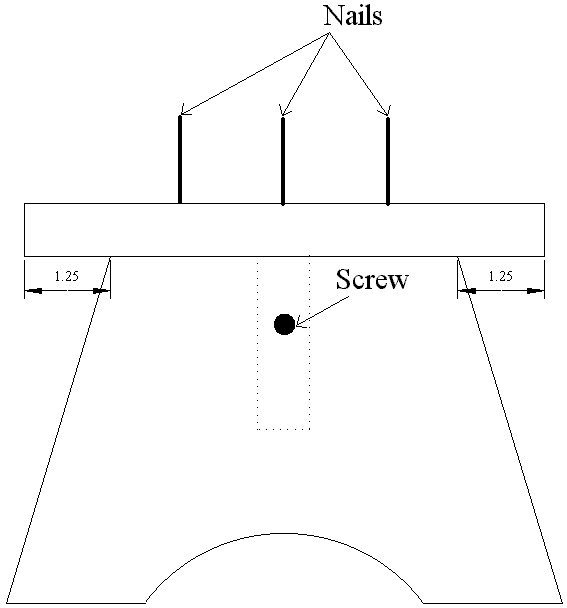
First, cut out the 7-1/2" by 12"
top then round the top edge with a 1-3/16''
diameter by 3/8'' high 'Table
Top Edge' router bit. Next, cut out the
2-1/2" by 8-1/2" brace. Now, cut our
two 8" by 5" pieces for the ends. Clamp
them together and cut the curves into the bottom
of both and remove the angles on each side. If you you want to let your Jr. Woodcrafter drill the holes, mark the spot, as indicated by the small black dot on the drawing to the left, on each end with a pencil dot. Otherwise, drill the pilot holes into the end pieces for the screws. |
||
| The Jr Woodcrafter will need a hand drill and the proper size bit. The holes need to be big enough the screws will go in easily but do not wobble in the hole (about 1/8"). Now all your Junior Woodcrafter needs is the four wood pieces, the directions, two 1-1/2" sheet rock screws, eight finishing nails (points slightly dulled), a hammer, a hand drill, one drill bit, one counter sink bit (optional), one sheet of 150 grit sandpaper, a really cool workshop apron small enough for kids, and safety goggles. | |||
| Construction. | |||
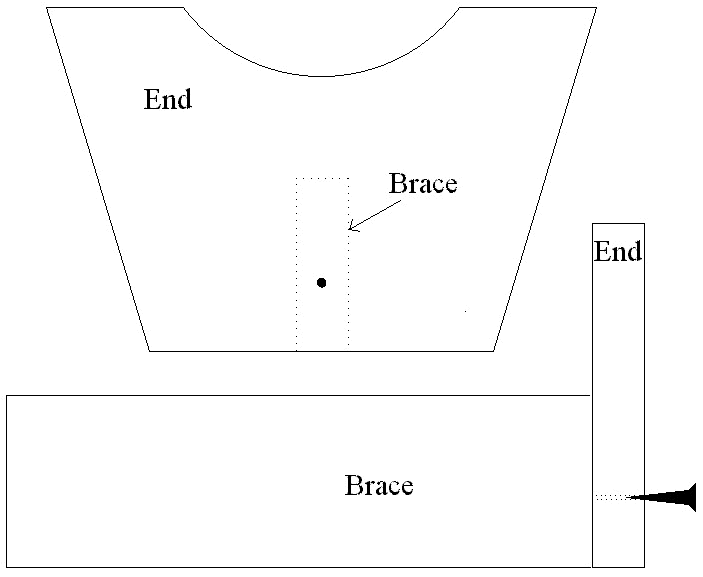
| 1. Drill a 1/8" hole in each end piece
as indicated by the pencil dots. 2. Use the counter sink bit to bevel the pilot hole enough for the screw head to sit flush. 3. Start a screw into each end and screw it in until it just starts to go all the way through. 4. Apply glue to one end of the brace then stand it upright on the workbench. 5. Turn one end piece upside-down and place in centered against the brace so the screw will go into the brace. |
 |
||
| 6. Apply glue to the other end of the brace. 7. Attach the last end piece to the brace in the same manner. |
 |
||
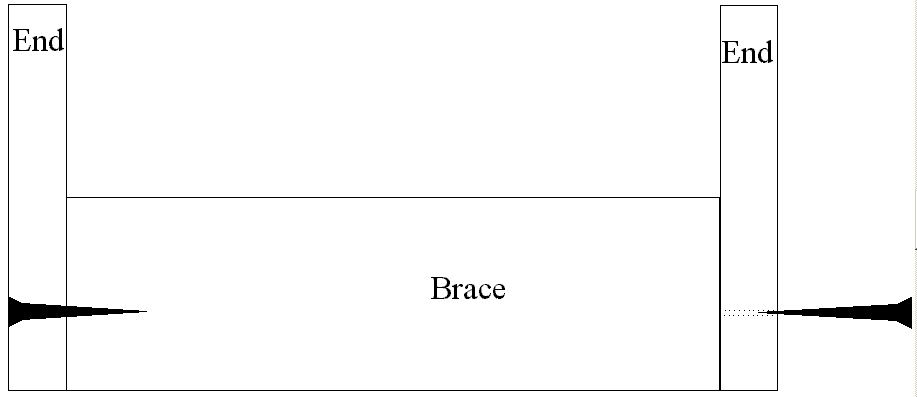
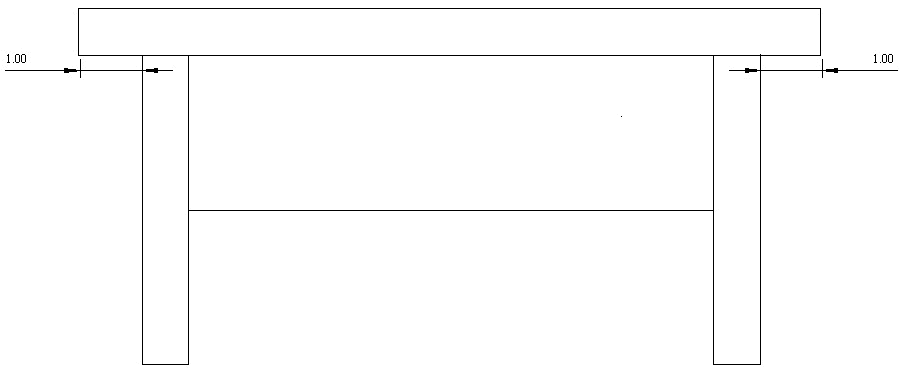
| 8. Stand the base upright and apply glue to
all the top edges. 9. Carefully center the top over the base. 10. Determine where to place the nails by sight or place them 1-3/8" from the end edge. 11. Drive one nail through the top and into the end piece. 12. Go to the other end of the top and drive one nail through the top and into the end piece. 13. Drive two more nails into each end. |
 |
||
| 14. Optional - drive two nails through the
top and into the brace. 15. Sand all surfaces to a smooth finish. 16. Be sure to sand the sharp corners off completely to a soft round shape. 17. You can finish the stool in several ways: unfinished, a natural finish, stained and finshed, or painted. |
 |
||
| You may wish to paint your name on the stool and then coat it with a clear protective finish. | |||
| * * * * Click on any picture above to download a higher resolution picture. * * * * |
*********** WARNING***********
Read my page on safety
before building this item.