Young and old enjoy croquet, a
game that has grown in popularity in recent years
... and you'll enjoy making this beautiful,
complete croquet set. Incidentally, if you are
unfamiliar with the rules, you can find layout
and playing instructions at most libraries.
The heads and handles of the mallets, the stakes
and the six balls should be made of hard wood
such as birch, maple or beech. The impact shock
of the mallets can be reduced and damage to the
balls largely prevented by inserting hard rubber
or plastic disks into the ends of the mallet
heads, see Fig. 1. Three mallet heads can be
turned at one time on the lathe by using a
24" tool rest, (Cat. No. 694) Photo No. 3.
To cut the plastic or rubber seats in the mallet
heads, mount the stock in a four jaw independent
type chuck. Cut about twelve notches or beads on
the mallet handles to provide hand grips and
better mallet control. To prevent the handle
stock from chattering while turning, use the
steady rest as shown in Photo No. 5. The two
23" stakes can be made from 3/4"
diameter hardwood dowels, tapered on the lathe
and turned to a sharp point.
Several balls can be turned at one time on the
lathe using the scraping method with a round nose
turning tool as in Photo No. 6. Individual balls
can also be turned with a skew chisel, but should
only be tried by experienced wood turners. While
the balls are on the lathe, mark the 1/2"
wide color bands by making slight groove marks
with a diamond point tool. Varnish the balls
while still on the lathe. When dry, enamel the
six different colored bands by turning the lathe
by hand while holding the brush to the ball. If
preferred, each ball may be completely enameled.
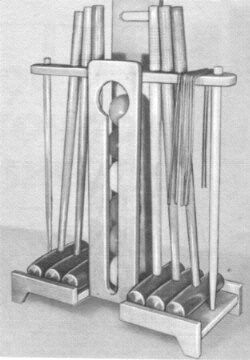
The balls are easily removed from the ball
storage compartment by sliding them up to the
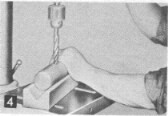
large opening. The opened portion of the ball
compartment is cut on the scroll saw, Photo No.
2.
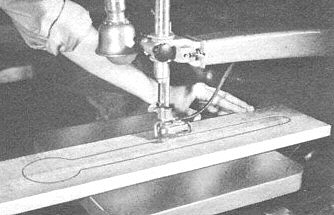
The opening in the front
part of the ball compartment is cut out
on the scroll saw. |
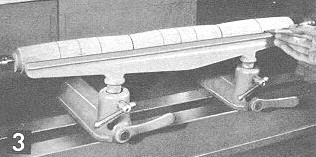
Three mallet heads can be
turned at one time on the lathe by using
an extra tool support base and a Cat. No.
694 tool support. While stock is in the
lathe, mark off the handle hole position. |
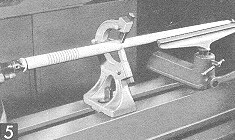
To prevent chattering of
the long mallet handles while turning,
use the No. 948 steady rest. |
If you feel you are well versed on the
use of the skew chisel, you can turn the
balls individually using the cutting
method. |
|
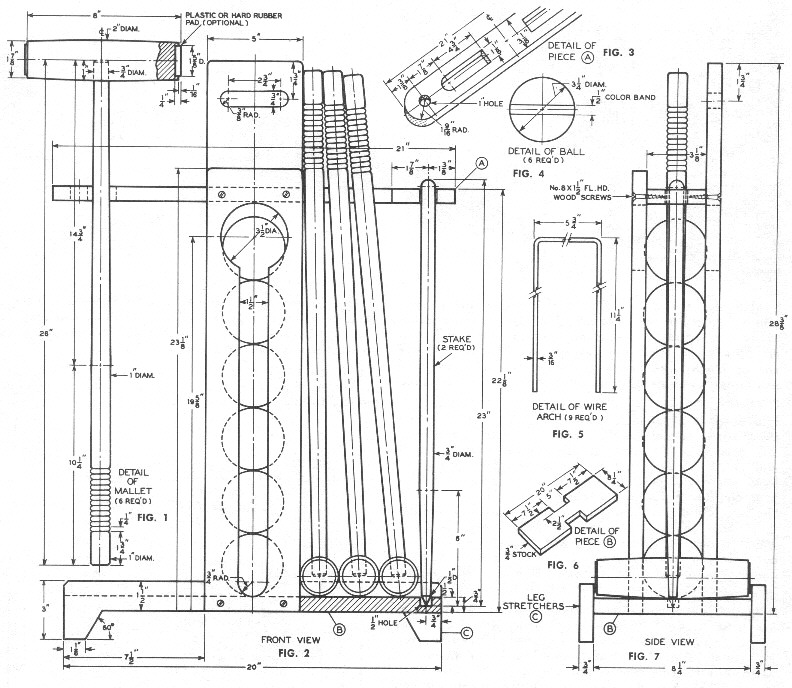
All parts of the rack are made
of hard wood or exterior plywood. See complete
details of parts in the line drawing.
The nine metal arches are bent to shape from
3/16" mild steel wire as indicated in Fig. 5
of the line drawing. Each arch requires a piece
of wire 28-1/4" long.
Finish the balance of the project with a sealer
and a coat of spar varnish and enamel the hand
grips on the mallets to correspond to the ball
colors.
BILL
OF MATERIALS
| No. of
Pieces |
Name |
Size |
| 6 |
Mallet
Heads |
2
x 2 x 8 |
| 6 |
Mallet
Handles |
1
x 1 x 26 |
| 12 |
Hard
Rubber or Plastic Pads (Optional) |
1/4
x l-5/8 diam. |
| 6 |
Balls |
3-1/4
diam. |
| 2 |
Stakes
|
3/4
diam. x 23 |
| 1 |
Base
(B) |
3/4
x 8-1/4 x 2O |
| 4 |
Leg
Stretchers (C) |
3/4
x 3 x 7-1/2 |
| 1 |
Back
Upright |
3/4
x 5 x 28-3/8 |
| 1 |
Ball
Compartment Front |
3/4
x 5 x 23-1/8 |
| 1 |
Top
Mallet and Stake Support (A) |
3/4
x 3-1/8 x 2l |
| 8 |
Flat
Head Wood Screws |
No.
8 x 1-1/2 |
| 9 |
Wire
Arches |
3/16
diam. x 28-1/4 |
|
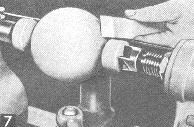
A 3/4", Cat. No. 872,
machine spur bit is used to drill the
handle holes in the mallet heads - use a
V-block to steady the stock. |
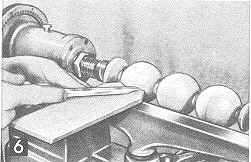
Three or more balls can be
turned at one time on your lathe using
the scraping method with a round nose
turning tool. Note the wood template for
checking the roundness of the balls being
turned. |
|