|
|
|
The Woodcrafter Page© 2004 - all rights reserved.
|
|
|
|
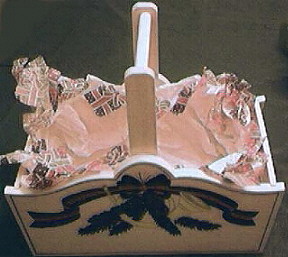
Christmas Card Caddy.
Make this nice caddy for
any occasion.
This attractive, yet easy to build, project makes a great
Christmas present.
Deliver it filled with food, wine, candy or use your
imagination.
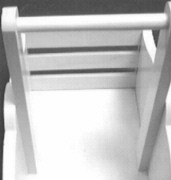
Mounting of the handle
supports.
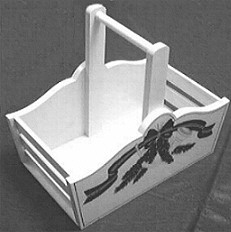
Mounting of the end slats.
|
 The completed item.
* * * * * * * * *
Right-click on the picture above to
download the full scale drawings
as an Adobe Acrobat pdf file.
* * * * * * * * *
|
|
Detailed
Instructions
***********
WARNING***********
Read my page on safety
before building this item.
Materials needed:
Any wood will work for this project.
1 - piece of 1/4" thick pine - 6" * 12"
for the bottom. & the slats.
1 - piece of 1/2" thick pine - 8" * 24"
for the sides & the handle supports.
1 - 6" length of 1/2" dowel for the handle.
Construction:
1. First, download the Adobe Acrobat pdf
file by right clicking on the drawing above then print
out the full size drawings.
2. Cut the bottom from 1/4" stock to 5-1/8" by
9".
3. Cut six slats from 1/4" stock to 1" by
5-1/8".
4. Cut a 4-5/8" length of 1/2" dowel for the
handle.
5. Cut the two handle supports from 1/2" stock to
1" by 7-3/4".
6. Band-saw and/or sand the top of the handle supports to
a nice round shape.
7. Use the full size template to cut the sides from
1/2" stock.
8. Use a router or table saw to cut the 1/4" grooves
into the inner surface of the sides for the slats.
9. Cut the 1/4" groove along the bottom edge of the
sides for the bottom.
10. Drill the 1/2" holes into the handle supports
1/4" deep for the handle.
11. Position, glue, and clamp the bottom into the groove
along the edges of the sides.
12. Glue, and clamp the handle into the holes in the
handle supports.
13. Position, glue, and clamp the handle supports to the
sides.
14. Glue the slats into the grooves down the ends of the
sides. Spacers will make this easier and produce a nicer
end project..
15. Sand all flat surfaces with 200 grit paper and remove
all sharp corners.
16. Paint, decorate and fill.
17. You can glue ribbons, pine cones, tree decorations or
paint the sides.
18. Carve or wood-burn the name of the family into side
for a nice extra.
|