| TheWoodcrafter.net |
 Copyright © 2004. |
| My Basic Projects |
| The Retro Section |
| Jr. Woodcrafter |
| My Work |
| Detailed Plans |
| About |
| Lathe Work |
| Safety |
| Hints |
| Pic Gallery |
| Links |
| Search |
| Home |
| Birdhouses |
| Guest Book |
| Contact Us |
|
|
||||||||
|
| Rumble
Seat Rambler
|
|||||||||||||
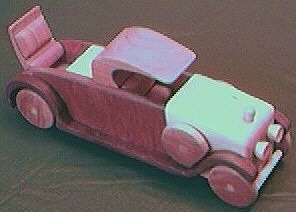

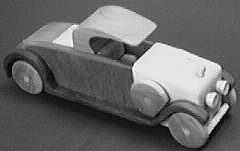
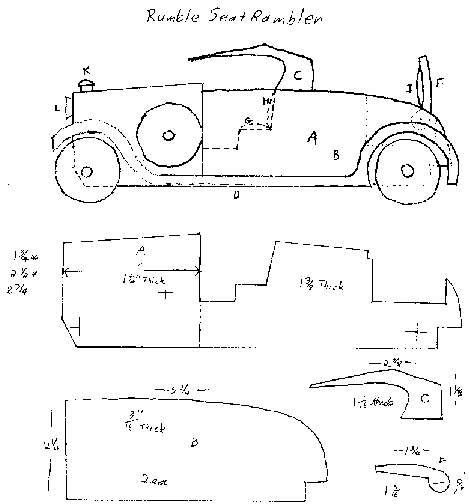
| Materials needed: |
| 9" long 2x4 |
| 3" long 1/8" dowel |
| 2' long 1/4" dowel |
| 4" x 9" plank 3/4" thick |
| 1" x 2" x 3" scrap for roof |
| 1-1/2" turning stock or dowel for wheels |
| Dowels/plugs for headlights/radiator cap |
| Childsafe clear wood finish |