| TheWoodcrafter.net |
 Copyright © 2004. |
| My Basic Projects |
| The Retro Section |
| Jr. Woodcrafter |
| My Work |
| Detailed Plans |
| About |
| Lathe Work |
| Safety |
| Hints |
| Pic Gallery |
| Links |
| Search |
| Home |
| Birdhouses |
| Guest Book |
| Contact Us |
|
|
||||||||
|
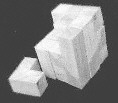 |
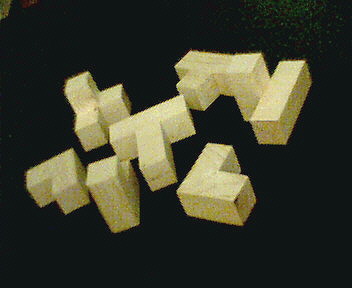
Here's a really nice Wooden Puzzle Project.
Seven Piece Puzzle.
|
Detailed
Instructions
***********
WARNING***********
Read my page on safety
before building this item.
Click here to download complete directions & plans for the project. (pdf file)
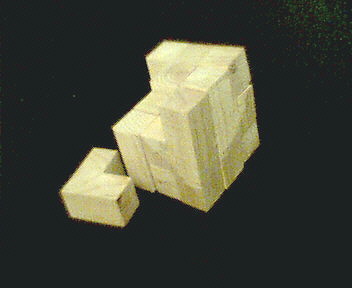
This puzzle is based on shapes consisting
of 1 inch cube combinations. The final assembled puzzle
is a three inch cube.
Precision size is critical. It is best if you cut the
pieces every so slightly larger than the 1" cubes to
compensate for loss during sanding.
I recommend you do not finish the wood but leave it
natural.
If a truly fine project is desired, use a band saw with a
good sharp blade and adjust the table and miter angles
with a combination square before beginning this project.
However, the puzzle will work well even with sloppy
sizing of the pieces.
Materials needed:
1 good looking 4" x 4" at least
12" long.
>>>> Optional : 1 good looking 2" x
4" at least 16" long.
Construction:
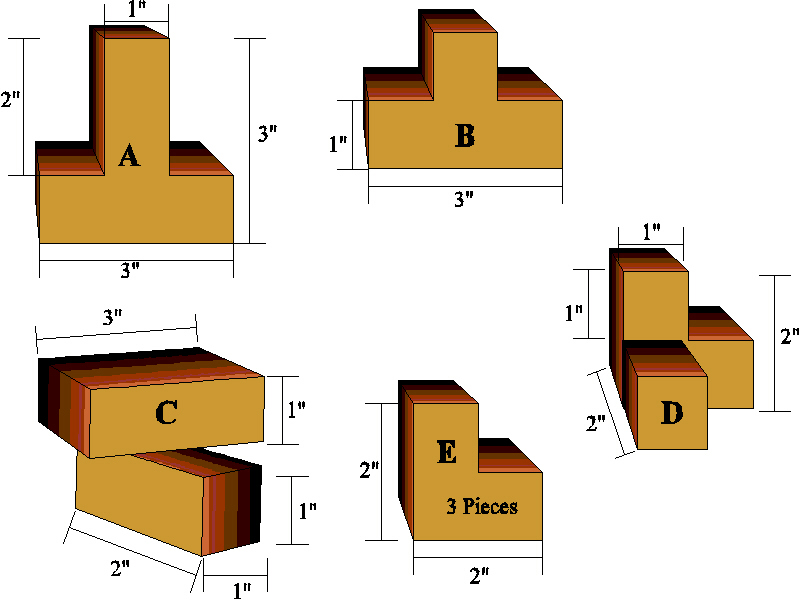
1. First, cut out one 3" x 3" x
1" block for part A.
2. Cut out one 2" x 3" x 1" block for part
B.
3. Cut out one 2" x 2" x 3" block for part
C if you are using some 2" thick stock.
4. Cut out one 3" x 1" x 1" block and one
2" x 1" x 1" block for part C if you are
using only 2" x 4" material..
5. Cut out one 2" x 2" x 2" block for part
D if you are using some 2" thick stock.
6. Cut out three 2" x 2" x 1" blocks for
part E. Cut one more (for part D) if you are using only
2" x 4" material.
7. Cut out one 1" x 1" x 1" block for part
D if you are using only 2" x 4" material.
8. Set up your saw to cut out a piece 1" wide and
1" deep (including the thickness and depth of the
blade) with a table miter and/or by clamping guides/stops
to the table.
9. Cut the 1" x 1" notches out of parts B, D
& E.
10. Change you guides to cut out a piece 1" wide and
2" deep.
11. Cut the 1" x 2" notches out of part A.
12. If you are using some 2" thick stock, carefully
cut out part C.
13. If you are using only 2" x 4" material,
glue the 1" cube part to the ‘L’ shaped
portion of part D.
14. If you are using only 2" x 4" material,
glue the 2" x 1" x 1" part to the 3"
x 1" x 1" portion of part C.
15. Sand all surface to a smooth finish.
16. Now… here’s the tricky part : assemble the
puzzle.
17. Sand the exposed edges to a smooth - flat surface.
Note…the puzzle is not that hard to figure out but if you give up, you can click here to download complete directions. (pdf file)