| TheWoodcrafter.net |
 Copyright © 2004. |
| My Basic Projects |
| The Retro Section |
| Jr. Woodcrafter |
| My Work |
| Detailed Plans |
| About |
| Lathe Work |
| Safety |
| Hints |
| Pic Gallery |
| Links |
| Search |
| Home |
| Birdhouses |
| Guest Book |
| Contact Us |
|
|
||||||||
|
Here is the orginal article from the
Deltagram
|
|
Tilt Top
|
|
|
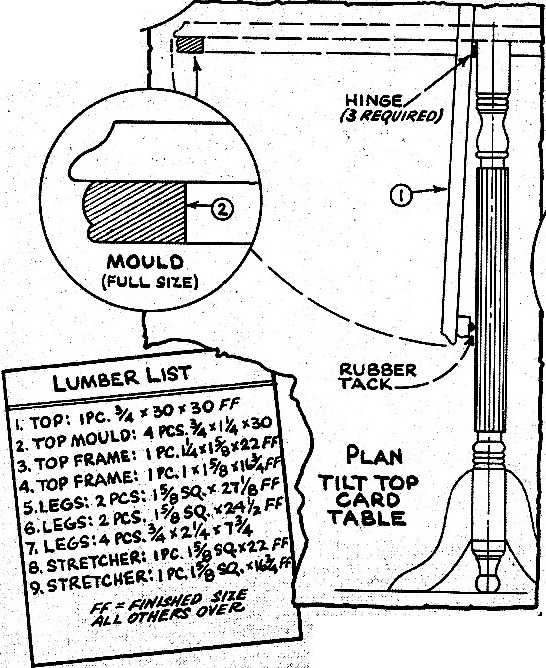
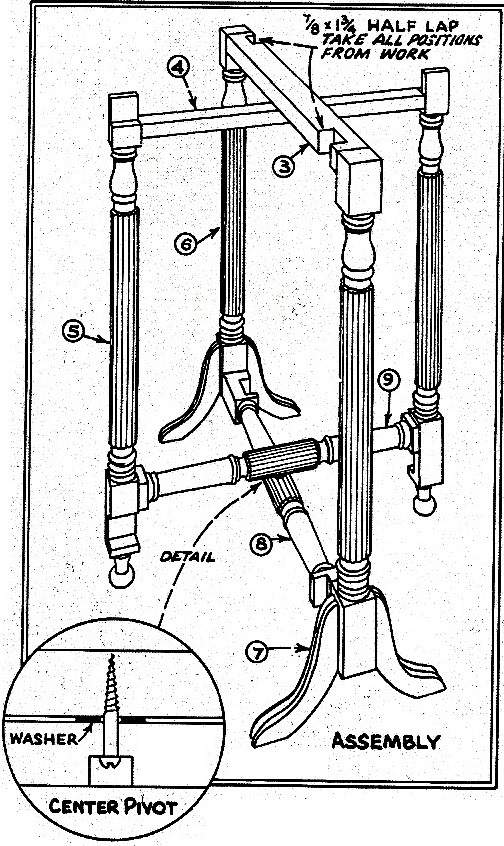
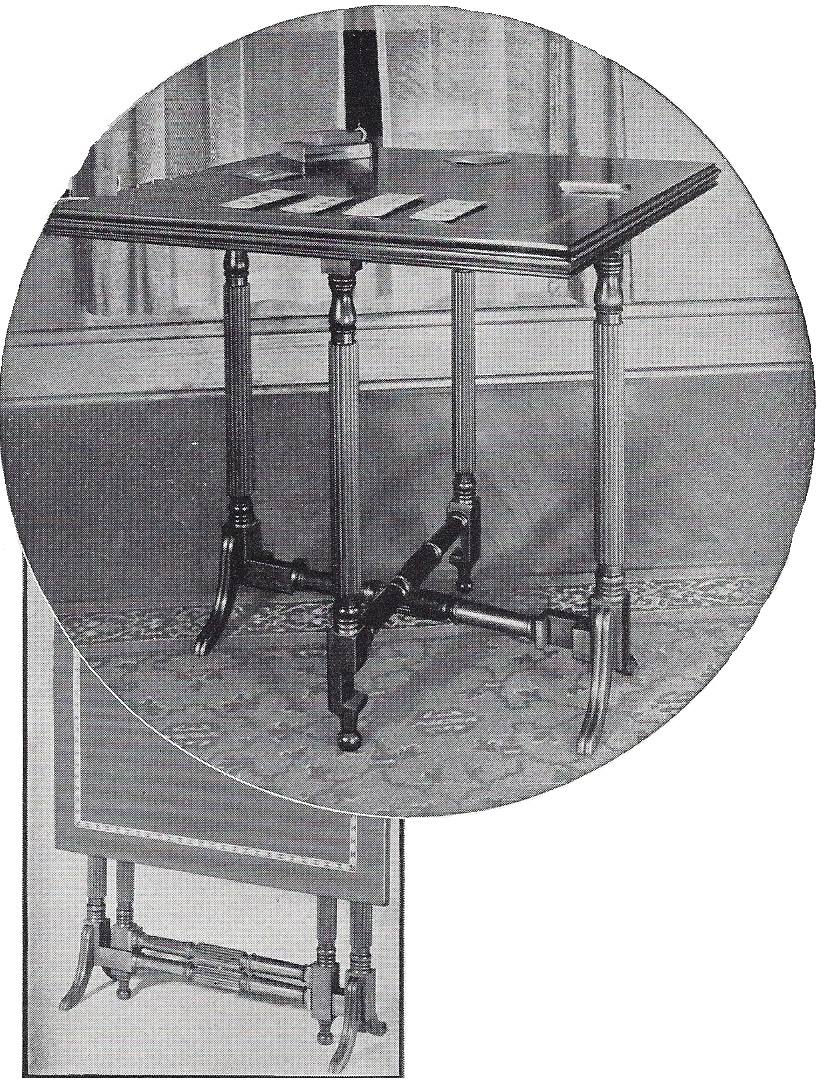
Make the band sawed legs next, and then set up the various pieces in a temporary assembly. Care in measuring is required at this point, and the various interlocking half- lap joints should not be cut until an actual set-up determines their position. The top is made from select 1%;-in. plywood. with an outside rail bringing up the total edge thickness to 11/3 in. The rail pieces are neatly mitered at the corners, this operation being done after the stock is moulded to shape. Fastening is by means of glue and screws into the top proper. An inlay banding on the top sur- face adds considerably to its appearance. If the table is being constructed for a paint or lacquer ?nish, the top surface offers unlimited possibilities for decoration. In any case, a rich t-op surface is essential since this type of table does double duty as both table and screen, both roles focusing attention on the top. |
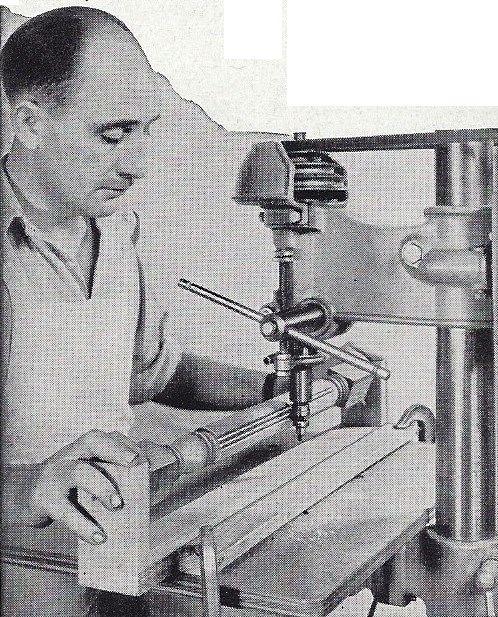 This Tilt Top Table Does Double Duty as Card Table and Screen, an Shown in the Upper Photos. Photo Directly Above Pictures the Reeding of the Turned Legs on the Drill Press. |
|
|
The final assembly of top to frame is by means of three hinges spaced equally across the center of the top, as shown in the de- tail. Check the position of the underside of the rail against the legs when the table is folded, and insert a rubber tack in the rail at the two contact points as a check against marring. Lighter plywood can be used for the top providing a heavy edge moulding and stiffening cross members are used in making a suitable framework.
|
 |
|
 |
 |
Right-click here to download the drawing as an Adobe Acrobat (pdf) file.
* * * * Click on the drawings above to download a higher resolution picture. * * * *
*********** WARNING***********
Read my page on safety before building this item.