| TheWoodcrafter.net |
 Copyright © 2004. |
| My Basic Projects |
| The Retro Section |
| Jr. Woodcrafter |
| My Work |
| Detailed Plans |
| About |
| Lathe Work |
| Safety |
| Hints |
| Pic Gallery |
| Links |
| Search |
| Home |
| Birdhouses |
| Guest Book |
| Contact Us |
|
|
||||||||
|
Here is the orginal article from the
Mar- Apr 1956 Deltagram
Butterfly
|
|
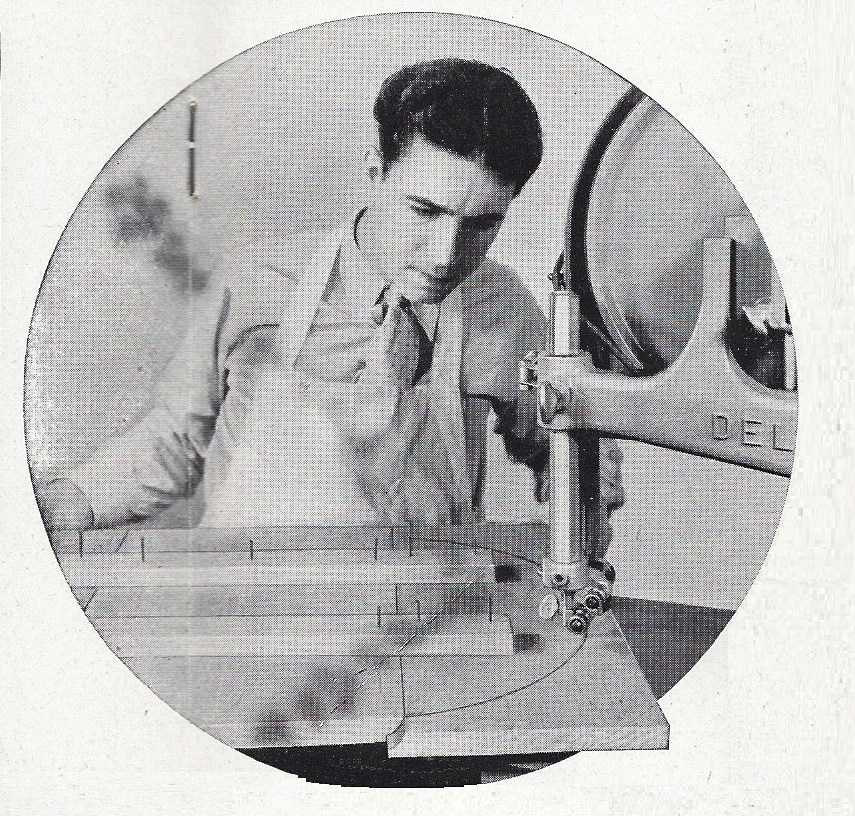
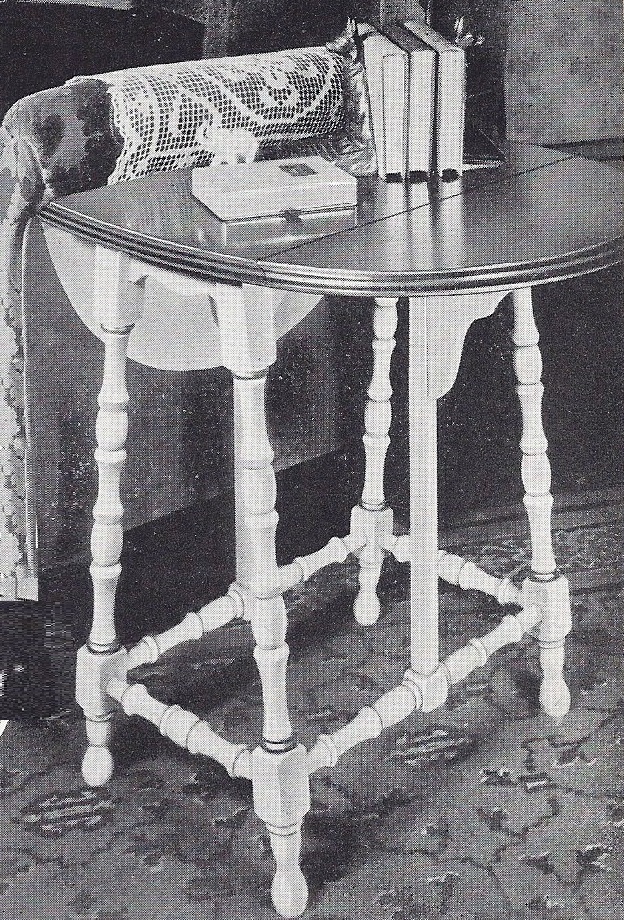
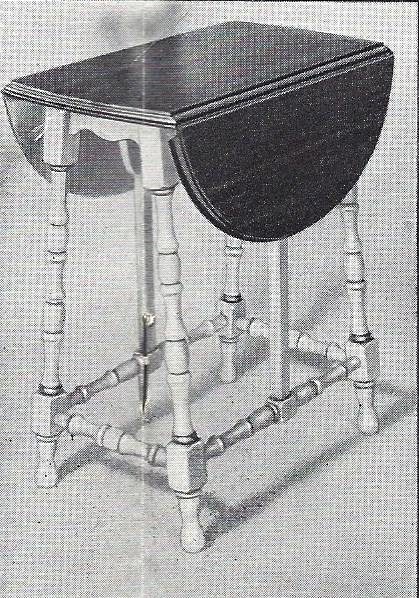 Photos Above Show Views of the Table and How the Top Boards are Held Together for Sawing and Shaping. Blueprint at Left Shows the Construction. If This Reproduc- tion of the Original Blueprint is Used as a Working Plan, Use the Scales to Determine Dimensions not Marked. |
Simple Design of a Popular Classic EVERY craftsman eventually builds a butterly table The popularity of the piece has given rise to innumerable variations in design and construction, some difficult to construct and with considerable ginger-bread detail; others simpli?ed while yet retaining the essential characteristics of grace and utility The design shown here falls in the latter class - indeed, it presents the butterly table in as simplified form as could be desired. Start the construction by glueing-up the stock for the top if this cannot be obtained the specified width. While the glue is drying, square the stock for the legs and turn these to the plan shown in the blueprint. The mortises for the aprons and the holes for the stretchers can then be made, centering the cuts in each case in the center of the turning |
| Do not make a permanent assembly until all parts of the table have been made and checked each against the other. The ?rst operation in making the top calls for the making of the drop leaf hinge joint by which the end pieces are joined to the center board. The joint is shown full- size on the plan, and is easily made on the shaper or on the circular saw with mould- ing cutters. Carefully lay out the position of the hinges, and rout the grooves to take the hinge barrels. Before cutting the ellip- tical shape of the top, it is best to ?t the three boards of the top together. This can be done by nailing wood strips in place, as can be seen in the photograph, or by asseniblying by means of the hinges. The idea, of course, is to treat the top as one large surface so that there will be a perfect uniformity of shape all around. A 1/32 in. clearance should be left at the joints as an allowance for the ?nish. |
The lines for the top form a simple ellipse, which can be easily laid out with a beam compass or with string and pencil to the radii shown. Sand the edges carefully after band sawing, and then shape to the plan shown, using shaper cutter D-120. The moulding can be varied to suit your own equipment for doing this kind of work. |
Right-click here to download the drawing as an Adobe Acrobat (pdf) file.
* * * * Click on the drawings above to download a higher resolution picture. * * * *
*********** WARNING***********
Read my page on safety before building this item.