| TheWoodcrafter.net |
 Copyright © 2004. |
| My Basic Projects |
| The Retro Section |
| Jr. Woodcrafter |
| My Work |
| Detailed Plans |
| About |
| Lathe Work |
| Safety |
| Hints |
| Pic Gallery |
| Links |
| Search |
| Home |
| Birdhouses |
| Guest Book |
| Contact Us |
|
|
||||||||
|
Here is the orginal article from the
January - February 1955 Deltagram
ROCKWELL MANUFACTURING COMPANY - A DELTACRAFT PULICATION
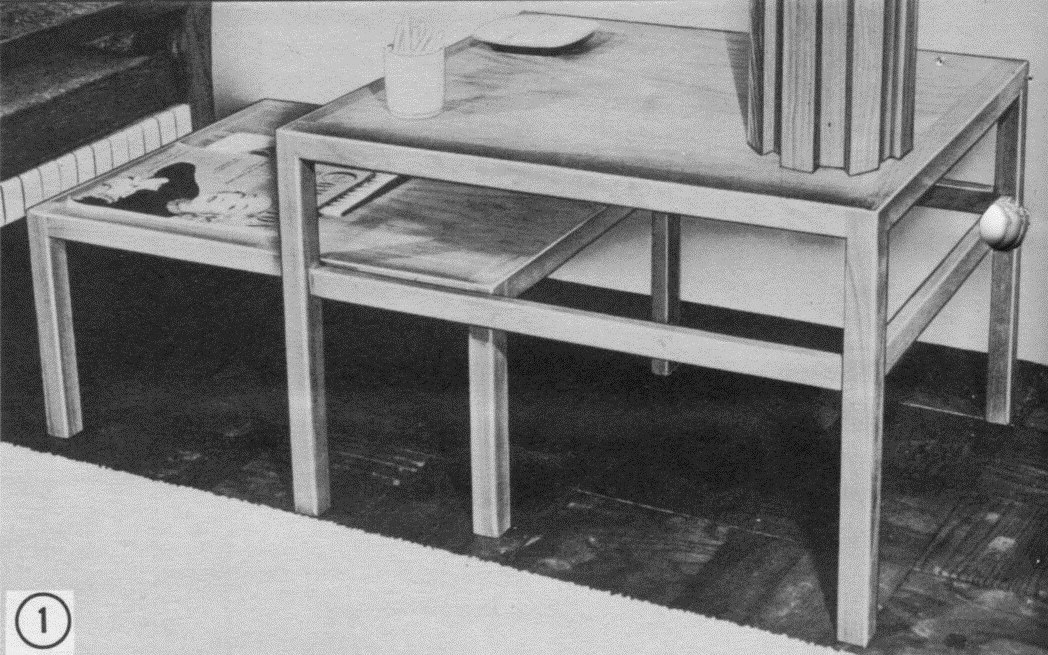
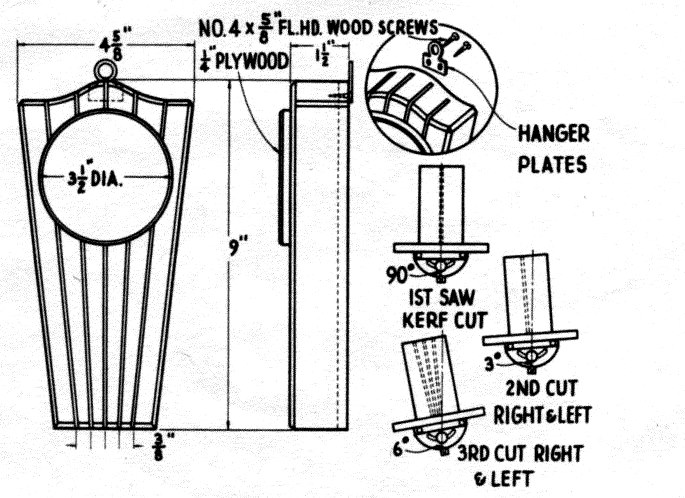
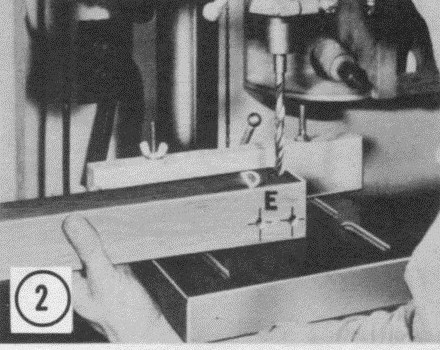
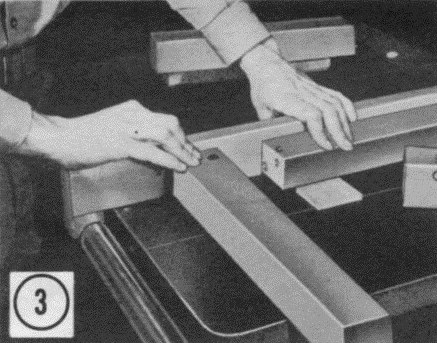
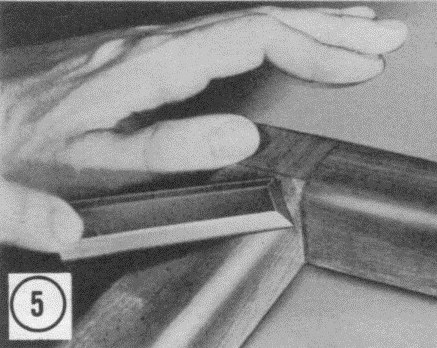
This is a versatile piece of furniture that can be used almost anywhere. When company comes the two tables can he separated to provide an extra coffee or end table. Combined with the modern lamp featured on page 4 it will make a piece you'll be proud to own. Begin the project by cutting the legs. If six quarter stock is not available glue up two pieces of ¾ inch stock for each leg. Same size stock is used for all top rails on each table. The center rails on the large table are made of ¾ X 1½ stock. Bore holes for dowel joints in all stretchers first (photo #6 ). Should you prefer mortise and tenon joints instead, be sure to add three inches to the length of all stretchers (see starred items on bill of materials). You can end bore long pieces by using the Deltashop Sander with a chuck fastened to the back end and an auxiliary table mounted over the rip gauge (see photo #6 and Craftsheet). After boring holes in the stretchers use steel center pins for locating exact mating hole in matching pieces (photo #3). All four edges on legs and center stretchers are rounded off. The top stretchers should be rounded on three sides only with the inside edge left square. Mitre effects on rounded edges where stretchers and legs meet are made with either a file or hand chisel as in (photo #5 ). The plywood tops are fitted to both tables after the tables are assembled. By putting a slight angle on the edges of the plywood (Fig. A) you can remove and replace the tops much easier while fitting them. Either cleats screw fastened to the sides and top or glue blocks will hold the panel top in place. (see Fig. A) Scrape and sand all surfaces smooth with number 2-0 and 4-0 garnet paper. Apply two thin coats of white shellac, sanding between coats with 6-0 garnet paper, and follow with one coat of rubbed effect varnish. |
|


Right-click here to download the drawing as an Adobe Acrobat (pdf) file.
* * * * Click on the drawings above to download a higher resolution picture. * * * *
*********** WARNING***********
Read my page on safety before building this item.