| TheWoodcrafter.net |
 Copyright © 2004. |
| My Basic Projects |
| The Retro Section |
| Jr. Woodcrafter |
| My Work |
| Detailed Plans |
| About |
| Lathe Work |
| Safety |
| Hints |
| Pic Gallery |
| Links |
| Search |
| Home |
| Birdhouses |
| Guest Book |
| Contact Us |
|
|
||||||||
|
Here is the original article from the
January - February 1955 Deltagram
ROCKWELL MANUFACTURING COMPANY - A DELTACRAFT PULICATION
|
|
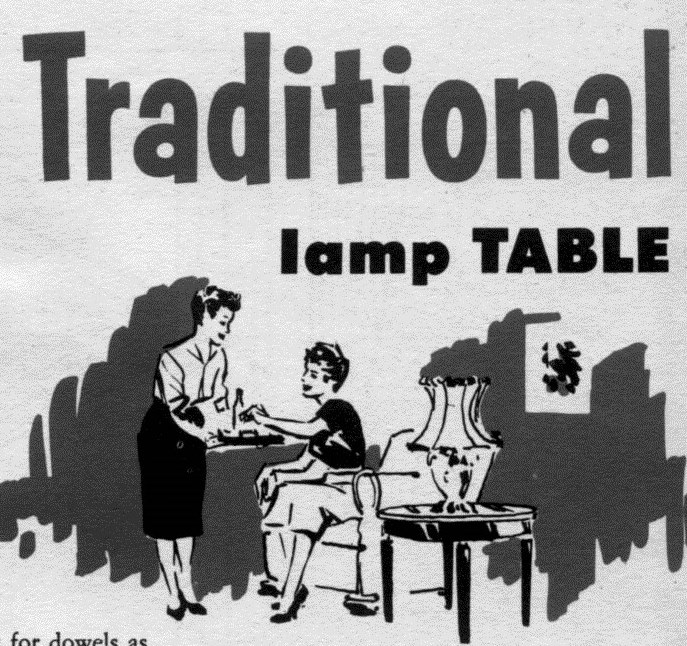 |
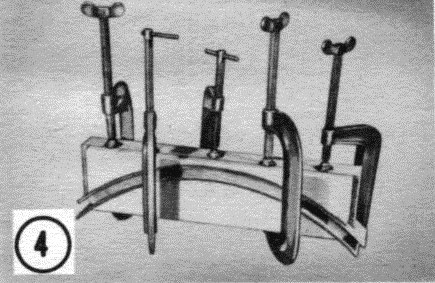
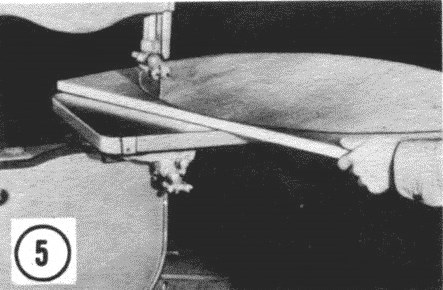
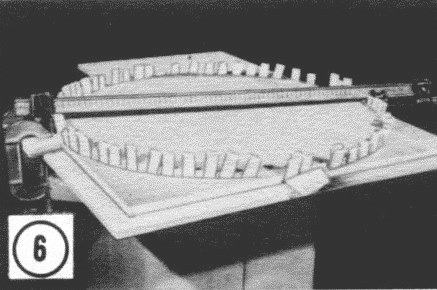
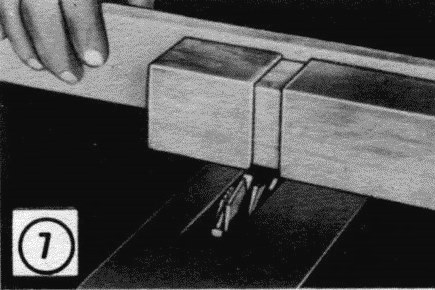
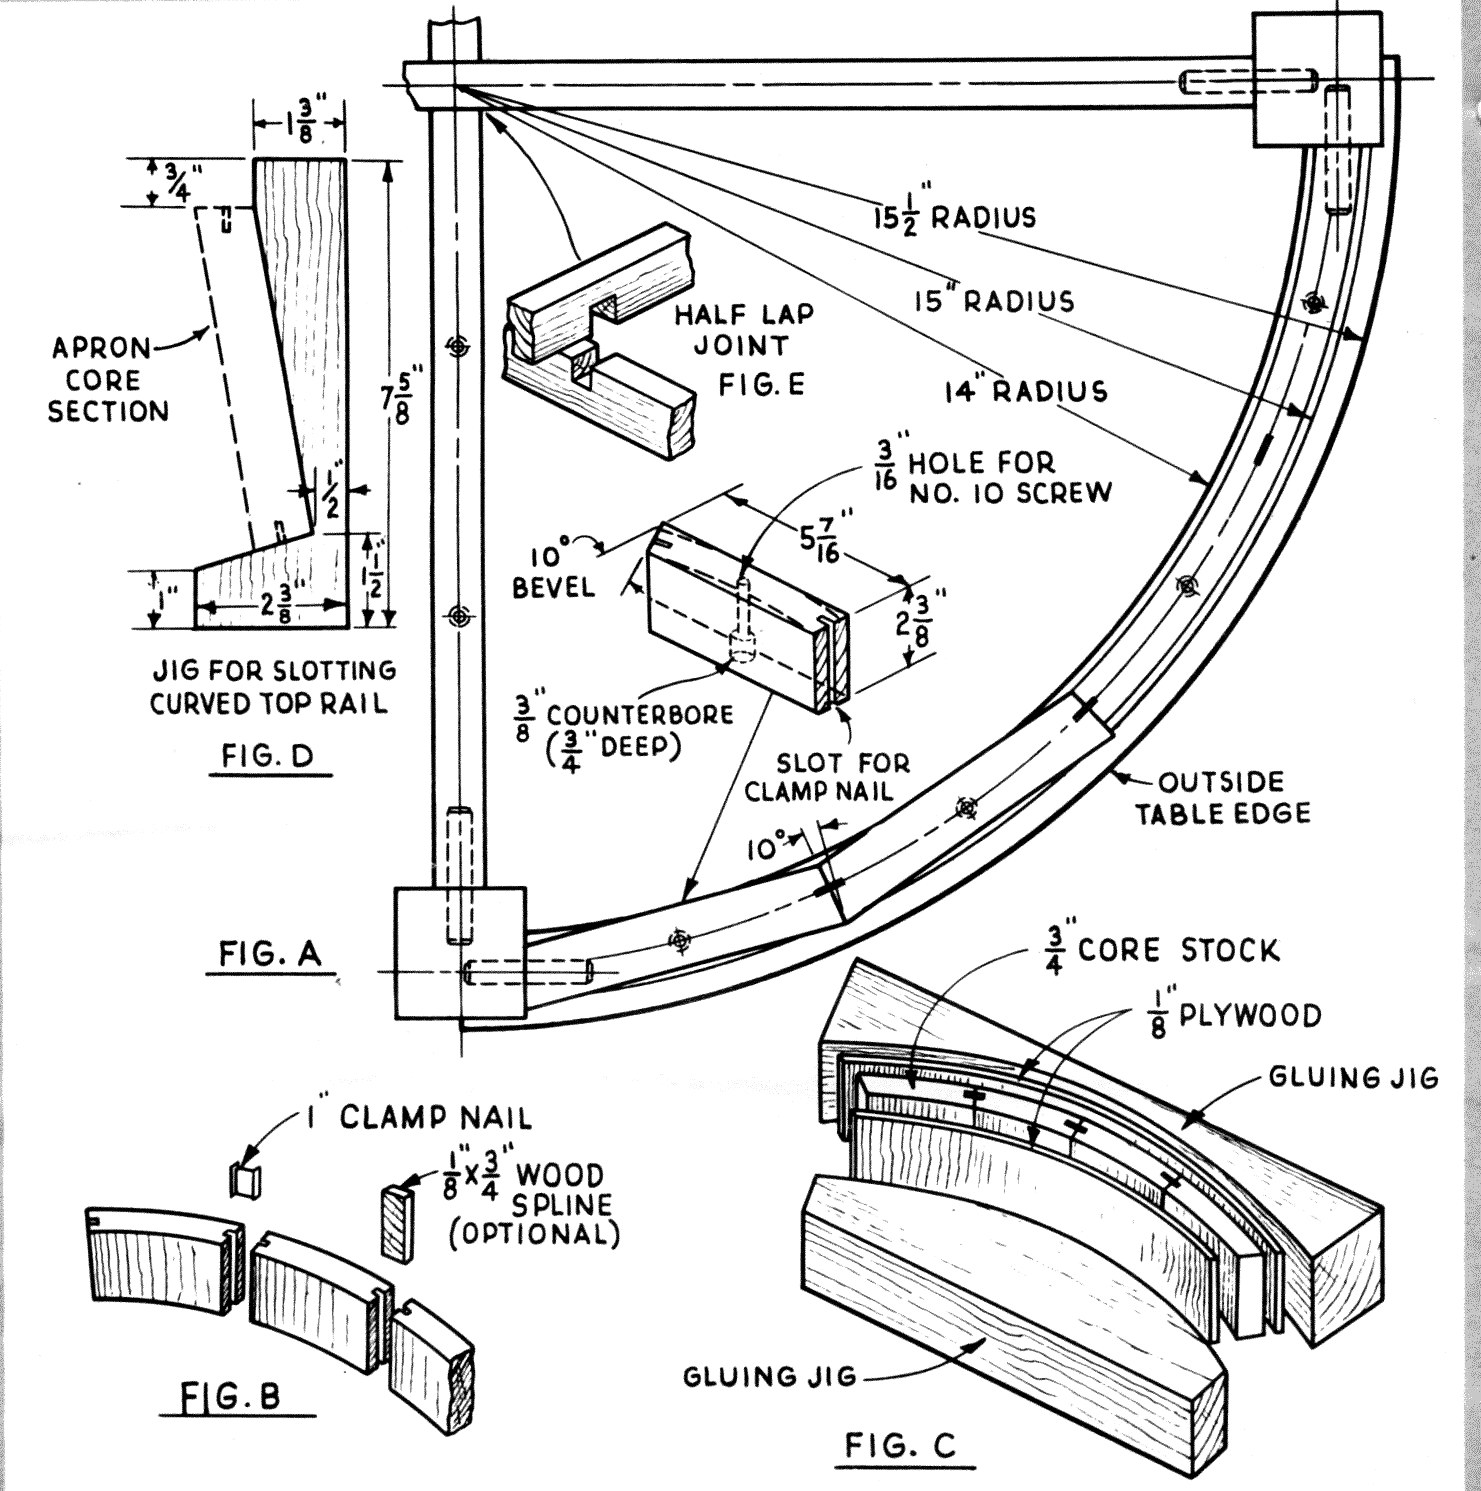
| A beautifully styled round table for the craftsman who prefers the more intricate designs of traditional furniture. This is another piece in the Whitcomb traditional series. A matching lamp will follow in the next issue of the Deltagrarn. Since the curved apron of this table requires a lot of fitting and gluing, let's begin by making quarter sections of a full-size layout on a spare panel, same as Fig. A. Note that each quarter section of the core stock is made of four pieces of stock (basswood or gum) with slot in each to receive a wood spline or metal clamp nail Fig. B. Make the end pieces longer for later fitting. After the four sections are glued together, cut a two piece form (with the inside and outside radii of the apron) and glue on a 1/8 inch piece of plywood to both the inside and outside curves of the core stock, Fig. C. When glue is thoroughly dry, cut and fit to match your layout. |
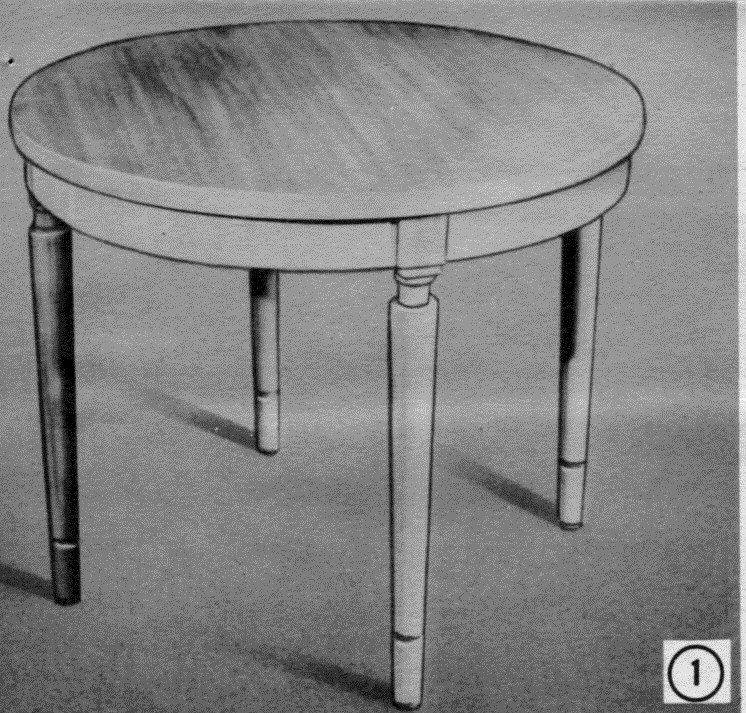
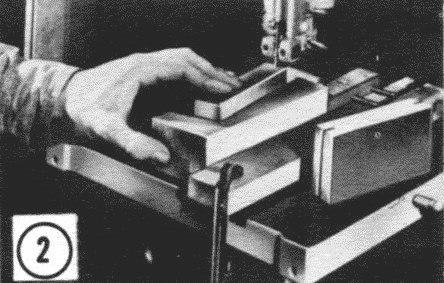
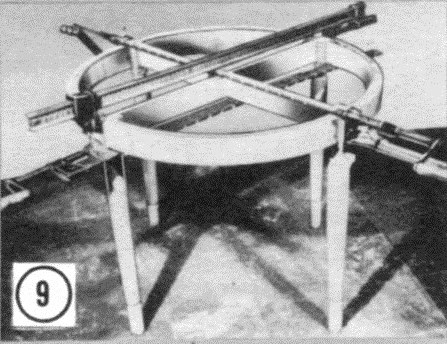
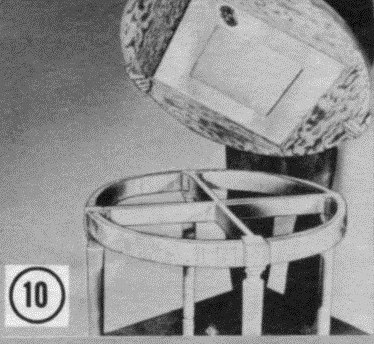
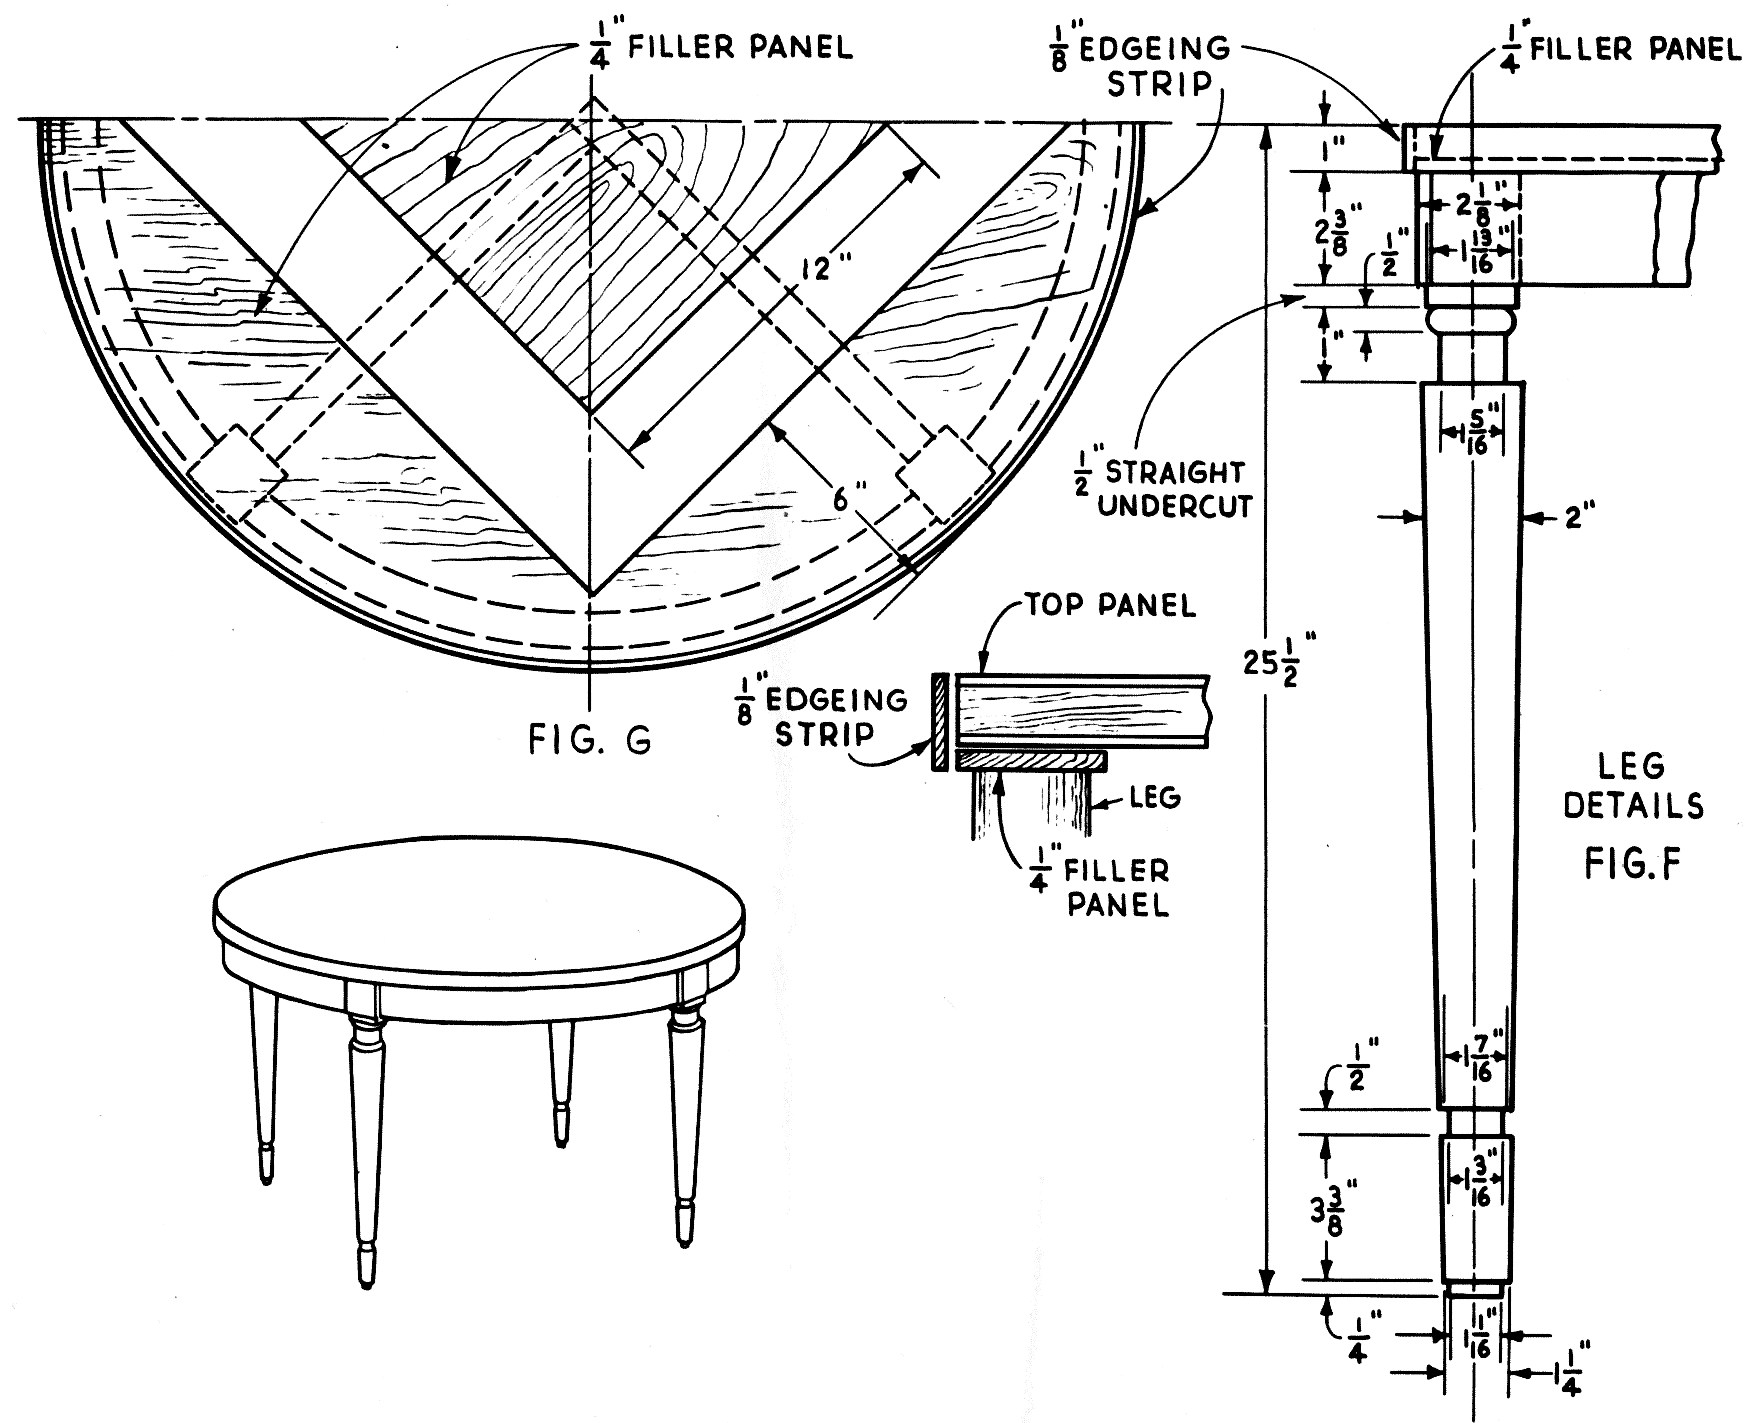
Bore holes in the ends for dowels as shown in photo No. 8. Center cross braces will stiffen the table considerably. These are made of ¾ x 2” stock half lapped at the center and doweled to the legs (see quarter section). The four legs are made of 2-1/8 X 2-1/8 stock turned to the design shown in Fig. F. Be sure to sand each leg thoroughly with 2-O and 4-0 garnet paper, while in the lathe. The ¾ inch plywood top (one side good) is edge banded with a 1/8 x 1 inch piece of solid stock. Note the ¼ inch spacer plywood for building up the thickness of the top (see Fig. G). Sand entire project with 2-O and 4-0 garnet "paper cleaning off all sand dust before applying two thin coats of white shellac (sanding between coats with 6-0 garnet paper) and follow with a coat of rubbed effect varnish. |
 |
|
|
|
|
|
|
|
|
|
|
|
|

Right-click here to download the drawing as an Adobe Acrobat (pdf) file.
* * * * Click on the drawings above to download a higher resolution picture. * * * *
*********** WARNING***********
Read my page on safety before building this item.