| TheWoodcrafter.net |
 Copyright © 2004. |
| My Basic Projects |
| The Retro Section |
| Jr. Woodcrafter |
| My Work |
| Detailed Plans |
| About |
| Lathe Work |
| Safety |
| Hints |
| Pic Gallery |
| Links |
| Search |
| Home |
| Birdhouses |
| Guest Book |
| Contact Us |
|
|
||||||||
|
Here is the orginal article from the
January - February 1955 Deltagram
ROCKWELL MANUFACTURING COMPANY - A DELTACRAFT PULICATION
 |
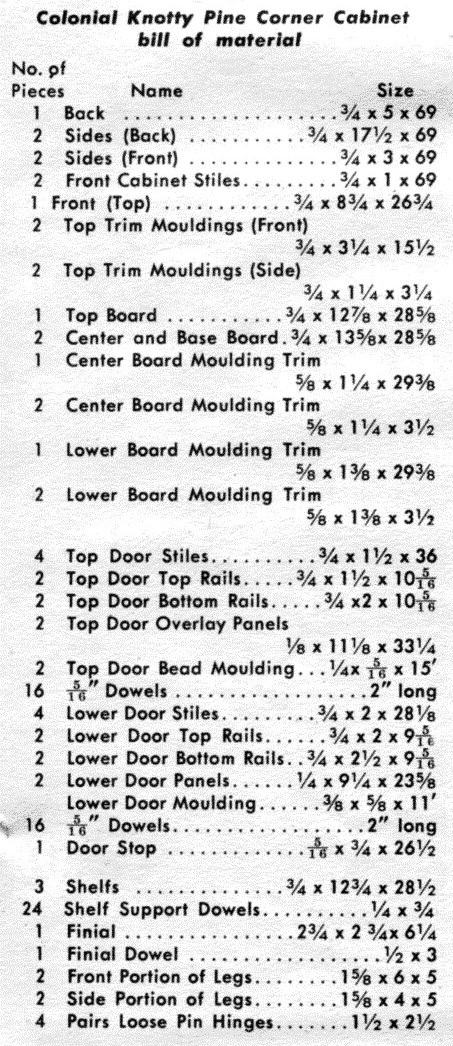
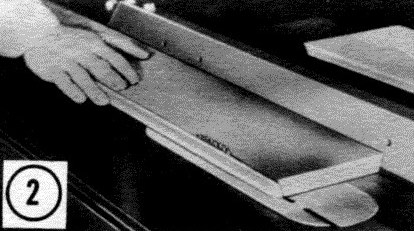
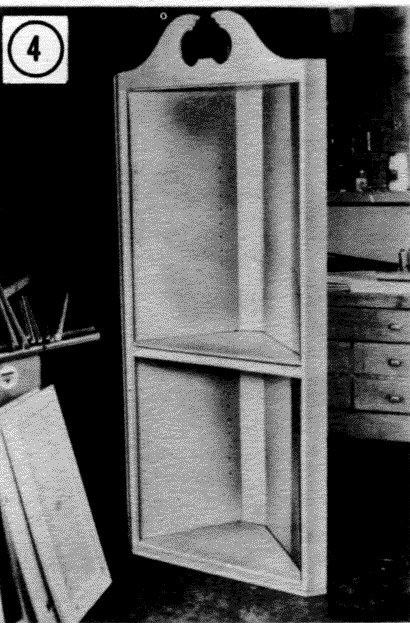
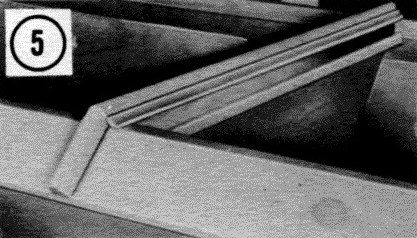
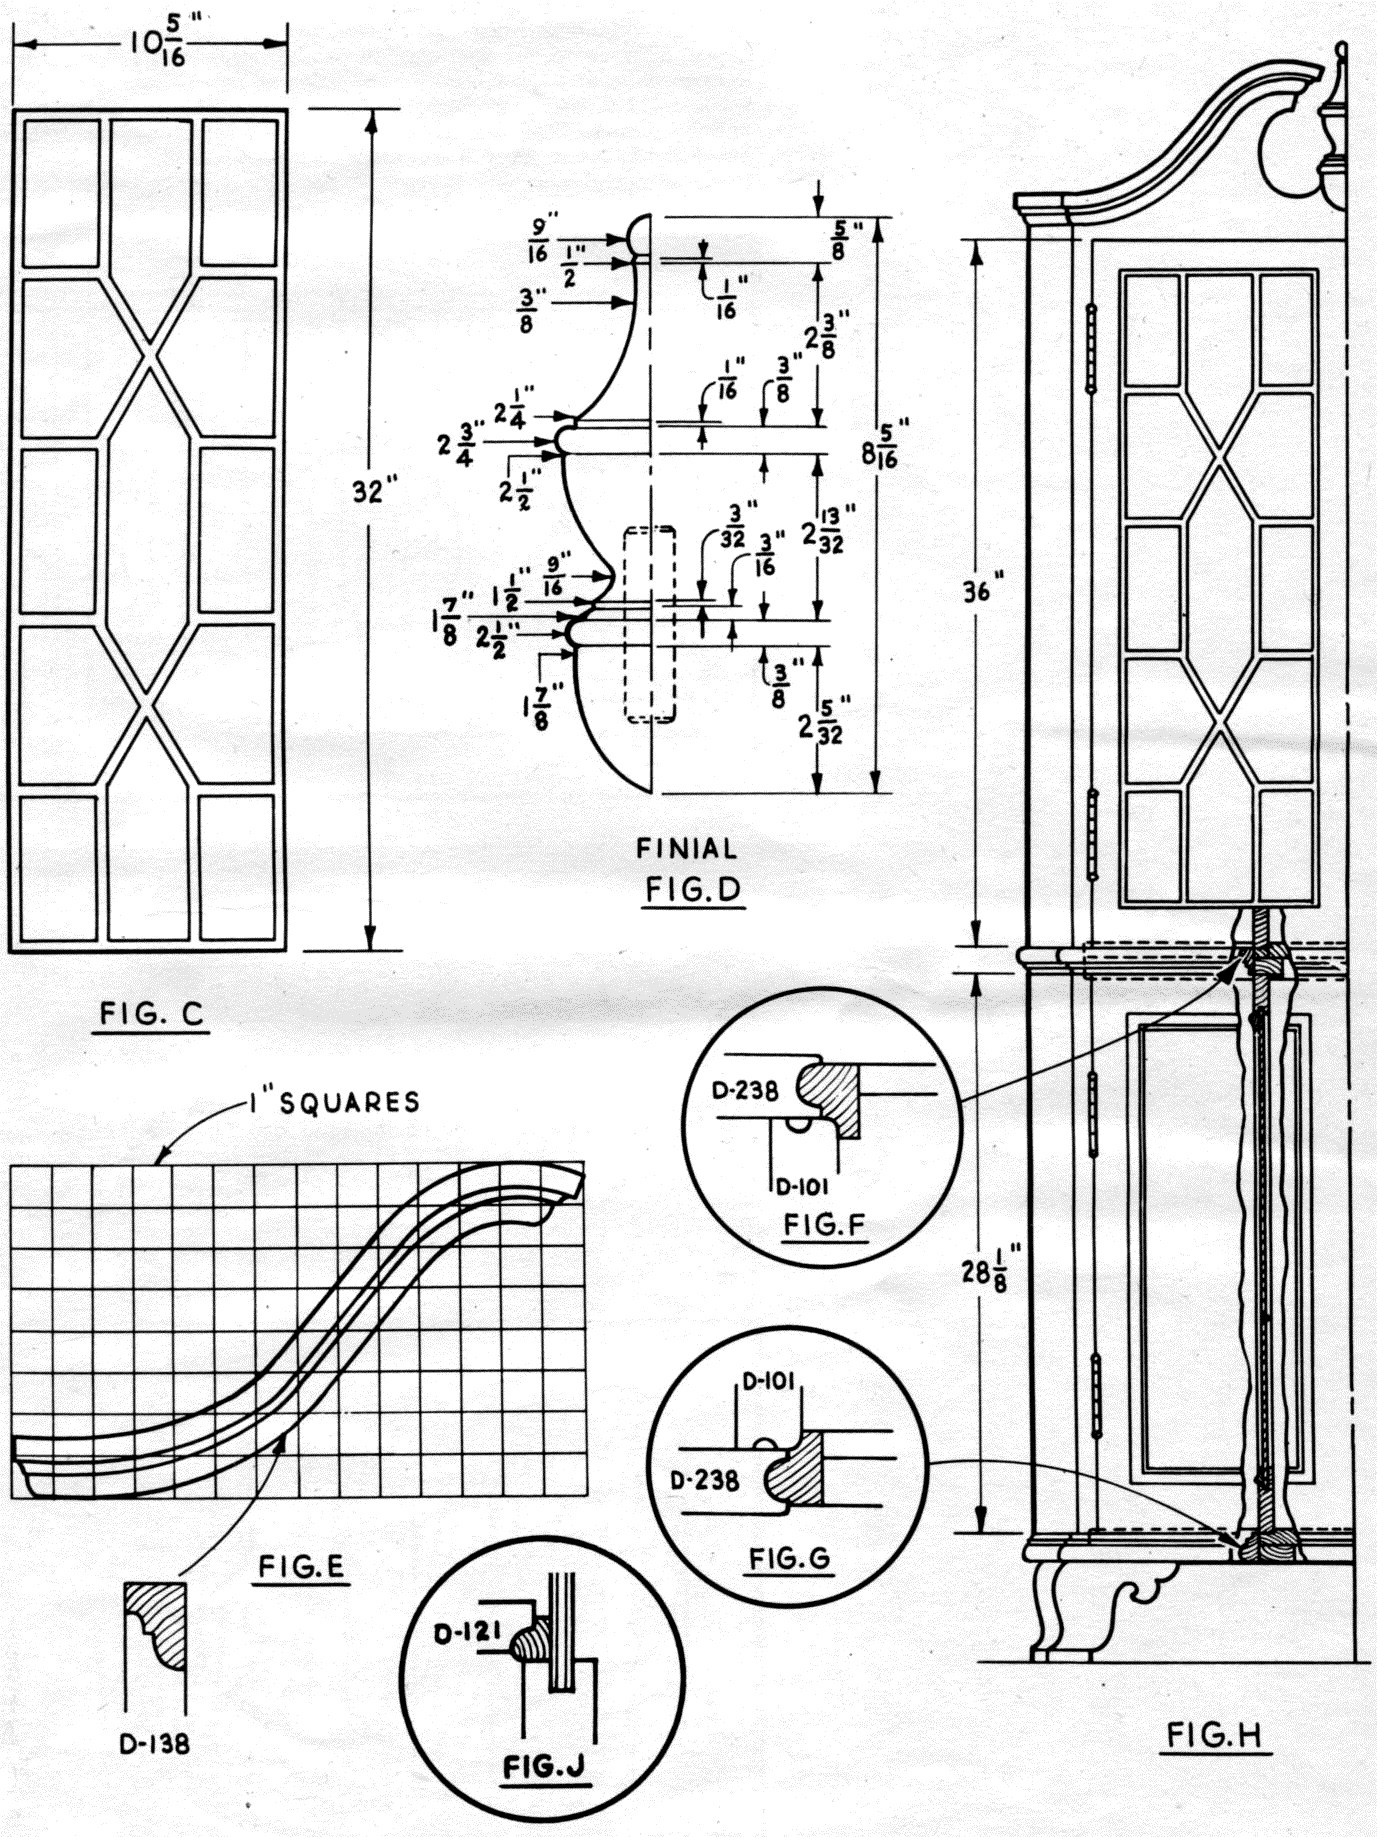
| There's a spot in almost every home for this Early American knotty pine corner cabinet. It offers a maximum of storage while taking up a minimum of space in the room. It is especially useful in a dining room too small for a conventional china cabinet, or in the game room where it will add useful beauty. A good suggestion might be to build a pair to spot in opposite corners. Pine plywood back is faced with ¾ inch solid or plywood knotty pine stock. (See Fig. A and Photo No. 4). Framework is tongue and grooved and assembled with glue and finishing nails. Bottom doors are grooved to receive ¼ inch panel with applied mouldings on the outside ( Fig. J). The scrolled top doors are made by overlaying a solid piece of single strength glass with the fretwork cut from l/8 inch birch plywood (Fig. C and Photo No. 1). Bead moulding is glued and nailed to form the rabbet for the glass and overlay pattern. Top and bottom doors have 5/I6 inch dowel joints. If you prefer mortise and tenon joints be sure to add 3 inches to the length of bottom and top rails. Shelf and bottom board mouldings are cut on the spindle shaper with cutters indicated in Figs. G and F. Fit the miter (Photo No. 5) by setting the miter gauge on the saw at 22½°. |
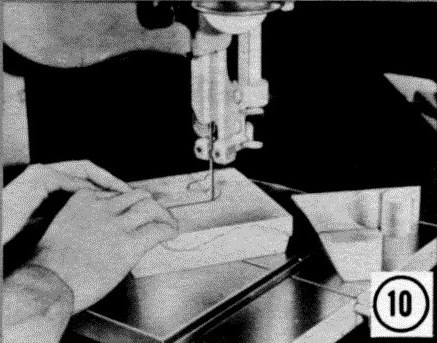
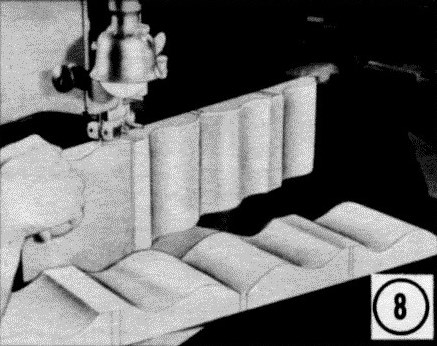
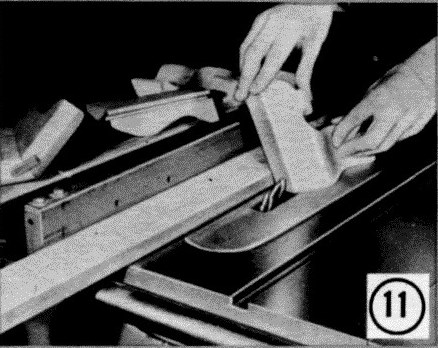
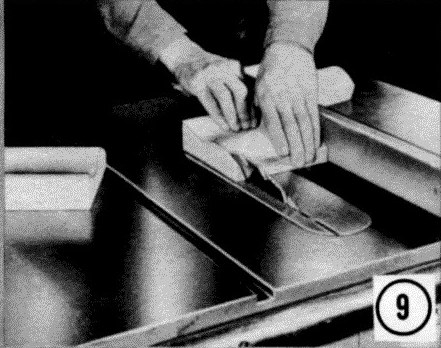
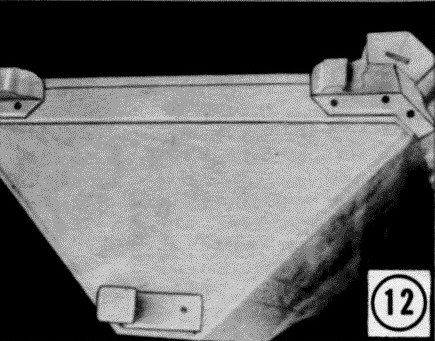
The overlay mould on the very top is made from ¾ inch stock cut to shape on the band or scroll saw as indicated in Fig. E. The curved pieces and the straight return ends are made on the shaper with the D-158 cutter. Miter the short return ends at 22½° and miter cut the curved moulding free hand on the band saw to match the short ends. Make two templates of the scrolled feet as in Fig. B and B-1. First make the face cuts by drawing the design (B-1) on the edge of a piece of 1 5/8 xt 24 inch solid stock and cut out on the band saw as shown in (Photo No. 8). Save the cut pieces for marking off the side cuts (Fig. B). Before band sawing the ends, bevel cut the legs at 22½° (Photo No. 9). The joints are grooved using two 1/8 inch outside dado cutters to receive ¼ x 1 inch splines, see Photo No. 11. The ¾ x 1 inch cleats are screw fastened to the legs which in turn are screw fastened to the base, see Photo No. 12. Tack the cut-out pieces with thin brads and band saw as shown in (Photo No. 10). The rear leg is cut from 1½ solid stock Fig. B-2 and screw fastened to the base (Photo No. 12). Shelves are made of ¾ inch plywood with a 1/8 inch edging strip glued to the front edge only. Shelves are made adjustable by drilling holes on 1 inch center for metal shelf supports or ¼ inch hardwood dowels. |
Sand the entire project with 2-0 and 4-0 garnet paper breaking all sharp corners. Finish natural with three coats of very thin shellac (half shellac, half alcohol) sanding between coats, and one coat of rubbed effect varnish. |
|
 |
|
|
|
 |
|||
|
|
|
|
|
|
|
|||

Right-click here to download the drawing as an Adobe Acrobat (pdf) file.
* * * * Click on the drawings above to download a higher resolution picture. * * * *
*********** WARNING***********
Read my page on safety before building this item.