|
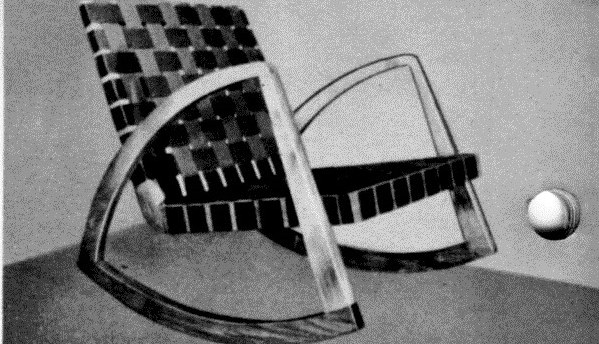
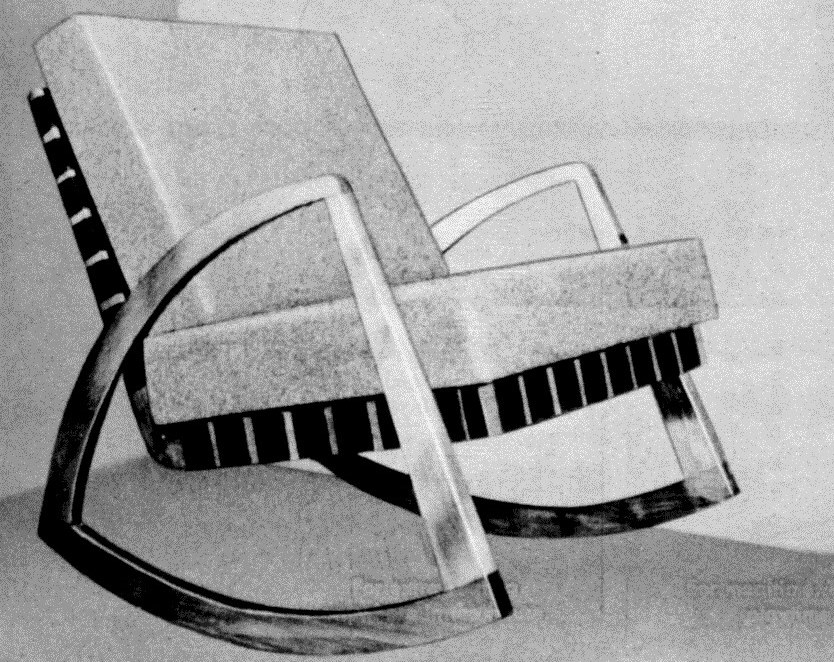
Comfortable enough for everything from television viewing to rocking baby--light enough to move from room to room—beautiful enough for any room --it's a rocking chair with a modern flair. Its clean modern lines and the use of colorful webbing and cushions make it appealing to everyone.
Foam rubber cushions are recommended and can be made or purchased as desired.
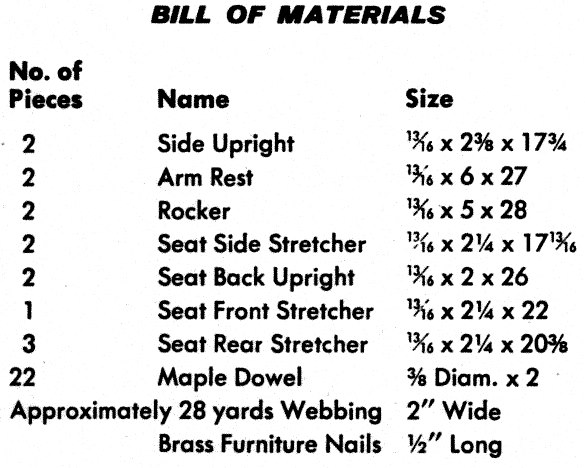
Good kiln dried straight grained stock 1 inch maple or birch is recommended.
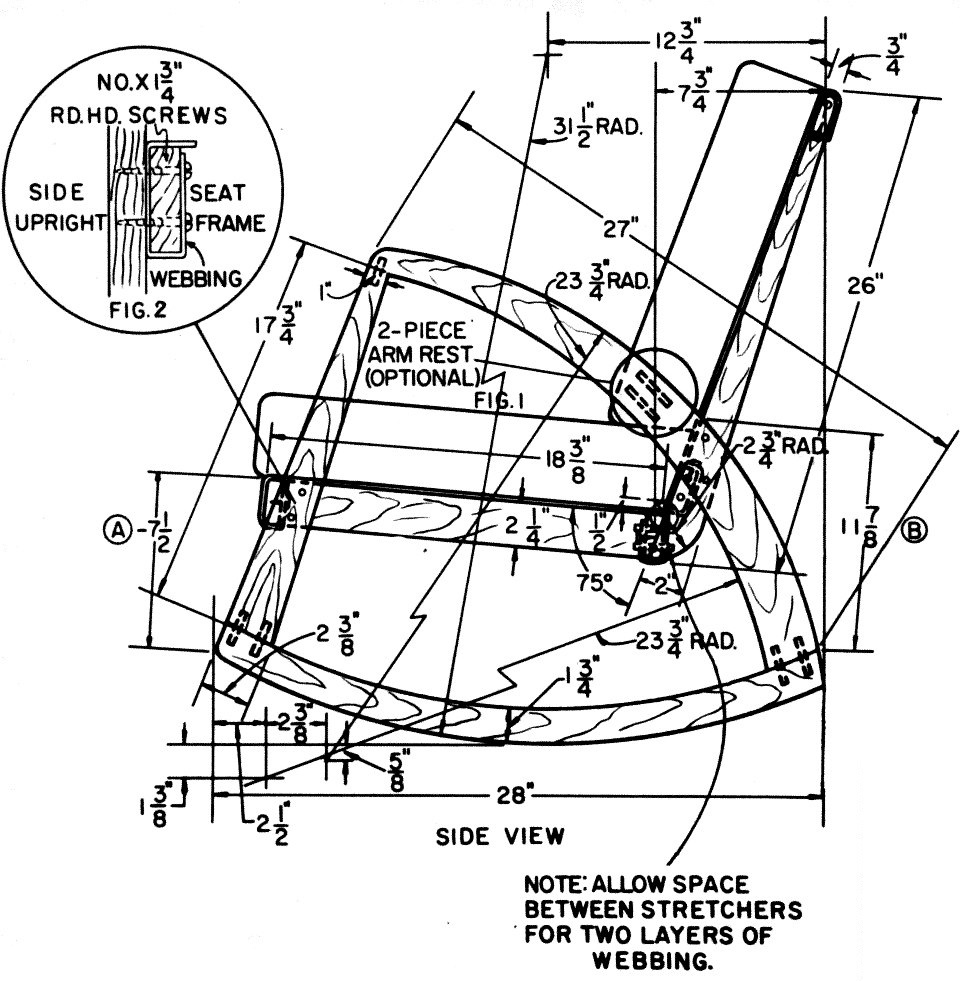
Start by laying out the complete side section in full size on a large panel. When laid out properly, the stock used for the curved parts can be laid over the full-sized drawing and the arcs can be scribed onto the stock exactly as on the drawing. This drawing will come in handy when fitting the joints and laying out the dowel hole positions (see Photo #5). The arm rest piece could be made in two parts as indicated on the drawing (Fig. #1). By doweling two pieces together narrower stock can beused.
The rockers and the side uprights can be cut from the same piece of stock by laying them out as shown in Photo #2. For fast smooth cutting of the curved pieces use a skip tooth blade on your band saw. Sand all external curves on the disc sander and internal curves on the drill press using the Delta No. 830-3 inch drum sander. When all pieces are fitted, mark off the dowel position with straight lines (Photo #5).
These are also used in lining up the stock while drilling the holes on the drill press.
First drill the upright piece and the end section of the curved arm piece. With steel center points, mark off drill point locations for corresponding dowel holes (Photo #5).
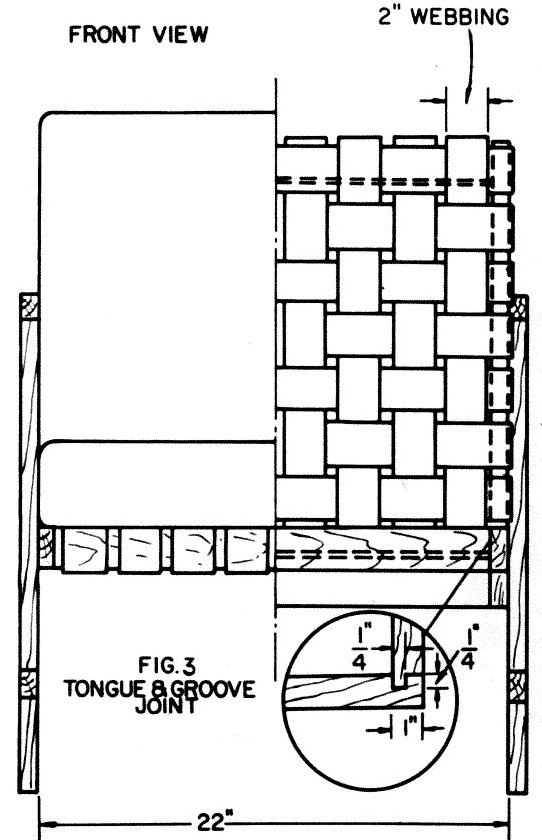
The seat and back are assembled as one unit. One end of the side piece has a 1/4 x 1/4 inch tongue that is glued into the front stretcher (Fig. #3) while the back end is angle cut at 75° and doweled to the side piece of the back rest. The back seat stretcher and the two back stretchers are doweled. These stretchers are also used for tacking the webbing.
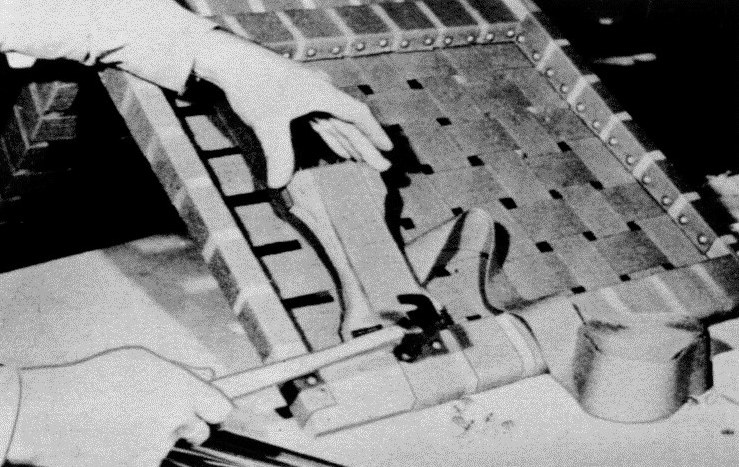
Before applying the webbing over the seat and back unit, the finish should be applied. Sand all parts thoroughly making sure to break all sharp corners. Apply two coats of thin white shellac and follow with a coat of rubbed effect varnish. The cotton webbing should be mounted with a basket weave pattern about 1/2 inch apart. Tack the webbing on the under side using 1/2 inch upholstery nails.
You are now ready to assemble the seat section to the sides with No. 10 x 1-3/4 round-head wood screws (Fig- #2). If you plan on using cushions made with 4 inch foam rubber, the approximate dimensions to use for ?tting the sides to the seat frame are marked at A and B (side view of drawing). You may want to raise or lower the distance to suit your particular purpose, but if you do, be sure to add or subtract the same amount on the front and the back to maintain proper balance of the rocker.
Colored webbing alone makes the rocker a very attractive piece of furniture for any room in the home.
|
|
|

(Photo No. 3)
The rocker stock and a side upright can be band sawed from the same piece. A 1/4 inch sltip tooth blade (Delta No. 28-884) makes a last smooth cut on all hard woods.
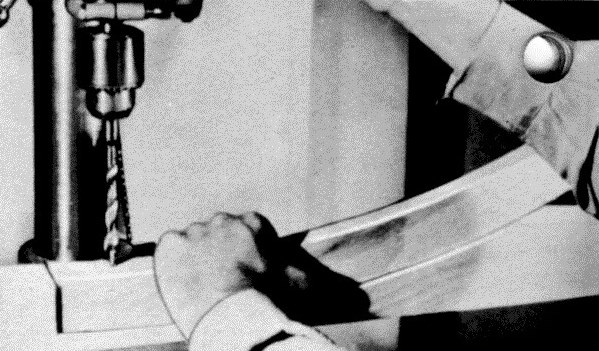
(Photo No. 4)
To help hold the curved rocker piece while drilling the dowel holes on the drill press, a jig with o corresponding curve and stop is used-
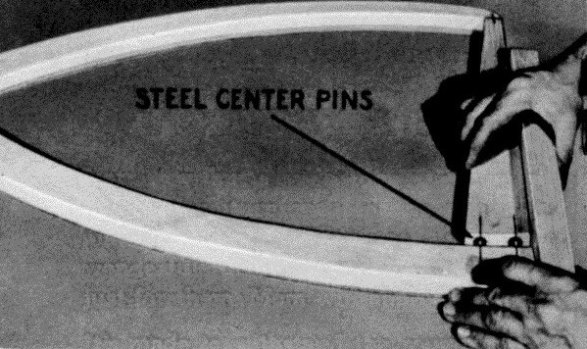
(Photo No. 5)
Lines drawn on pieces to be drilled for dowels will help when lining up stock on the drill press for proper alignment of holes. Note steel clowel centers being used to make exact drill points for corresponding dowel holes.
|