TheWoodcrafter.net
The Woodcrafter Page
Copyright © 2004.
My Basic Projects
The Retro Section
Jr. Woodcrafter
My Work
Detailed Plans
About
Lathe Work
Safety
Hints
Pic Gallery
Links
Search
Home
Birdhouses
Guest Book
Contact Us

The Woodcrafter Page© 2004 - all rights reserved.
 
Ad space available here.


Here is the orginal article from the
May - June 1956 Deltagram
ROCKWELL MANUFACTURING COMPANY - A DELTACRAFT PULICATION


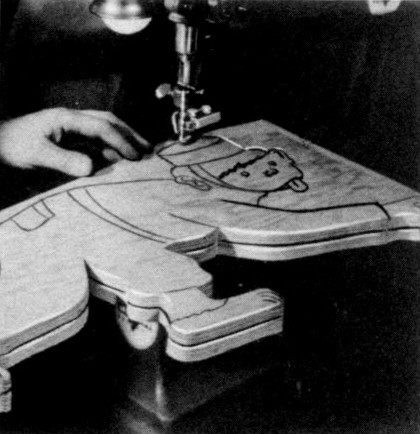
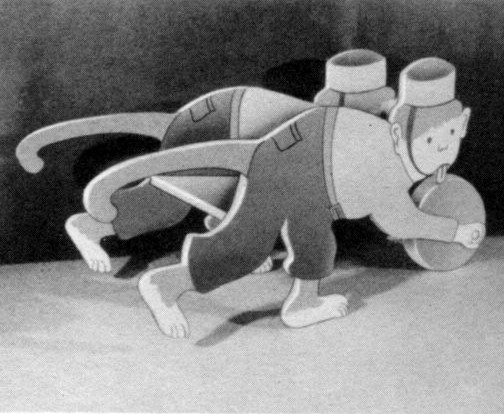
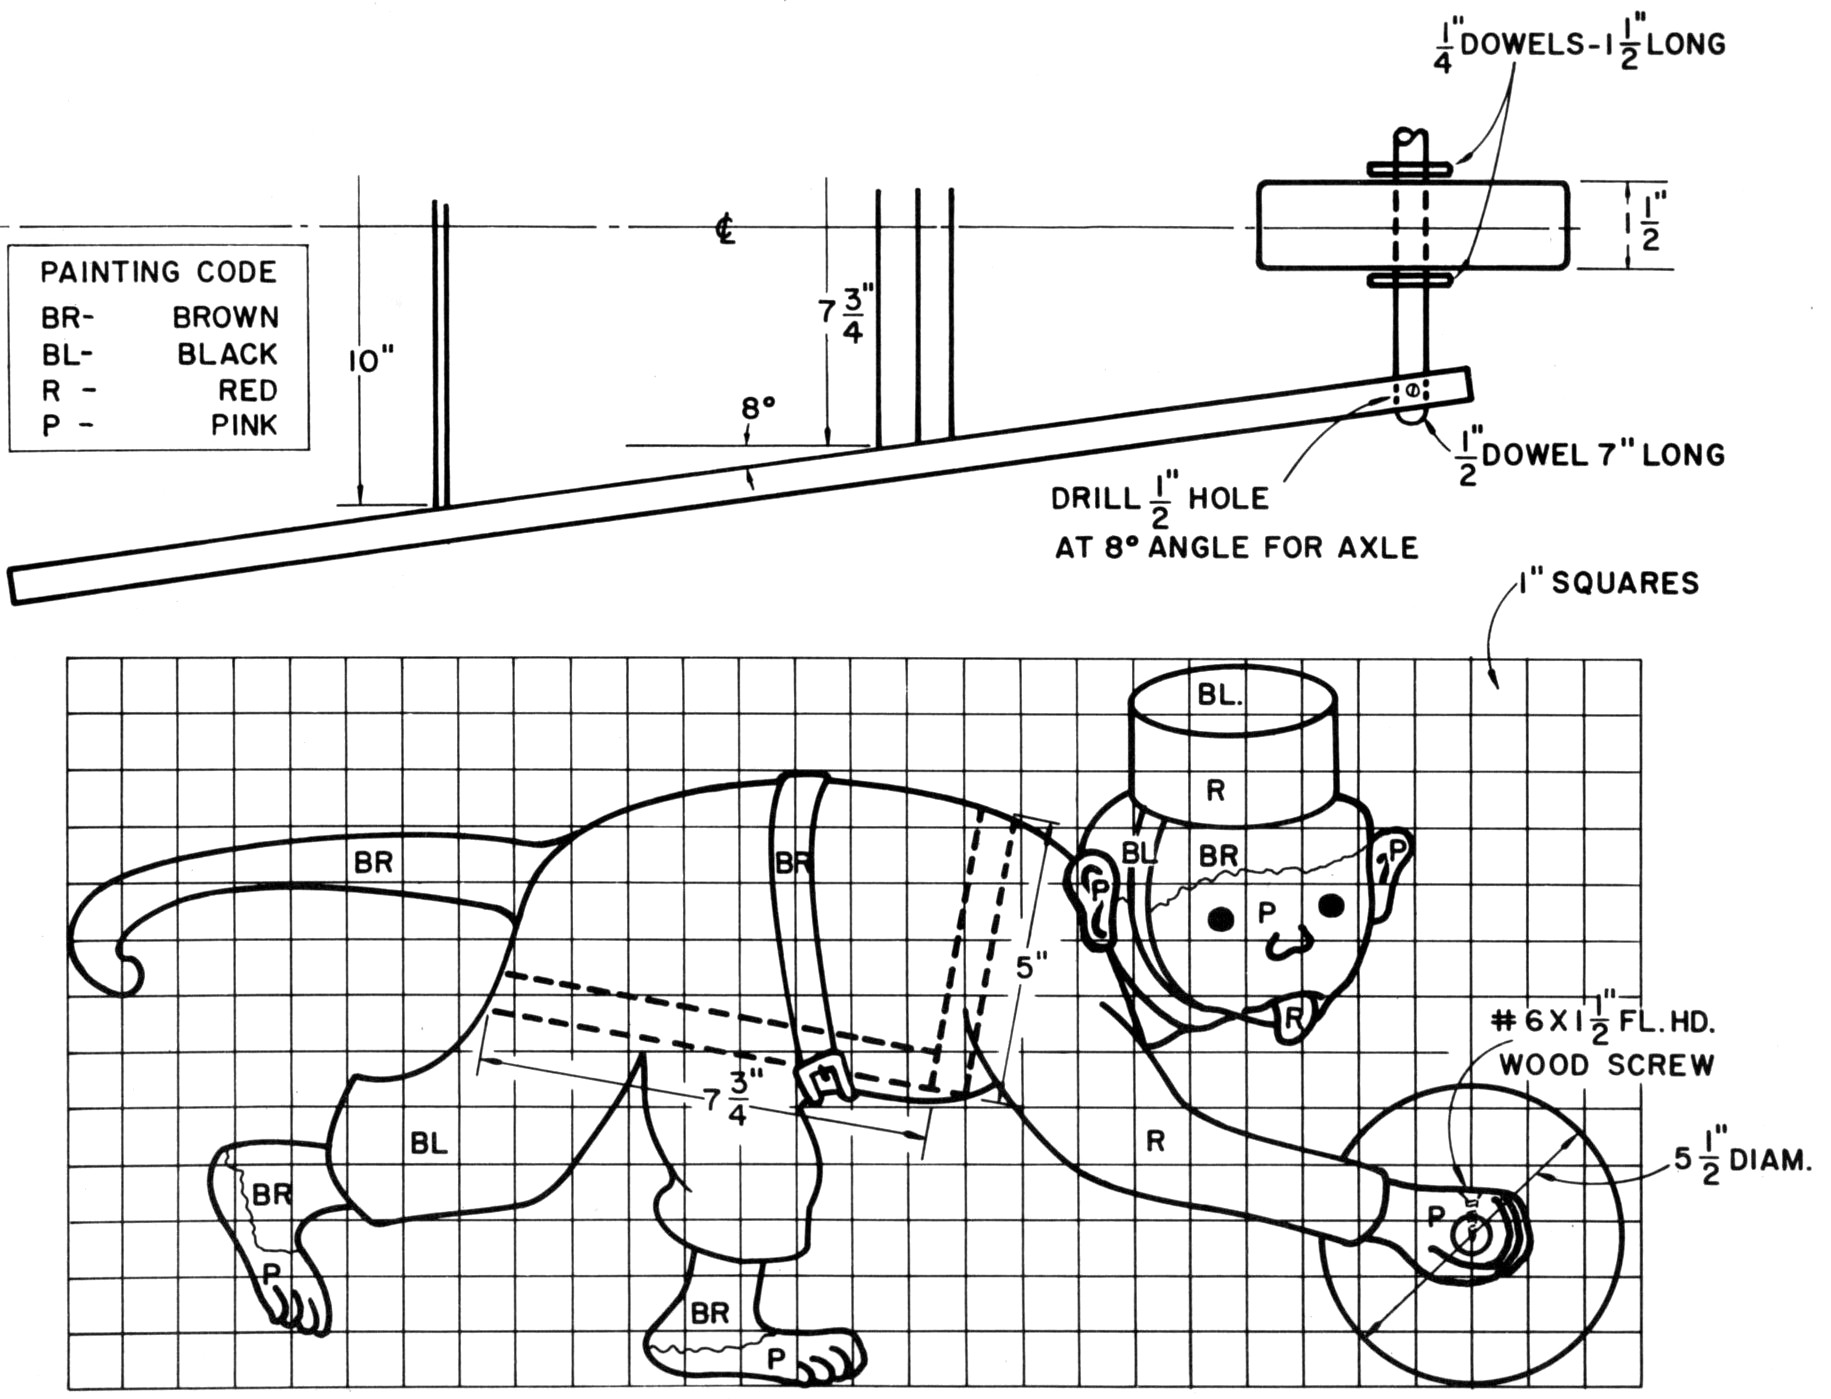
The youngster in your family will get loads of fun wheeling his toys around the garden in this “monkey” wheelbarrow. If you can give him some sand, he’ll be busy for hours at a time wheeling it from one place to another in the play yard.

Layout the monkey pattern (using the squares method) directly on your 5/8 inch waterproof plywood stock or a piece of cardboard and scroll or bandsaw to shape. Tack both sides together and saw them out at one time. Sand the edges well and break all sharp corners. The sanding attachment on the scroll saw Cat. No. 711 or the belt sanding attachment on the bandsaw Cat. No. 28-810 is ideal for this purpose.
Bore the axle hole in the sides on the drill press using a ½ inch machine spur bit Cat. No. 808 with the table tilted at 8°. The side edges of the bottom and back of the bed of the wheelbarrow are cut on the circular saw with the table or saw arbor tilted 8° (see drawing). These pieces are then assembled to the sides with waterproof glue and No. 8 flat head wood screws.


The wheel is made of two pieces of ¾ inch waterproof plywood glued together. The hole in the wheel for the axle should be 9/16 inches so it will ride freely over the axle.


(Photo no. 2)
By tacking the pieces together, both sides can be cut on
the scroll saw at one time.

(Photo no. 1)
 

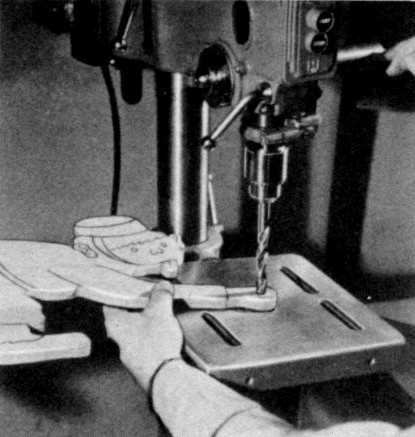
Two ¼ inch dowels hold the wheel in position. The axle is screw fastened to each side with a No. 6 by ½ inch flat head wood screw.
After carefully sanding the entire project, seal it with a coat of shellac. Follow with a coat of undercoating. Paint the marked sections as indicated in the color chart on the drawing. The feature outlines should be painted in black.


(Photo no. 3)
With a Cat. No. 808 ½ inch machine spur bit and the table of
the drill press tilted at 8° the axle holes are bored in the sides.


Right-click here to download the drawing as an Adobe Acrobat (pdf) file.

* * * * Click on the drawings above to download a higher resolution picture. * * * *

*********** WARNING***********
Read my page on safety before building this item.