|
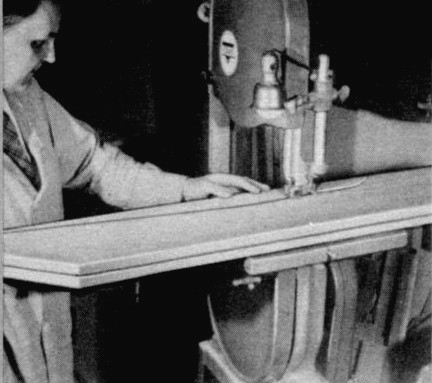
(Photo No. 2)
Tack both sides together and cut out at the same
time on either that band saw or scroll saw.
(Photo No. 3)
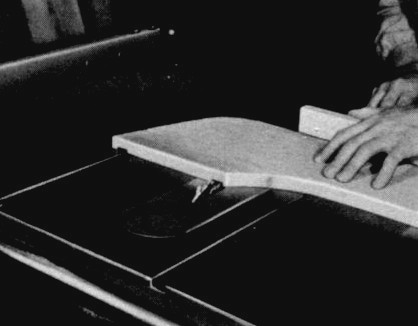
Grooving the sides for the end pieces (optional) is done
on the circular saw with the dado head Cat. No. 34-333
in two operations.
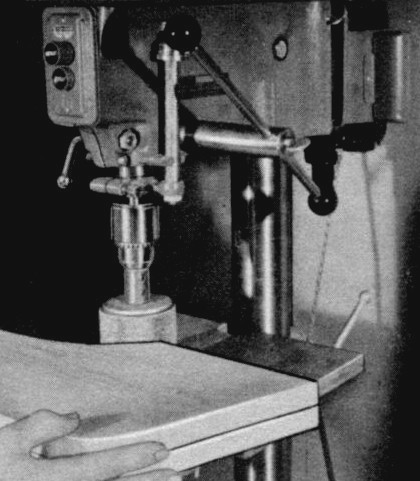
(Photo No. 4)
All curved edges are easily sanded on the drill press
with the 3-inch drum sander Cat. No. 830
and auxiliary wood table.
|
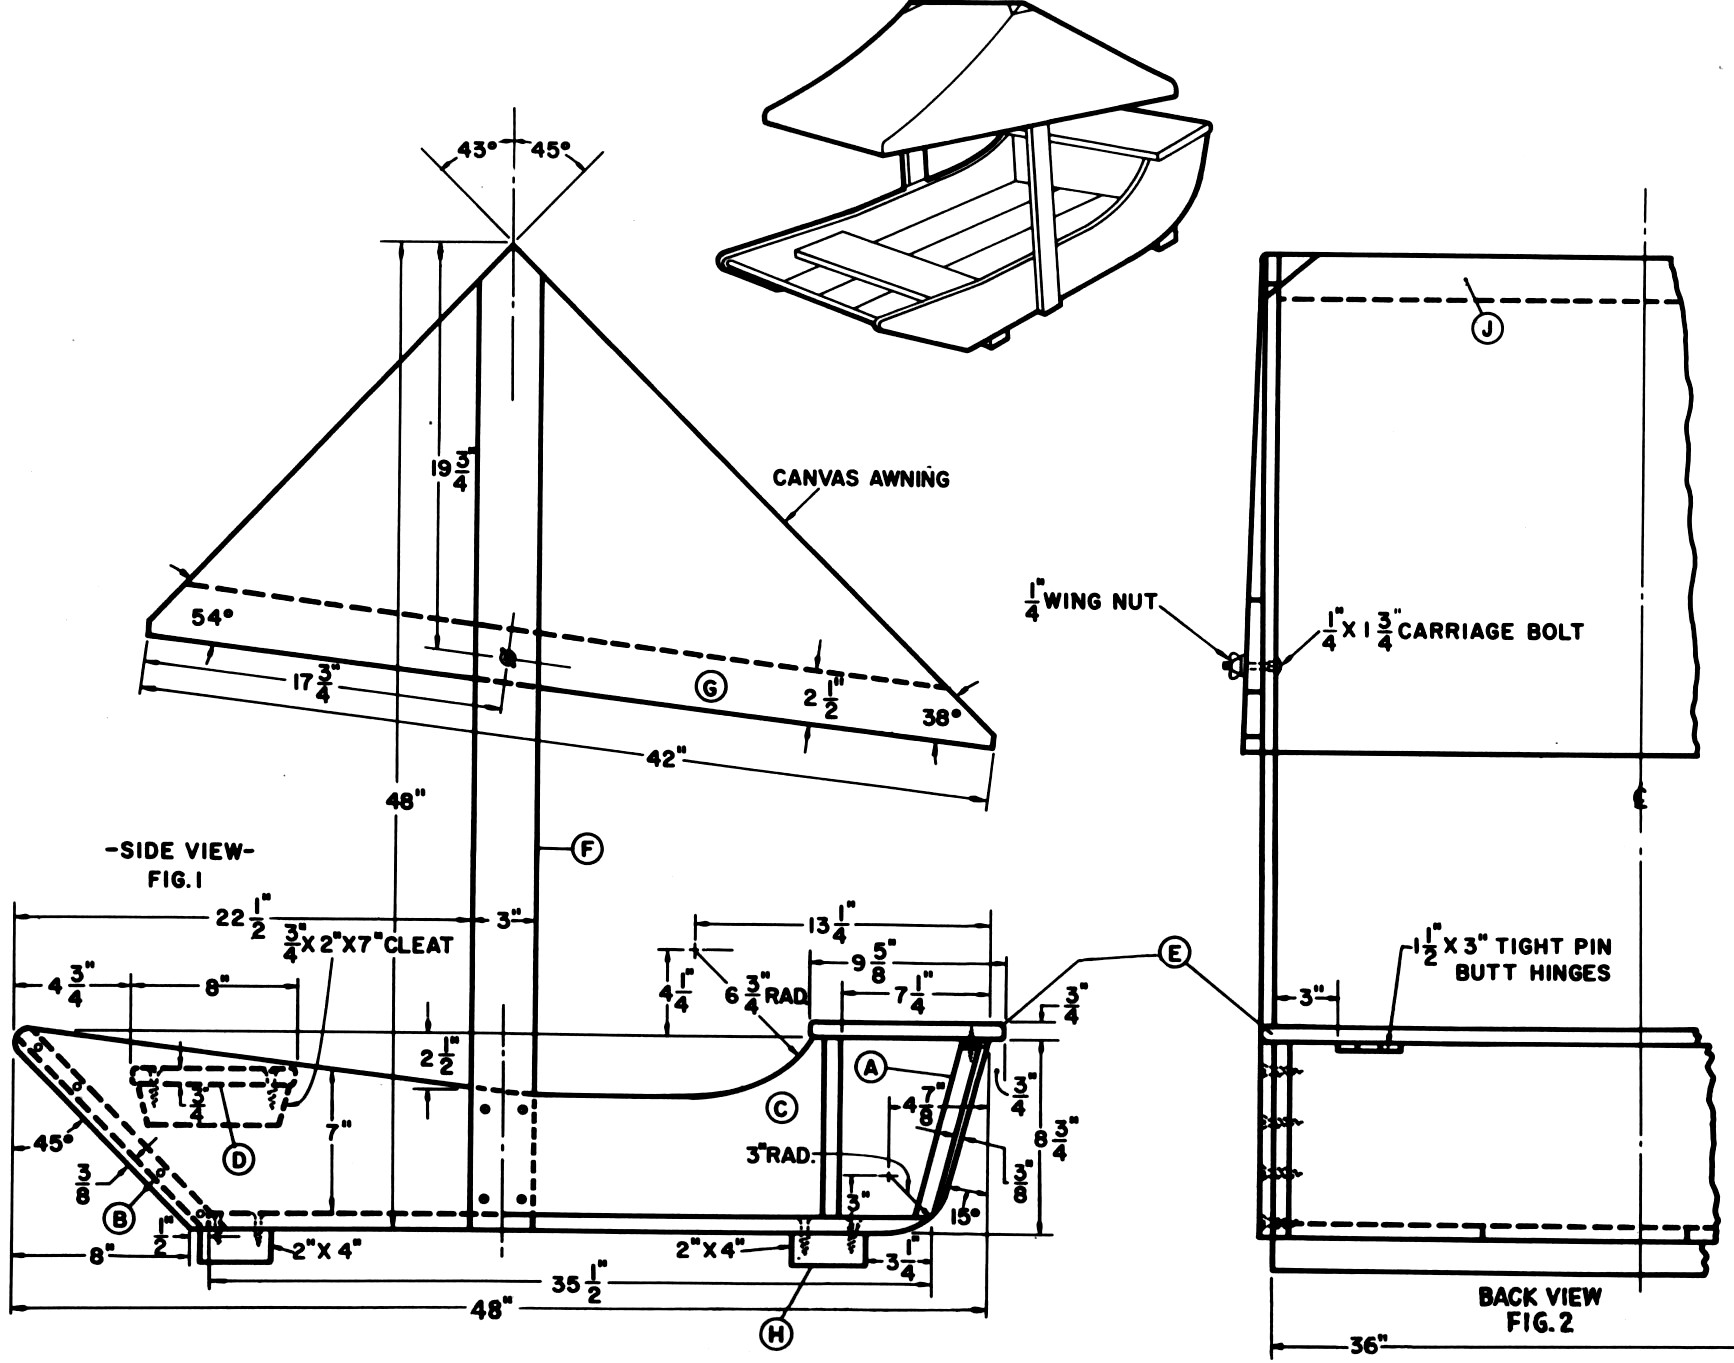
If you want to keep your youngsters at home and happy during the Summer, build them this simple sand box. The one shown here simulates a boat. The canopy represents a sail. An added feature is the box compartment on one end for storing pails, shovels and whatever toys the child chooses to play with. This eliminates a lot of unnecessary tracking of sand into the house.
Begin by tacking two pieces of 3/4 x 8/4 x 48 inch stock for the sides. Lay out the end taper and top edge cuts as indicated in the drawing. Saw the end taper cuts on the circular saw by setting the miter gage to 450 for one end cut and the other end at 15°. Then band saw the top edge on the band saw (see Photo No. 2). Sand all curved sections on the drill press using a 3-inch drum sander Cat. No. 830 (Photo No. 4).
Grooving the sides for the crosspieces, (which is optional, see Photo No. 3), will make a stronger box than merely having butt joints. In either case, screw fasten the sides to the crosspieces with at least four No. 10 x 1 3/4 brass flat head wood screws. The bottom can be made of 3/4 inch solid stock or % inch waterproof plywood fitted as indicated in the drawing.
The seat cover piece (E) over the box compartment is hinged to the base with 11,4 x 3 brass tight pin butt hinges. The seat (D) on the opposite side is screw fastened to the cleats which are screw fastened to the sides of the box. Screw fasten the box to the 2 x 4 cleats from the inside of the box (see drawing).
Canopy support pieces (F) are screw fastened to the sides with No. 10 x 1 ‘/ inch flat head wood screws. Cross pieces (G) are held in position on support pieces (F) with 4 x 1% carriage bolts and wing nuts. By adding a ¼ inch wide groove in the upper portion of the uprights (F), the canvas top can be made adjustable to provide maximum shade.
All exposed edges can be rounded off on the circular saw with the moulding cutter head and the Cat. No. 35-238 cutters, or they can be removed with a hand plane and sandpaper.
For a sealer use a wood preservative. Follow with an outside undercoat and a coat of outside enamel. Green with white trim makes a pleasing combination of colors.
|
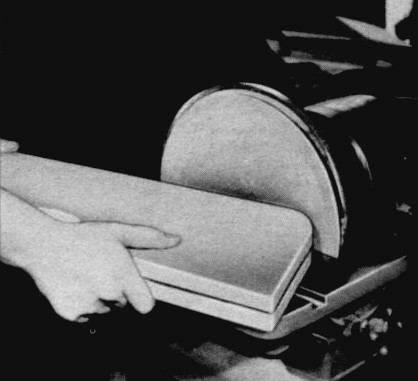
(Photo No. 5)
End cuts are sanded smooth on the disk sander.
|
Bill of Materials
| No. of Pcs. |
Name |
Size |
| 2 |
Sides |
¾ x 8¾ x 48 |
| 1 |
End(A) |
¾ x 8½ x 33 |
| 1 |
End (B) |
¾ x 13¼ x 33 |
| 2 |
Cross Piece (C) and Inside Seat(D) |
¾ x 8 x 33 |
| 1 |
Seat (E) |
¾ x 9-5/8 x 36 |
| 2 |
Seat Cleats (For Seat(D)) |
¾ x 2 x 27 |
| 2 |
Bottom Cleats (H) |
1-5/8 x 3-5/8 x 34½ |
| 2 |
Canopy Uprights (F) |
¾ x 3 x 48 |
| 2 |
Side Pieces for Canopy (G) |
¾ x 2½ x 42 |
| 1 |
Top Support (J) |
¾ x 2½ x 36
|
| 26 |
Flat Head Brass Wood Screws |
No. 10 x 2 |
| 2 |
Tight Pin Butt Hinges |
1½ x 3
|
| 2 |
Carriage Bolts (with wing nuts and Washers) |
¼ x 1¾ |
|
|