|
Add a colorful decorative highlight to your home plus valuable storage space with this chest. It is designed by Peter Hunt, one
of America's leading authorities on "Peasant Art," .
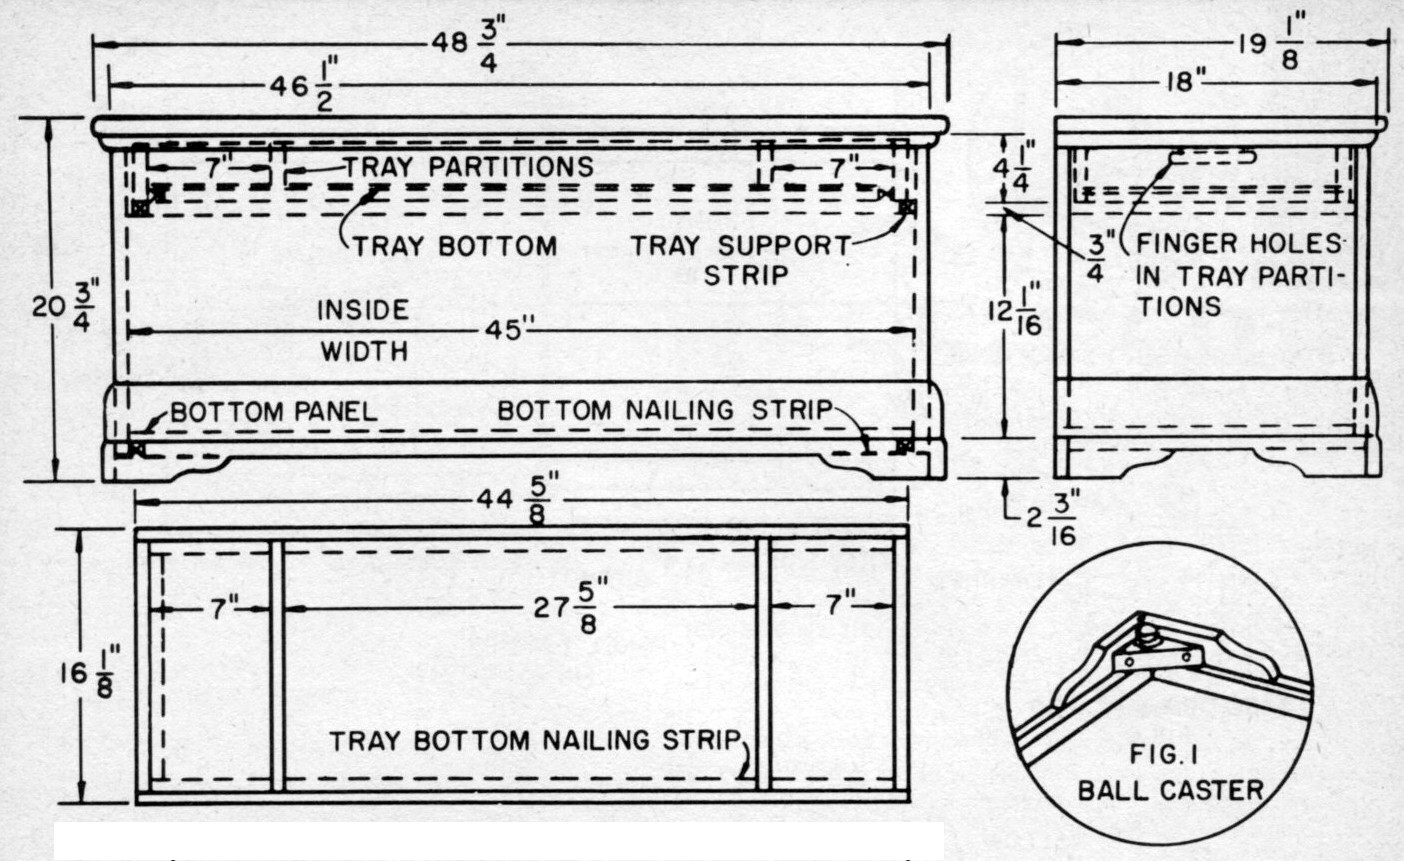
On a piece of ¾ inch thick "Weldwood Old Craftsman Pine" plywood 48 x 96 inches layout the necessary pieces as shown in the panel layout, Fig. No.4. About 1/8 inch will be lost between pieces for saw-cut, so allow for this. Using a pencil, lightly write the name of each piece directly on the panel. As laid out on the diagram, the front and end supports are to be butt joined. Since the box will be painted, the butted joints will not show. If you prefer to miter or have tongue and groove joints, cut the end pieces longer to allow for the miter or tongue.
For a butt jointed chest, drill holes about four inches apart to take # 10 x 1½ inch flat head wood screws. Before drilling these screw holes. bore 3/8 inch holes about 3/16 inches deep for counterbores to leave a space for the wood plugs to cover the screw heads. Use glue along the edges of the end panels to make firm joints.
The curved cuts on the bottom supports can be cut on the band saw (Photo NO.3) or scroll saw. The joints are mitered and positioned in place ¾ inch from the bottom of the chest. These can be screw fastened to the sides with #10 x 1 inch flat head wood screws.
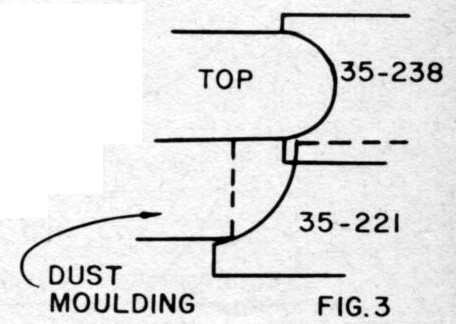
The top is moulded on the front and two side edges with the # 35•238 moulding cutter knives. The shoe moulding trim of the cover is made with # 35•221 moulding cutter knives. see Fig. No.3. This moulding ads as a dust seal and is fastened to the chest cover with glue and brads. Be sure to allow about 1/8 inch space around the edge of the chest so it will open and close freely.
The bottom of the chest is made of 3/8 inch thick Novoply or wood plywood and is fitted against
|
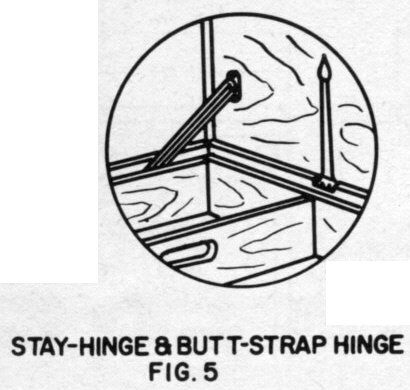
the bottom cleats with glue and brads. The lid of the chest uses butt-strap hinges mounted flush on the underside of the lid and mortised into the top edge of the back to the depth of the folded hinge knuckle (see Fig. No.5).
Make the sliding tray 1/8 inch smaller than the width and length of the inside of the chest to allow plenty of leeway when removing it. The hand-grip holes can be made by first drilling two 1 inch holes, on 2½ inch centers, 1-3/8 inches from the top and then cutting the balance of the handle opening on the scroll saw. The tray rests inside the chest on ¾ x ½ inch cleats that are glued and nailed to the sides of the chest.
The dam shell base moulding can be made as shown in Fig. No.6. First bevel cut the stock by tilting the blade 20°, before rounding off with a hand plane and garnet paper. The corners should be mitered and the moulding applied to the chest with glue and ¼ inch brads.
Ball casters are screw fastened to the bottom of the chest onto corner blocks as shown in Fig. No.1.
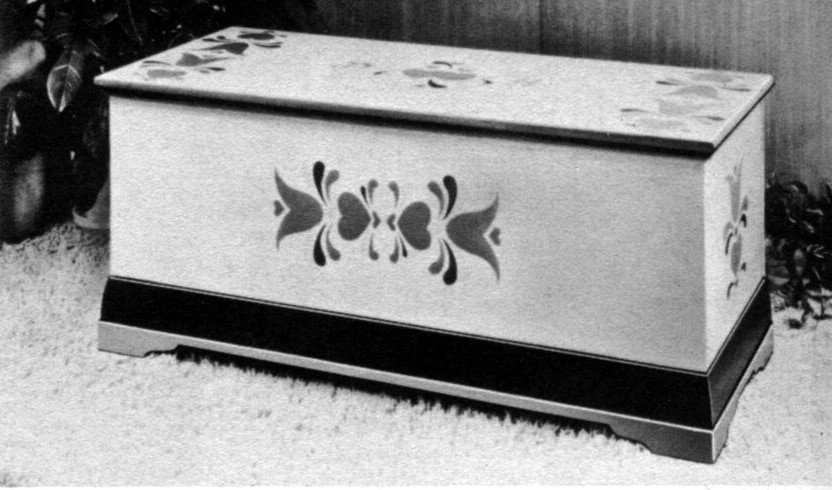
Sand the project thoroughly and finish with three thin coats of' white shellac. For a decorative effect, trace the outlines of the pattern (Fig. No.7), on a piece of translucent paper and trans¬fer the design to the finished surface of the chest. Paint in bright colors as suggested in Fig. No.7. The top edge, shoe moulding and base support should be painted red and the clam-moulding black.
|
|
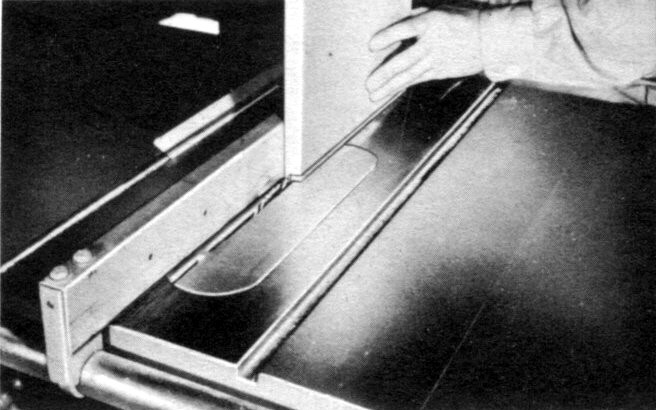
Photo #2
If you decide on tongue and groove corner joints,
the tongue on the end boards can be made in two
cuts using the #1016 hollow ground saw blade.
|
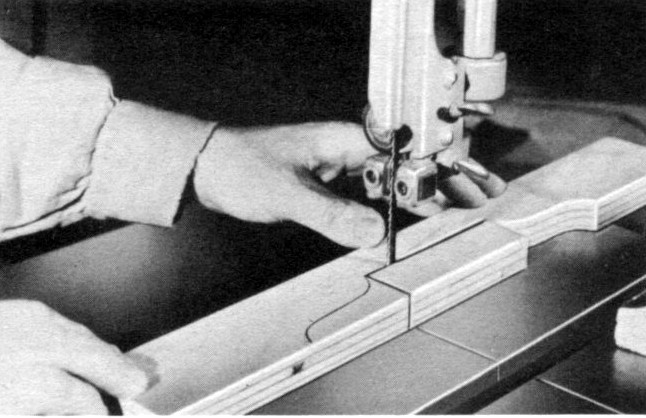
Photo #3
Trace the full size curve cuts (Fig. No.2) onto the base
support pieces and cut on the scroll saw or band saw as
shown above. Use a sharp narrow blade for this operation. |
|
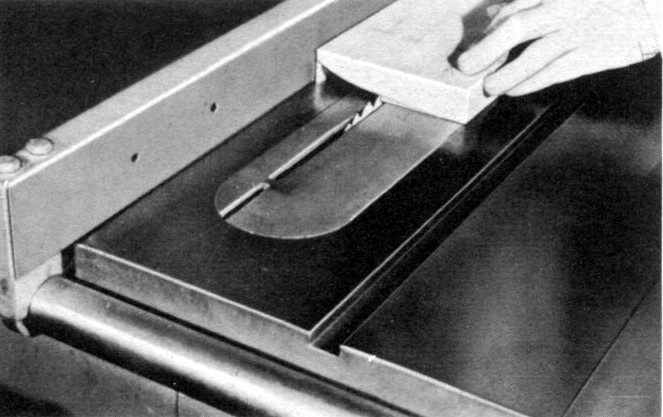
Photo #4
Another method of making the curved clam~moulding is
on the circular saw by making a series of saw cuts
to remove the surplus stock. Note the piece of stock
left remaining towards tha fence to support tha piece
while making the saw kerfs.
|
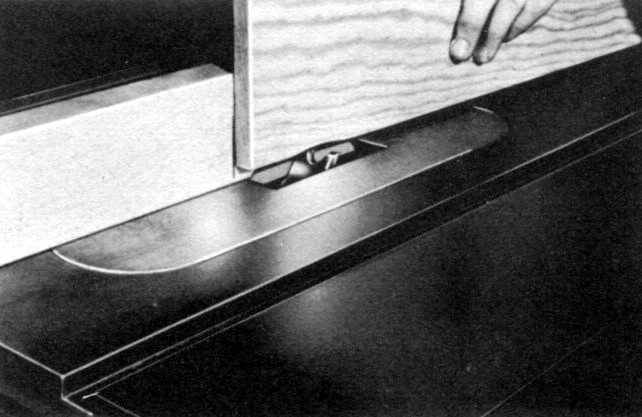
Photo #5
To makethe top edge moulding, use the Delta #35-238
moulding cutter knives mounted in the #265 moulding
cutter head on the saw arbor of your circular saw. |
No. of
Pieces |
Name |
Size |
|
1
|
Front of Chest |
¾ x 17-13/16 x 44-5/8 |
|
1
|
Backof Chest |
¾ x 20 x 44-5/8 |
|
2
|
Side of Chest |
¾ x 17-13/16 x 16½ |
|
1
|
Top of Chest |
¾ x 19-1/8 x 48¾ |
|
1
|
Bottom of Chest |
3/8 x 16½ x 45 |
|
4
|
T ray and Bottom Piece Cleats |
¾ x ¾ x16½ |
|
4
|
Tray and Bottom Piece Cleats |
¾ x ¾ x43½ |
|
2
|
Tray Ends |
¾ x 4¼ x16¼ |
|
2
|
Tray Front and Back |
¾ x 4¼ x44¾ |
|
2
|
Tray Partitions |
¾ x 3¾ x14¾ |
|
No. of
Pieces |
Name |
Size |
|
2
|
Base Support |
¾ x 2-3/16 x 18¾ |
|
1
|
Tray Bottom |
¼ x 15¼ x 43¾ |
|
1
|
Base Support |
¾ x 2-3/16 x 48 |
|
2
|
Clam-Shell Base Moulding |
¾ x 3½ x 18¾ |
|
1
|
Clam-Shell Base Moulding |
¾ x 3½ x 48 |
|
2
|
Top Lid Dust Moulding |
7/16 x 11/16 x 18-11/16 |
|
1
|
Top Lid Dust Moulding |
7/16 x 11/16 x 47-7/8 |
|
4
|
Caster Support Block |
¾ x 3 x 3 |
|
4
|
Ball Casters |
¾" |
|
1-Pair
|
Black Hammered Butt-strap hinges |
¾" wide |
|