| TheWoodcrafter.net |
 Copyright © 2004. |
| My Basic Projects |
| The Retro Section |
| Jr. Woodcrafter |
| My Work |
| Detailed Plans |
| About |
| Lathe Work |
| Safety |
| Hints |
| Pic Gallery |
| Links |
| Search |
| Home |
| Birdhouses |
| Guest Book |
| Contact Us |
|
|
||||||||
|
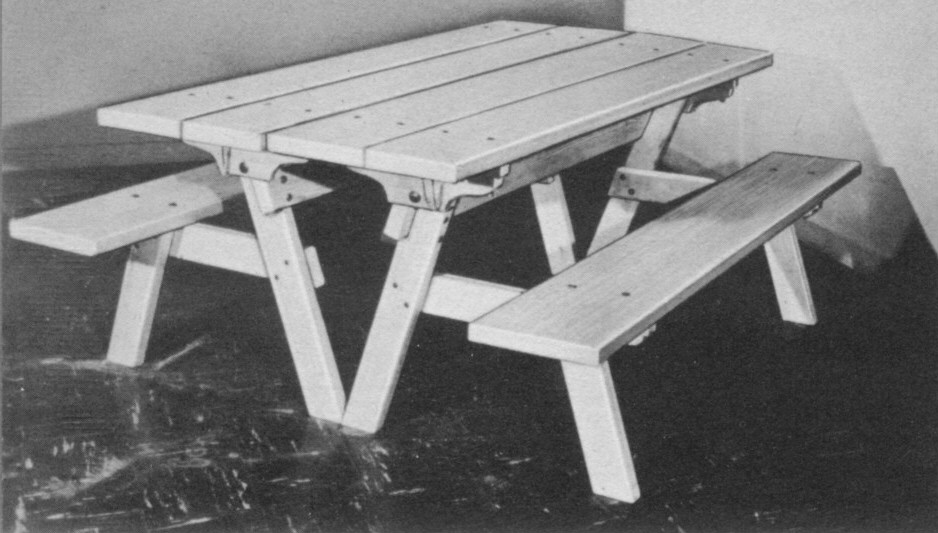
Dual Purpose
Picnic Table and Benches
Here is the orginal article from the
November - December 1959 Deltagram
ROCKWELL MANUFACTURING COMPANY - A DELTACRAFT PULICATION
|
|
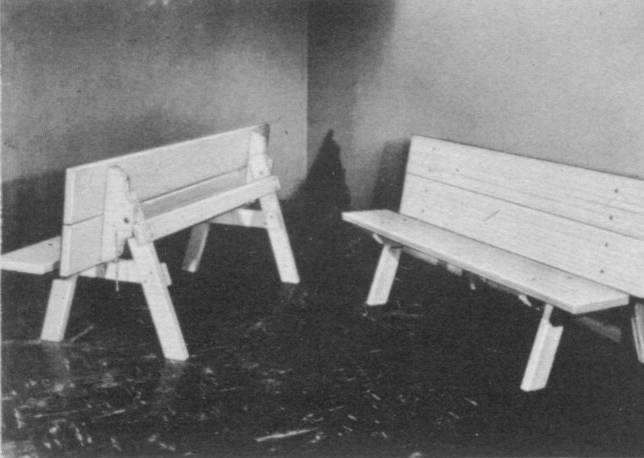
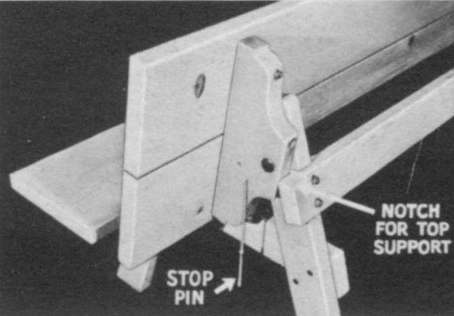
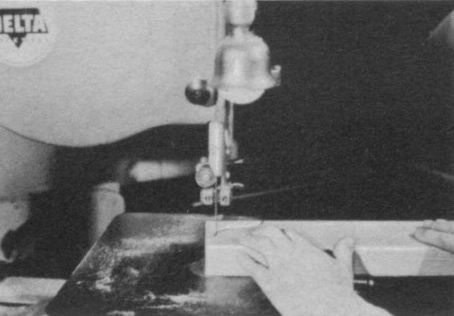
It's a picnic table! It' s a pair of benches! You get double-use, double-fun, from this unusual combination picnic table that readily converts into two attractive benches. Only standard materials available at any local lumber dealer are used in its construction. Cut the table and seat legs and the horizontal seat supports from 2 x 4 stock. Angle cuts on these pieces are made on the saw by setting the miter gage at 72o. Be sure to round off the top corners of the table legs to allow the table top to swivel, (see drawing ) . Also make a 3/16 inch deep notch in the table leg to receive the rear 2 x 4 stretcher. This stretcher is bevel notched on each end (Fig. No. 3) to support the table top when the top is in a horizontal position (see Fig. Nos. 1 and 4) . |
|
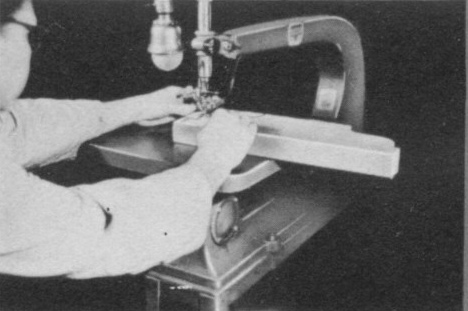
|
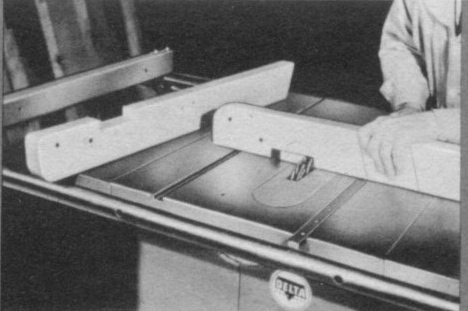
Scrolled portions of the seat support and the table top support can be cut on the band saw or scroll saw, see Fig. No. 2 for cut-out details. Assemble the two legs and seat supports with 5/16 x 3½ inch carriage bolts. Seat planks are full size 2 x 10's . The table top planks are dressed down to 8-7/8 inches wide. A ½ inch gap between the planks will give you an 18 inch top . When the two tables are placed side by side (Photo No. 1) they will make up a 36 inch picnic table top.
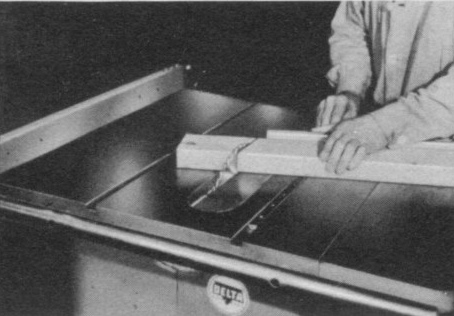
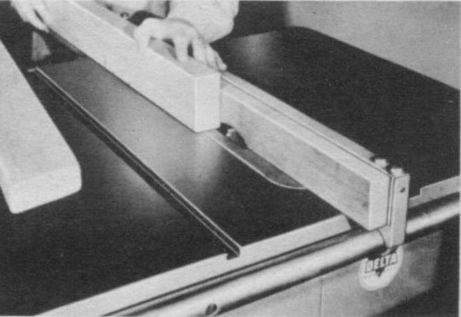
Seat planks as well as the top planks have an 8½ inch overhang at the ends. Drill the bolt holes in the planks first. Lay these planks over the leg assemblies and mark off the hole locations with a scratch awl for drilling. Be sure to break all sharp corners by rounding them on the shaper or circular saw. The cutters used on the circular saw are the Delta # 35-103 mounted in the # 265 Moulding Cutterhead (Photo No. 8). Sand the project thoroughly and apply a coat of wood preservative before applying any finish. Leave natural by applying two or three coats of spar varnish. For a painted finish use a coat of outside undercoat and two coats of enamel. White with green trim makes a very attractive color combination. |
|
|
|
|
|
|

|
|
|
|
Right-click here to download the drawing as an Adobe Acrobat (pdf) file.
* * * * Click on the drawings above to download a higher resolution picture. * * * *
Read my page on safety before building this item.