|
|
|
The Woodcrafter Page© 2004 - all rights reserved.
|
|
|
|
Noah's Ark Toy
Here is the orginal article from the
November - December 1957 Deltagram
ROCKWELL MANUFACTURING COMPANY - A DELTACRAFT PULICATION

The wonderfully familiar story of Noah's Ark was the starting point for a very interesting hobby. It involved designing and building an educational toy that would capture the heart of every child, and it led to free form sculpturing on a power tool. An entertaining project to make, and it calls for creative expression in one of the oldest art forms.
Mr. Richard L Felver, an Industrial Designer who teaches at Carnegie Institute of Technology, made the toy Noah's Ark for his little daughter, Sally, aged 5. Sally and all the children in the neighborhood are just fascinated with it. Although there are plans for the entire project here, Mr. Felver says the most fun comes from using your own imagination in sculpturing the animals.
The ark and six animals are shown on the following pages. The ark itself is not difficult to build, but it does have quite a bit of thought behind it. It is large enough to keep a child's interest for many hours at a time, yet it can be easily moved about. It is ruggedly constructed to take a lot of hard use. The removable top deck and the large hinged door satisfy a child's inquisitive urge to get to the "inside" of things. There are steps leading down from the top deck to the animal stalls and a passageway behind the stalls is provided to show how the animals are fed from inside the boat. The toy is very nice for teaching a child not only the story of Noah's Ark, but about the various animals, and about boats in general, and the many other things he will have questions about.
 |
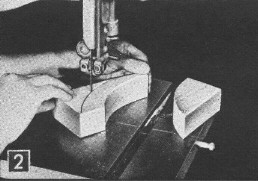
The real challenge, of course, is in carving the animals from just a plain block of wood. All of the animals for this project were sculptured on a BAND SAW. A very interesting technique that we think has excellent possibilities and will become more and more popular. Mr. Felver says it gives you the feel of doing free hand sketching with the added attraction of working in the third dimension. |
The band saw has long been used for curve cutting in a single plane. When you have the curves intersect one another in different planes you get form and shape.
|
By varying either the curve or the angle that it crosses another curve, you will have an altogether different result. The artistry comes in when you visualize the effect you will achieve by using various cuts.
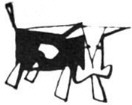 |
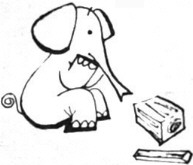
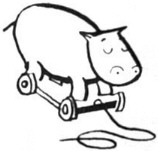
The animals shown here have been "abstracted" - that is, only the important features of each animal are emphasized while the details are eliminated. A child recognizes the animals by their general shape and distinctive things |
such as the elephant's trunk or the camel's hump. There are drawings and photographs showing how each of these animals was made. Use them to get started on sculpturing with power tools. As you become more proficient you will find many uses for your other power machinery in sculpturing.
We were so enthused about this idea of free form sculpturing on a band saw that we devoted quite a bit of this issue to what was originally planned as a Christmas Toy Project. The next issue of Deltagram is the traditional
 |
Christmas issue with ideas and projects that will add to your enjoyment of the holidays. We will carry through with the idea of power tool sculpturing on other toys that will appeal to children. There will be ideas on a Circus |
Wagon and plans for making pull-toys out of the animals shown in this issue. It's not too early to start with this Noah's Ark and we feel sure you will get a lot of enjoyment out of sculpturing on a power tool.
|
* * * * * * * NOTE * * * * * *
I am posting several related articles tied to
' free form sculpturing on a band saw'
and to this Noah's Ark toy.
| Just as a point of interest, this is not, as is quite evident, an exact replica of the Ark described in Genesis. The Biblical dimensions given were 300 cubits long by 30 cubits high and 50 cubits wide. The cubit is claimed to be 18 inches. The toy would not be as practical if the exact proportions were followed, and of course we don't have the many pairs of animals that were taken aboard the ark. We only |
show one each of a camel, a cow, an elephant, a goat, a hippopotamus and a rhinocerous. You may want to make two of each animal for authenticity. The original ark was described as being lined inside and out with pitch, but for a colorful toy we suggest you paint it brightly in reds, yellows and greens. |
 |
 |
2. Two stems are required on this arc. The stem is being finish cut on the band saw using a ¼ inch wide skip tooth blade.
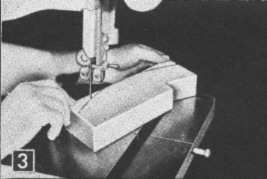
3. The outer curve of the bow sections are made with a 6 inch radius while the inside curves are drawn with a 5-3/8 inch radius. After laying out the curves, the pieces are then cut out on the band Saw. |
 |
 |
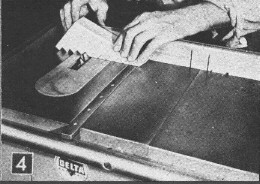
4. Stairs are made of one solid block. They can be cut on the band saw or on the circular saw with a dado head as shown here. The saw arbor is tilted at 45 degrees for this operation.
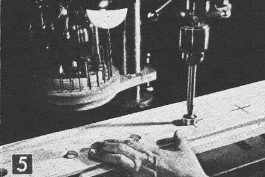
5. Port holes in the cabin sides, as well as the base sides, are made on the drill press using a one inch multi spur bit mounted in a router spindle Cat. No. 974. The drill press should run at the second lowest speed-1250 rpm.. |
 |
 |
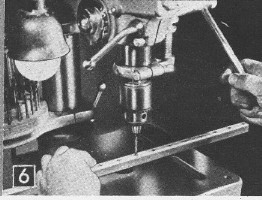
6. The 1/8 inch dowel holes in the stall cleats for the dowel bars are made on the drill press. These holes are spaced about one inch apart and the dowels assembled in place with glue.
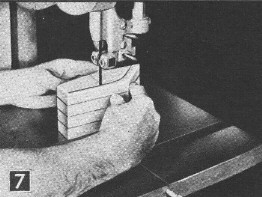
7. Four pieces of stock are required for the cabin ends. The can be cut at one time by tacking them together with brads. A ¼ inch skip tooth blade Cat. No. 28-884 is being used to cut the sections. |
| Bill Of Materials |
| Req No. |
Name |
Size |
| 4 |
Item No. 1 Bow |
1 5/8 x 3 5/8 x 6 7/8 |
| 4 |
Item No. 2 Bow |
1 5/8 x 3 5/8 x 8 1/8 |
| 4 |
Item No. 3 Bow |
1 5/8 x 3 5/8 x 9¼ |
| 4 |
Item No. 4 Bow |
1 5/8 x 3 5/8 x 8 7/8 |
| 4 |
Item No. 5 Bow |
1 5/8 x 3 5/8 x 10¼ |
| 2 |
Item No. 6 Stem |
1 5/8 x 3 5/8 x 10½ |
| 1 |
Item No. 7 Bottom |
¾ x 9 x 42 |
| 4 |
Item No. 8 Bow Support Uprights |
¾ x 1 x 8 5/8 |
| 2 |
Item No. 9 Cross Beams |
¾ x ¾ x 8 |
| 2 |
Item No.10 Stairs |
1 5/8 x 3 5/8 x 8¼ |
| 2 |
Item No.11 Stairs |
5/8 x 1 3/8 x 30 |
| 2 |
Item No.12 Stairs |
5/8 x 1 x 30 |
| 1 |
Item No.13 Deck |
¼8 x 7¾ x 49 |
| 4 |
Item No.14 Deck |
½ x 1½ x 6 7/8 |
| 2 |
Item No.15 Spacers |
1½ x 1¾ x 1½ |
| 1 |
Item No.16 Side |
¼ x 6 1/8 x 30 |
| 1 |
Item No.17 Side Cleat |
1 5/8 x 3 5/8 x 8 7/8 |
| 1 |
Item No.18 Side Door |
¼ x 5 x 29 7/8 |
| 1 |
Item No.19 Side Door Cleat |
¾ x ¾ x 29 7/8 |
| 2 |
Item No.20 Side Door Dowel Pivots |
5/16 Diam.x 1½ |
| 4 |
Item No.21 Cabin End |
¾ x 1 5/8 x 6 5/8 |
| 2 |
Item No.22 Cabin Sides |
¼ x ¾ x 8 |
| 1 |
Item No.23 Cabin Roof |
¼ x 4¼ x 18 |
| 1 |
Item No.24 Cabin Roof |
¼ x 4 x 23½ |
| 7 |
Item No.25 Stall Bar Supports (Bottom) |
¼ x 4¼ x 23½ |
|
| * * * * Click on the drawings above to download a higher resolution picture. * * * * |
*********** WARNING***********
Read my page on safety before building this item.
|
