| TheWoodcrafter.net |
 Copyright © 2004. |
| My Basic Projects |
| The Retro Section |
| Jr. Woodcrafter |
| My Work |
| Detailed Plans |
| About |
| Lathe Work |
| Safety |
| Hints |
| Pic Gallery |
| Links |
| Search |
| Home |
| Birdhouses |
| Guest Book |
| Contact Us |
|
|
||||||||
|

Here is the original article from the
November - December 1958 Deltagram
ROCKWELL MANUFACTURING COMPANY - A DELTACRAFT PULICATION
 |
|
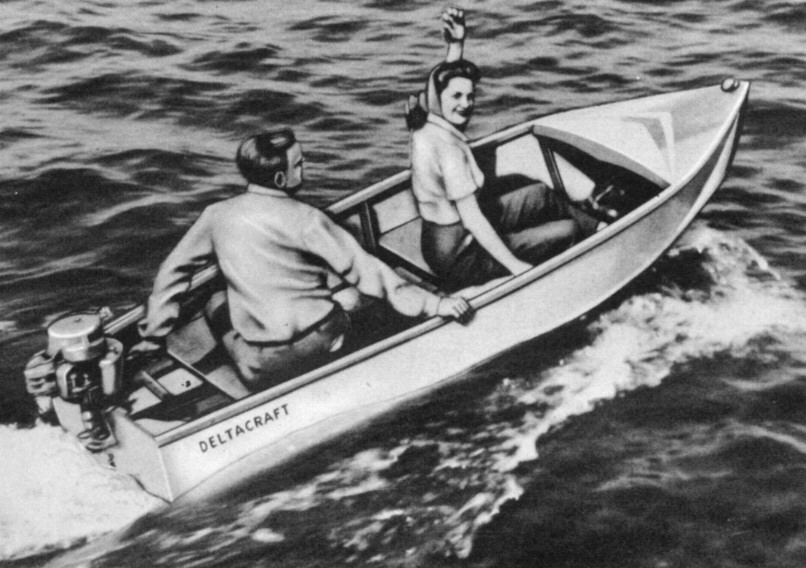
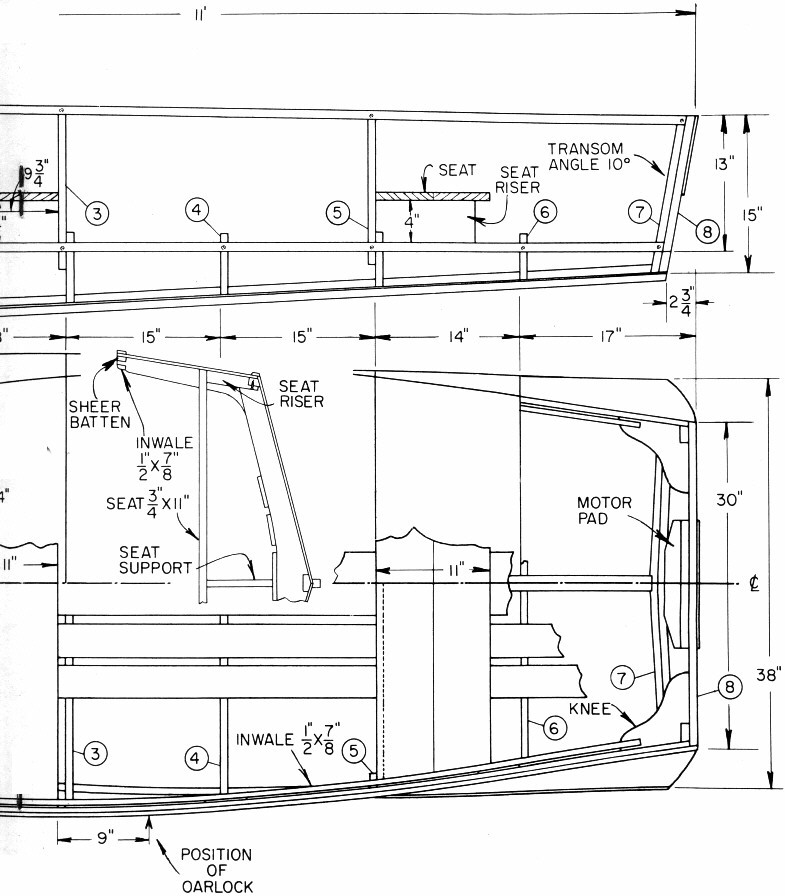
| An Eleven Foot General Purpose Boat For Oars Or Outboard Motor ... Easy And Economical To Build. |
|
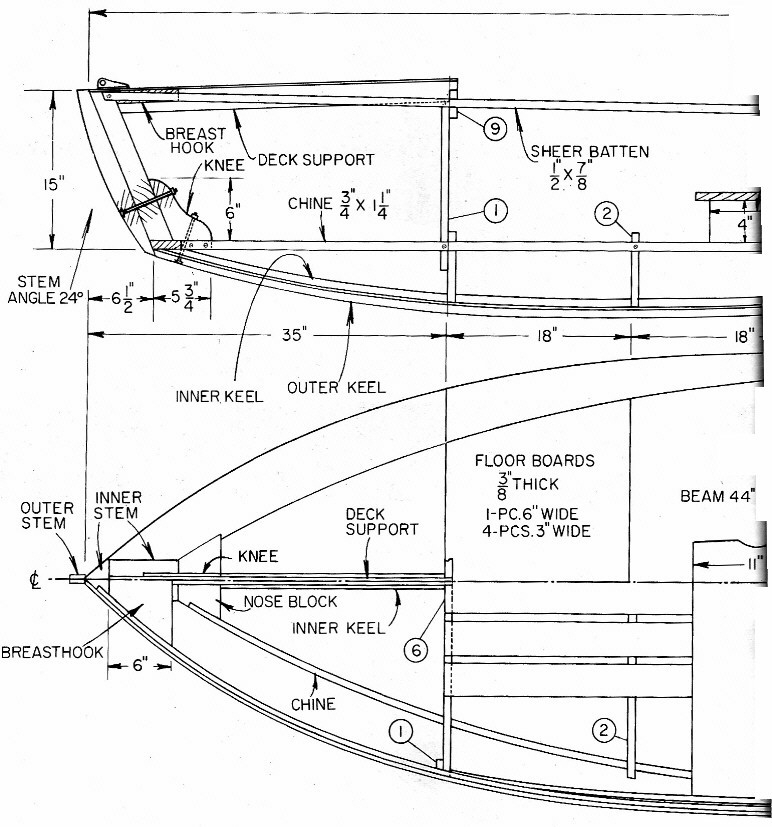
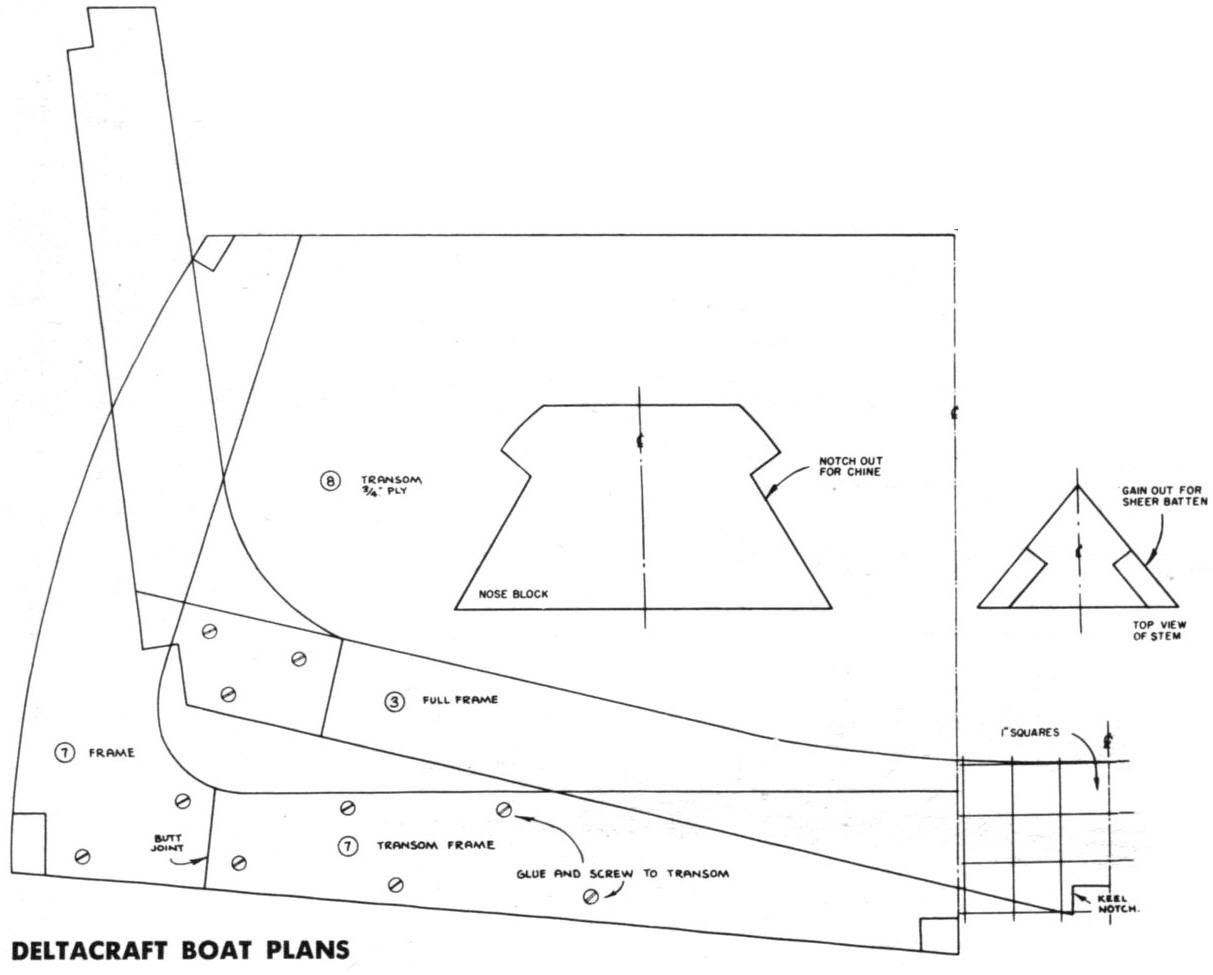
| The "Deltacraft" boat is made from waterproof plywood. The sides and bottom are 3/16" thick. All frames, chines, battens, etc., are white oak. The boat is eleven feet long; the bearn is 44" and the weight when completed is 124 pounds. Study the plans carefully to start with. The rib and transom drawings must be enlarged using the squares method. Simply transfer these parts to your ¾" oak and handsaw to shape (see photo 2). There are three bottom frames, three hull frames and the transom and transom frame. The full frames transom and transom frame are assembled with waterproof glue and brass screws. The transom frame does nor overlap as do the other frames. In assembling the full frames, fasten a temporary strip across the top or open end of the frame. (see photo 4). The inner keel is ¾" x 1½" oak. Layout the frame stations on a wood platform built on saw homes (see photo 4) and fasten the full frames in place by nailing through the temporary cross strips. The transom is slanted 10°. (See" drawing). Start at the transom and screw and glue each frame to the inner keel. Counter sink the screws deep enough so that the keel may be planed to the level of the bottom frames later. Next comes the chines which are ¾" x 1¼" oak. Clamp these in place and mark the various notches to be fitted. Due to the curve of the chincs, the notches of the forward frame have to be cut at an angle to fit. When this has been done, assemble with glue and screws, starting at the transom and working forward. The inner stem and nose block are assembled and notched for |
the chines and sheer battens. The chines are then fastened in place with glue and screws and clamped as shown in photo 3 using scrap pieces for clamping blocks. Bring the keel down, trim, and fasten to under-side of nose block. The sheer battens, ½" x 7/8" oak, are now cut and fitted in their notches. Assemble from transom forward, fastening the forward ends to the stem and clamping with a "V" block. (as shown in photo 5). Photo 6 shows the assembled frame and how the keel and chimes are planed to the correct angle. Use a straight edge as shown and plane both the chine and inner keel to a flat surface, even with the bottom of the frames. The sides of the frames are also checked and any surface which projects beyond the clime and sheer batten is planed down smooth. You should now have smooth flowing lines from stern to transom for planning. Hold the 3/16" plywood against the sides and mark with pencil the pattern required. Bandsaw to shape, leaving a little excess around the edges for final trim after assembly. In planking the sides, start at one of the center sections and work towards both ends. Apply glue and clamp a section at a time for fastening in place with screws. Drill lead holes for all screws and counter-sink the heads flush with the surface. Trim off plywood ends (see photo 7) and plane edges flush with bottom surface (photo 8). |
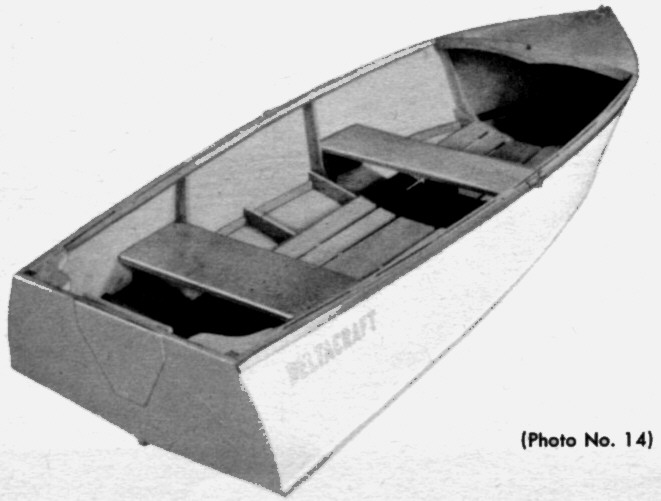 Photo #14 |
|
| Plank the bottom in two pieces with a butt joint in the center of the keel (photo 9). Fit the center joint over the keel carefully. Plane off edges with side planks as shown in photo 10. The outer keel is cut from ¾" oak 7/8" wide. Make a "V" cut in one side to fit the sharpest angle of the bottom plank. This would be between frames 1 and 2. Apply calking compound to the keel seam, and fasten the outer keel down over it. The front edge of the inner stem and side planks has been planed flat and the outer stem is now fastened over this joint with glue and screws. Two 5" carriage bolts are fastened through the inner and outer stem, knee and keels. (see drawing and photo 11). Trim strips are now fastened to the outside seam over the chines. The strips arc ¼" oak 7/8" wide. After assembly, the bottom edge is planed flush with the bottom planks. The boat is now removed from the platform, turned right side up, and the temporary cross strips removed. Cut and assemble the breasthook, deck beam and support, and plane the upper edges of the side planks and sheer battens. (photo 12). Cut the knees and fit them into the corners against the transom (photo 13). |
Notch the frames and knees and assemble the inwales and spacer blocks. The inwales are ½" x 7/8" oak and are spaced 3/8" from the sheer battens The outer trim strips are fastened to the upper edges and then the deck is cut and fitted flush with the outer edge. The four planks are 3/8" oak screwed in place as shown in the drawings. The seat risers are shown in the side view of the drawing and also the section. The rest seat must be assembled in two pieces inside the sides because of the overhanging inwales. The motor pads consist of a ¾" plywood pad on the oinside of the transom and a 3/16" plywood pad on the outside. The seats, supports and the floor boards are finished separately and assembled after the inside of the hull is finished. Thc screwheads are covered over with putty which is mixed its follows: One pan powdered white lead One part (bulk) whiting. .....Mix to thick paste with ---- ...........One part spar varnish ...........One part Japan drier ...........One part Linseed oil. |
 Photo #2 |
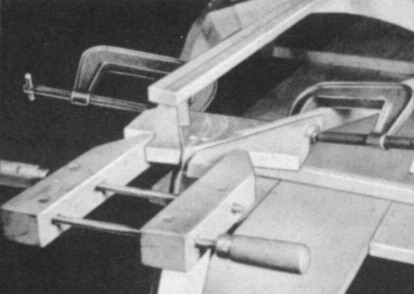 Photo #3 |
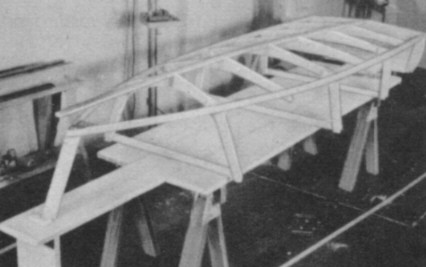 Photo #4 |
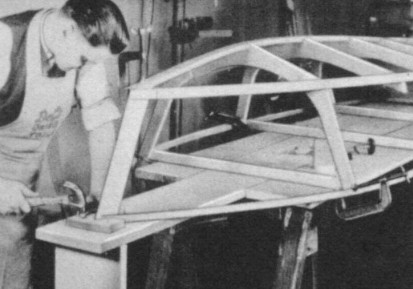 Photo #5 |
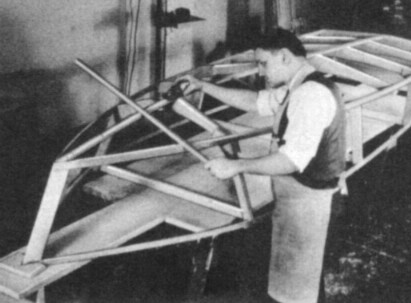 Photo #6 |
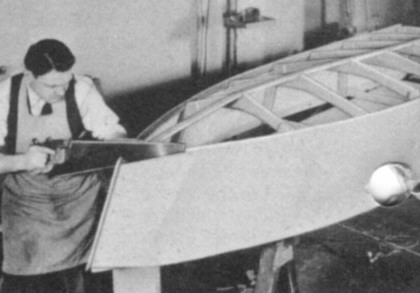 Photo #7 |
 Drawing 2 |
 Drawing 3 |
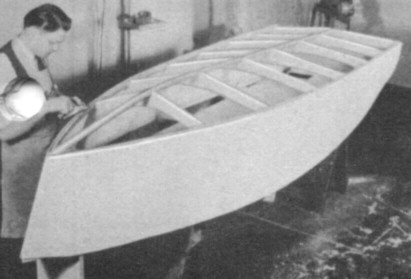 Photo #8 |
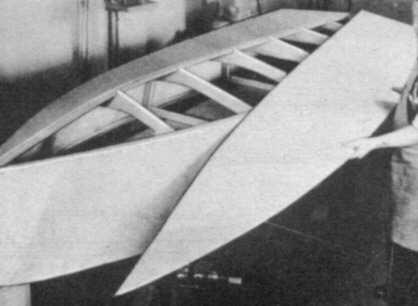 Photo #9 |
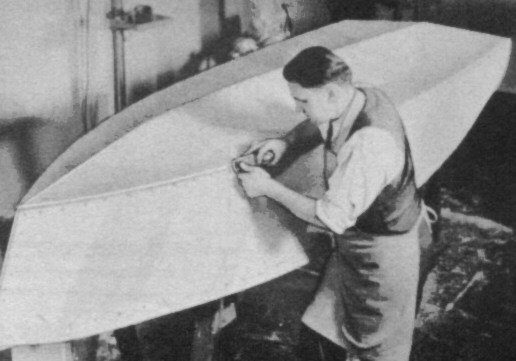 Photo #10 |
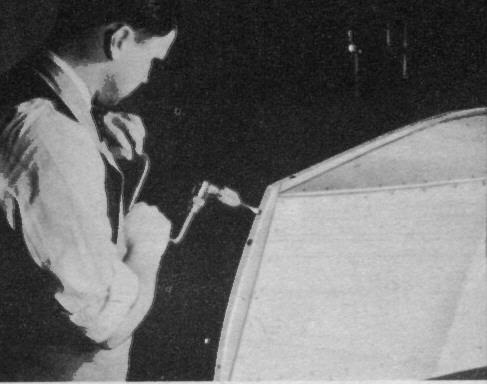 Photo #11 |
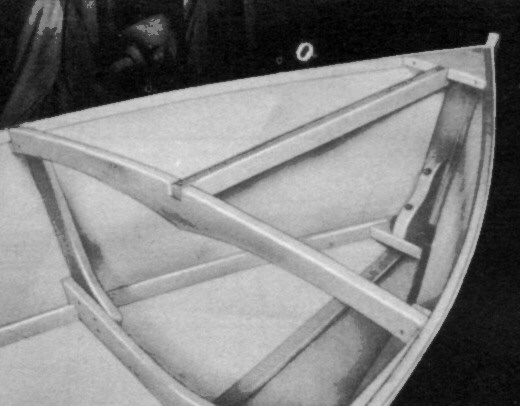 Photo #12 |
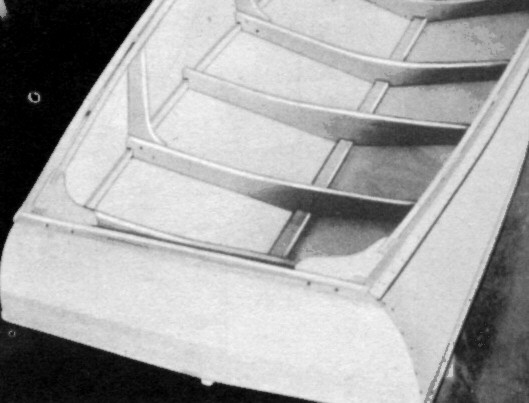 Photo #13 |
| The entire boat is sealed with shellac or plywood sealer. The bottom and trim is green marine enamel and the sides are white marine enamel. The inside of the boat and the deck is finished natural with several coats of spar varnish. The brass nose hook for tying up, and for the anchor rope was bolted through the breast hook, and the oar locks are screwed in place as shown in drawing. The boat now finished, photo 14, comfortably seats three people. When powered with an outboard motor of from 2 to 10 horsepower, the speed will be from 8 to 25 miles per hour. |
White Oak Lumber
Birch Water-Proof Plywood
Hardware & Paint
|
 Template #1 |
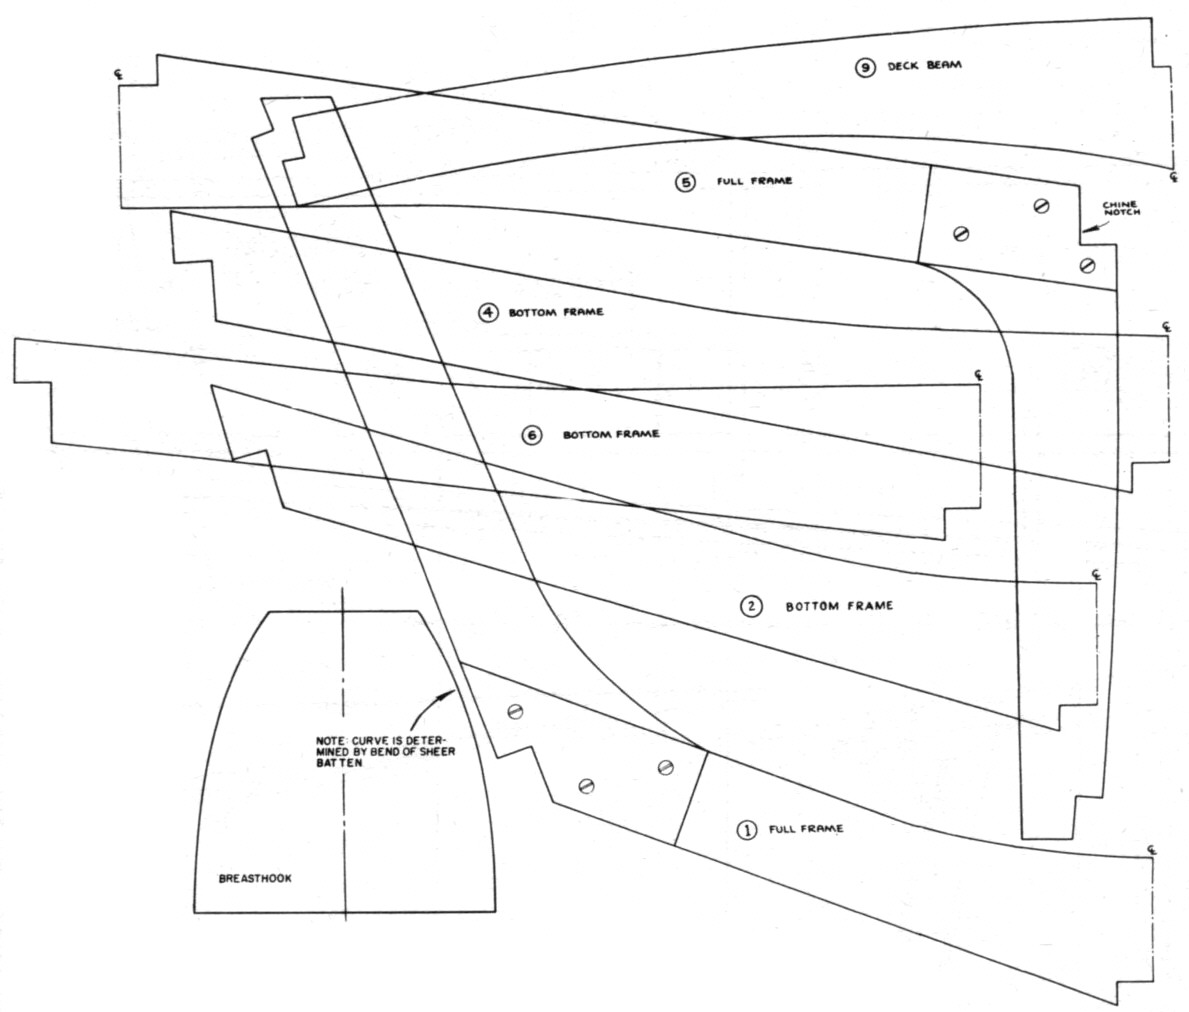 Template #2 |
* * * * Click on the drawings above to download a higher resolution picture. * * * * |
*********** WARNING***********
Read my page on safety before building this item.