|

Picture #1
| 1 |
Legs of the chair are turned on the lathe. Highest speed available, 3450 RPM is best for this job. |
| 2 |
Chair leg rungs, tapered back spindles, as well as the tenons of the straight back spindles are quickly turned down and finish sanded in the lathe. |
| 3 |
To bore holes in the chair legs for the rungs at the same angle in all four legs, a tilt jig is fastened to the drill press table with a C-clamp. A 5/8-inch Delta to No. 810 machine spur-bit was used. |
| 4 |
A strong and professional looking glue joint can be made easily on the circular saw using the Delta No. 34-131 cutters mounted in the No. 265 cullerhead. |

Photo #1
Commercially, the curved back of the chair would be made of one piece of stock steam-bent to shape.
However, knowing that you probably don't have that kind of equipment we have devised the following method that works very well. Start with three sections using 1½-inch thick stock and fasten the pieces together with a tongue-and-groove joint as shown in Figs. No. 4 and 9, also see Photo No. 8. The pieces are glued together using hand screws and a bar clamp. Note the notches cut in the pieces to hold the hand screws in place, see Photo No. 9. When the glue has set, cut the curved back on the band saw, Photo No. 11 and sand smooth on the drill press using a fine grip paper on the Delta No. 830 sanding drum, Photo No. 11. Holes for the back spindles are bored on the drill press at an angle by tilting the drill press table 12°, Photo No. 10. By fastening a curved piece of stock to the shaper fence, Photo No. 13, the front edge of the curved back can be rounded off using cutter No. D-253.
The chair can be painted or stained to suit your taste or finished natural by applying two thin coats of white shellac followed by a coat of rubbed effect varnish.

Photo #3
|
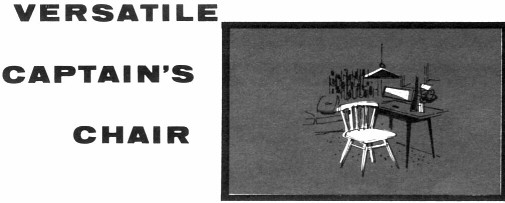
The Captain's Chair is a long-time favorite that is enjoying renewed popularity. Extraordinarily versatile, it will add to your decor whether you favor traditional or modern. Good taste is shown in the simplicity of design and in the contrast it will make in living room, bedroom, den, or even the kitchen. A satin-black finish is being featured by many interior decorators; however, it will lend itself readily to any finish you prefer.
Begin by cutting the chair leg stock from 1¼-inch square birch or maple. Note, the front legs are 1 inch longer than the rear legs, see dimensions in Fig. No. 5. To drill the holes at the proper angle for the chair rungs, use a tilt jig, Fig. No. 7 and Photo No. 3, 5/8 machine spur bit.
Chair seat is glued up of several pieces of 1-inch stock using glue joints made with the glue joint cutters, Photo No. 4. Cut the outline of the seat on the band saw, Photo No. 6. The outline can be made on paper using the squares method shown in Fig. No. 8. Mount a 6-inch face plate, on the seat board and turn the hollowed seat portion using the outboard side of the, lathe, Photo No. 5. Holes for legs are bored at a compound angle by tilting the drill press table (for the front legs) at 20° and placing the seat on the table as shown in Fig. No. 10. For the rear legs, tilt the drill press table at 25°. Holes in the top of the seat for the rear spindles are also bored at an angle, see Fig. No. 1. If your drill press table does not tilt, we suggest you use the auxiliary tilting table featured in the MayJune, 1957 Deltagram.


Figure 10

Photo #2

Photo #4
|
| Bill of Materials |
Req. No. |
Name |
Size |
|
Req. No. |
Name |
Size |
| |
2 |
Front Legs |
1¼ x 1¼ x 17½ |
|
3 |
Back Rest |
1½ x 1-15/16 x 9 |
| |
2 |
Rear Legs |
1¼ x 1¼ x 16½ |
|
2 |
Back Tapered Spindles |
¾ x ¾ x 11½ |
| |
4 |
Leg Rungs |
1 x 1 x 10½ |
|
4 |
Back Straigh Spindles |
9/16 x 9/16 x 11-1/8 |
| |
1 |
Seat |
1 x 17 x 17½ |
|
|
|
|

Figures 1, 4, & 8

Photo #5 |

Photo #6 |

Photo #7 |
| 5 |
To hollow out the seat portion of the chair, mount the stock on a No. 937 6-inch face plate and turn it on the outboard end of the lothe. The No. 697 floor stand is being used with a 12-inch tool support. |
|
| 7 |
Compound angle holes are being bored on the drill press with a 7/8-inch multi-spur bit. The table is tilted 20° for the front legs-25° for the rear legs. Note position of seat stock while drilling. |
|
| 9 |
After joints of curved back section pieces are carefully fitted, they are glued together with hand screws and a bar clamp. Note notches in stock to prevent hand screws from slipping. |
|
| 6 |
A skip tooth blade, Delta No. 28-884, is best for fast smooth cutting of the chair seat on the 14-inch band saw. |
|
| 8 |
The tongue and grooves of the section piece of the curved back are made on the circular saw. The angle cuts on the two outside pieces are made by tilting the saw arbor at 35°. One outside cutter of the No. 34-333 dado head makes the 1/8-inch groove. |
|

Figure 2 |

Figure 3 |

Figure 5 |

Figure 6 |

Figure 7 |

Photo #8 |

Photo #9 |

Photo #10 |

Photo #11 |

Photo #12 |

Photo #13 |
|