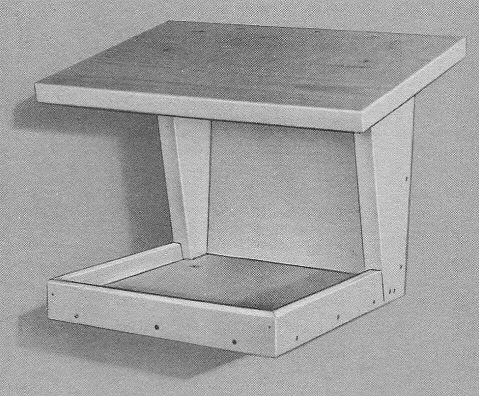
The entire robin shelter is made of ½" lumber except for the three ¼" edging strips. For a long lasting shelter box, make it out of redwood or cypress material.
Sides are taper cut with the miter gage at 73°, Photo No. 2. The top tapers on the sides and back are cut on the circular saw with the miter gage set at 76°. Assemble the tapered side piece to the back and base as indicated in the drawing (Figs. 1 and 1-A) with waterproof glue and 17 gage by l¼" common wire nails. Notch the base to fit the sides and back piece as shown in Fig. 1-A. Drill four ¼" drain holes at the front of the base board about 3/16" from the edge.
The ¼" edging strips have mitered joints at the front, the side pieces are taper cut to fit against the tapered sides. These pieces are glued and nailed in place with 19 gage by ¾" common nails.
Bore a ¼"' hole in the back piece for fastening the shelter to a tree trunk or porch enclosure with a round head brass wood screw.
Break sharp corners with a hand plane, sanding is not necessary. If redwood or cypress is used finish with two coats of wood preservative.
|
Bill of Materials
| No. of Pieces |
Name |
Size |
| 1 |
Base |
½ x 5¾ x 6½" |
| 1 |
Back |
½ x 5¼ x 7" |
| 2 |
Sides |
½x 3-1/8 x 7" |
| 2 |
Side Edging Strips |
¼ x 1 x 6-1/8" |
| 1 |
SeFront Edging Strip |
¼ x 1 x 6¼" |
| 1 |
Top |
½ x 7-3/8 x 9" |
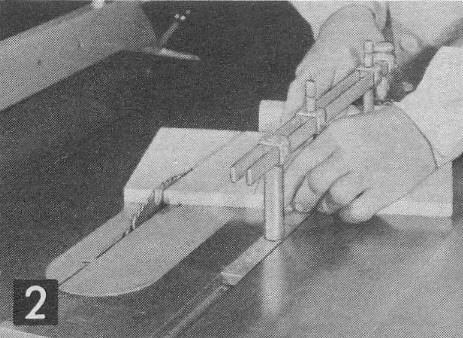
Photo #2
The long tapers on the side pieces are cut on the circular saw with the miter
gage set at 73°. One pass cuts the tapers on both taper pieces.
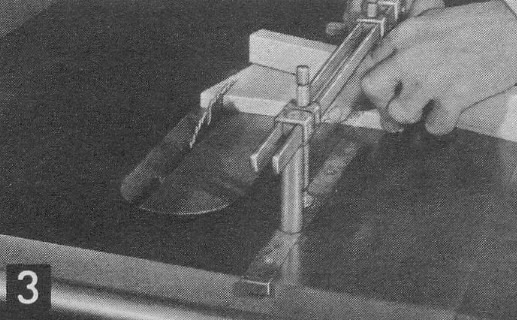
Photo #3
Short top tapers on the -side pieces are also cut on the circular saw with the
miter gage set at 76°.
|
