Submitted by
REV. CHARLES D. BROADBENT
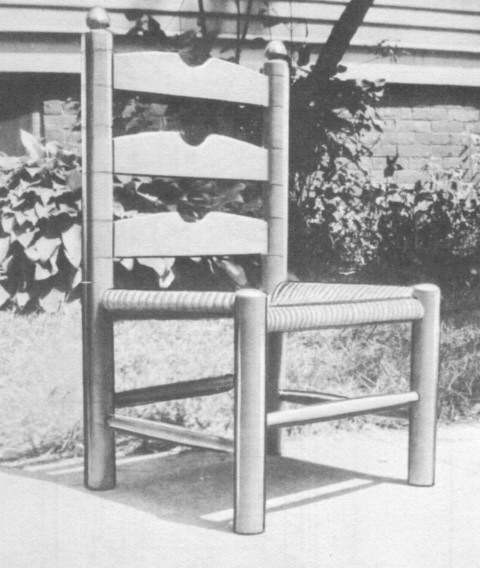
Here is a very simple and sturdy child's chair that any homecrafter can build even if he has only a little turning experience.
We recommend building the chair from maple, oak or birch since any of these hard woods will take a lot of abuse.
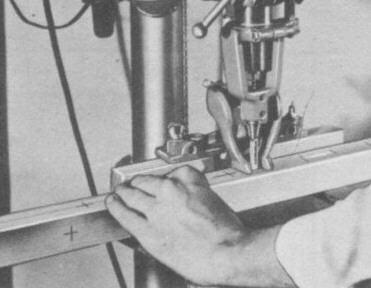
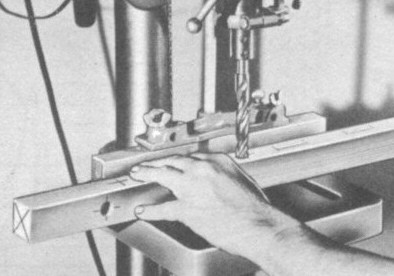
First, cut the leg stock to 1-5/8 inches square and about ½ inch longer than the finished length. While the stock is still square, make the mortises in the rear legs to receive the back slats, see drawing and photo #2. After mortising, bore the 5/8 inch holes for seat and lower stretchers. Hole distances are given in the front and side view of drawing on next page. After all the holes have been bored, turn the front legs to 1½ inch diameter slightly curving the tops. The rear legs are also turned I 1½ diameter with the top finial turned as in Fig. 1 of drawing.
After careful sanding of the chair, it should be stained with a maple colored oil stain and allowed to dry for at least 12 hours before applying three wash coats of orange shellac. Sand between coats with 4-0 garnet paper. The final finish is a coat of rubbed-effect varnish.
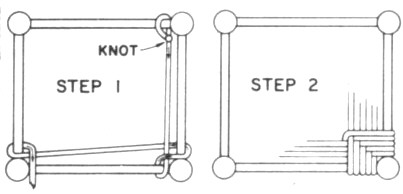
The line drawing #1 illustrates flow to begin weaving the chair seat. Because of limited space, we are unable to discuss the entire process in detail and, therefore, would suggest that you read some books on the subject of chair seating at your local library. We show only the first step and the pattern of the weave. In this case, the strands on one side of the seat are parallel with those on the other side. Several coats of shellac should be applied to the Rush fibre seat before it is thoroughly dried.
|
Bill of Materials
| No. of Pieces |
Name |
Size |
| 2 |
Rear Legs |
1-5/8 x 1-5/8 x 23½" |
| 2 |
Front Legs |
1-5/8 x 1-5/8 x 10" |
| 3 |
Back Slats |
¼ x 2½ x 12" |
| 2 |
Seat Stretchers
(Front & Back) |
5/8dia x 12" |
| 2 |
Seat Stretchers (Side) |
5/8dia x 10¾" |
| 2 |
Lower Stretchers
(Front & Back) |
¾ x ¾ x 12" |
| 2 |
Lower Stretchers (Side) |
¾ x ¾ x 10¾" |
| Fibre Rush (Depending on Pattern Weave) as required. |

Photo #2
The above photo shows the holes being mortised in the rear legs while the stock is still in the square. A quarter inch mortise chisel is used in this case.

Photo #3
Holes for the chair seat and stretchers are also bored on the drill press with a 5/8 inch machine spur bit while stock is still in the square.
 Drawing #1 Drawing #1
The above drawing shows the first step and pattern of weave in making the chair seat from Rush fibre.
|
