|
|
|
The Woodcrafter Page© 2004 - all rights reserved.
|
|
|
|
Small Bug House
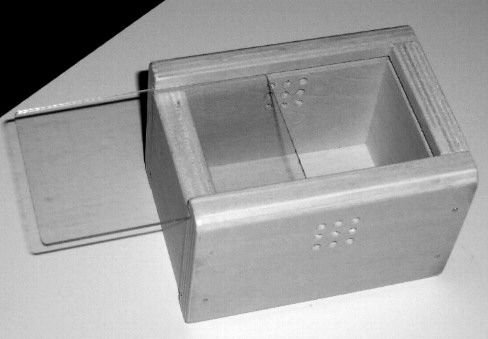
The actual finished item. |
Here's a cool little bug house project. I suggest you cut out, shape, and drill the pieces to this project then let your Junior Woodcrafter assemble it for aother fun project.
This simple project can be left unfinished or you can stain or paint it. The Jr, Woodcrafter actually made this item at the May Lowe's children's workshop and left his unfinished. |
Start by downloading the scale drawings in the Acrobat file by clicking on the link below. Cut all the pieces as indicated in the drawings, cut out/route the notches for the bottom and lid, drill the holes in the sides for air vents, and predrill all the nail holes with a very small bit.
The sides are ½" plwood, the bottom is 1/8" plywood, and the lid is 1/8" Plexiglass. |
| The Jr Woodcrafter will need the six (6) project pieces, the directions, ten (10) 1½ " finishing nails, one sheet of 150 grit sandpaper, a really cool workshop apron small enough for kids, and safety goggles. |
| Construction. |
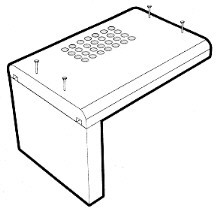
1. Start two nails into each end of one side. The rounded edge is the top of the box.
2. Attach the side to the tall end piece. |
 |
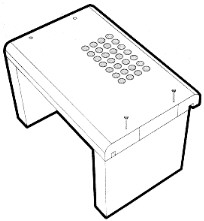
3. Locate the short end piece.
2. Position the short end piece with the notch closest to the edge and in line with the notch in the side piece
4. Attach the side to the short end piece using the two nails previously started. |
 |
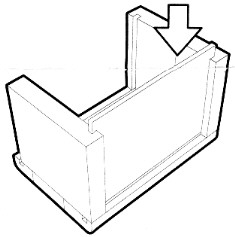
5. Locate the thin bottom wood panel.
7. Slide the panel into the bottom groove.
8. Align the bottom corners flush and nail the end on. |
 |
9. Locate the remaining side piece.
10. Start two nails into each end of the remaining side piece.
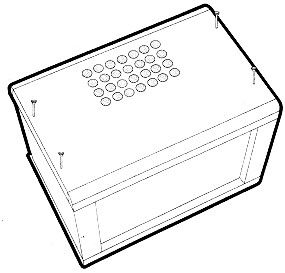
11. Attach the side to the end pieces. |
 |
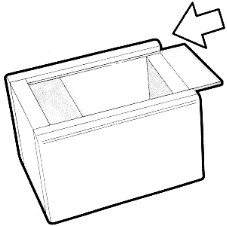
| 12. Peel the protective covering off the plexiglass top and slide it into the top groove for the door. |
 |
| * * * * Click here the picture above to download the drawings as an Adobe Acrobat (pdf) file. * * * * |
*********** WARNING***********
|
