| TheWoodcrafter.net |
 Copyright © 2004. |
| My Basic Projects |
| The Retro Section |
| Jr. Woodcrafter |
| My Work |
| Detailed Plans |
| About |
| Lathe Work |
| Safety |
| Hints |
| Pic Gallery |
| Links |
| Search |
| Home |
| Birdhouses |
| Guest Book |
| Contact Us |
|
|
||||||||
|
 |
Hobby Horse.
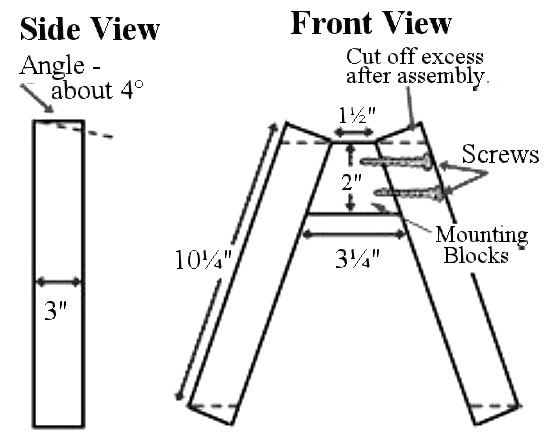
Download the drawings to generate full-size paper or posterboard templates of the project components. When scaling up the drawings, try not to be overly concerned about making the templates exactly like the drawings. They are provided as a reference to help you get started. They show the proportions of the project elements and illustrate how they are assembled, but they are not set in stone. If you make changes to the design, however, do not increase the curve on the bottom of the rockers but do make the curve slightly flatter in the center of the rockers so the horse will want to sit up straight. You may wish to change the animal by cutting a different head such as a cow, a dragon, or even a Hippogriff?. |
|
||||||||||||||||||||||||||||||||||||
 A Hint Regarding Screws There are many areas where you don't want the screws to show so try the following: Drill a pilot hole for each screw then, before installing the screws, drill a 3/8" countersink hole. The hole should be ¼" deep. After the screw is in place and secure, glue a short piece of 3/8" dowel into the hole - over top of the screw head. The dowel can then be sanded flush with the surrounding surfaces for an attractive joint that looks as if it has simply been pegged. You may even wish to use pre-made 3/8" decorative plugs which protrude a little from the hole and do not require trimming or sanding. 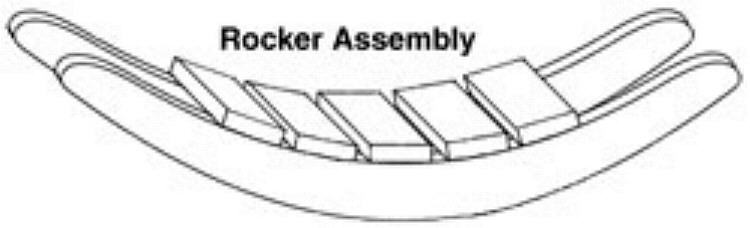 |
As you build the rocking horse, keep in mind the safety of any child who may ride it. Even if you intend to simply add horse to your home's decor, a visiting child may find it irresistible. Keep the following safety points in mind:
|
||||||||||||||||||||||||||||||||||||
*********** WARNING***********
Read my page on safety before building this item.
| Click on the picture (at the top) to download the project details in an Adobe Acrobat file (780Kb). |