| TheWoodcrafter.net |
 Copyright © 2004. |
| My Basic Projects |
| The Retro Section |
| Jr. Woodcrafter |
| My Work |
| Detailed Plans |
| About |
| Lathe Work |
| Safety |
| Hints |
| Pic Gallery |
| Links |
| Search |
| Home |
| Birdhouses |
| Guest Book |
| Contact Us |
|
|
||||||||
|
USA Space Shuttle
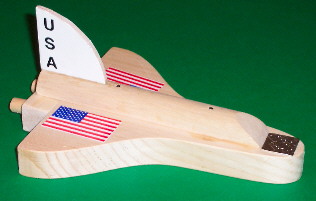 The actual finished item. |
This is a basically simple project except for making the groove for the tail section. Also, drilling the holes accurately is a little difficult without a drill press. Only adult woodcrafters should use a drill or drill press to make the holes. The base parts are cut from a ¾" (or at least ½") pine planking scrap. |
| Print out the diagram, cut out the base, and tape it to the planking. Leave the diagram in place as a guide for cutting the base to the specified size and shape. Now, cut two 1" lengths of the 3/8" diameter dowel and one¾" x¾" x 2" piece for the rocket extension. Next, cut a 5½" long piece of the 7/8" diameter dowel and cut a little less than half the diameter lengthwise. Use a router, or table saw, to cut a 2" long, 1/8" wide, 1/8 deep groove in the top of one end (the back) of the top. Finish this piece with a 45o bevel on the front. Finally, cut out the tail (from the printed drawing) and tape it to the planking. You can use 1/8" material here if you have some. Leave the diagram in place as a guide for cutting the tail to the specified size and shape. If you used a thick material, resaw it to a 1/8" thickness. |
 |
| Print out the decals and find two 1" brads to nail the top on and two 1½" finishing nails to nail the rocket extension on. Now all your Junior Woodcrafter needs is the six pieces, some wood glue, the four nails (dulled), the four decals, a hammer, one sheet of 150 grit sandpaper, a really cool workshop apron small enough for kids, and safety goggles.You can simply use white glue, or gluesticks, to attach the decals. |
|
| * * * * Click on the picture above to download a higher resolution picture. * * * * |
*********** WARNING***********
Read my page on safety before building this item.