TheWoodcrafter.net
The Woodcrafter Page
Copyright © 2004.
My Basic Projects
The Retro Section
Jr. Woodcrafter
My Work (Pics)
Detailed Plans
About
Lathe Work
Safety
Hints
Pic Gallery
Links
Search
Home
Birdhouses
Guest Book
Contact Us

The Woodcrafter Page© 2004 - all rights reserved.
 
Ad space available here.


Using a Wood Lathe


Lesson 4 - Tool Process in Spindle Turning
Exercise A-I-l-a. Straight Cuts

1. THE ROUGHING CUT (LARGE GOUGE).
Place the gouge on the rest so that the bevel is above the wood and the cutting edge is tangent to the circle or surface of the cylinder. The handle should be held well down.
Roll the gouge over slightly to the right so that it will make a shearing cut instead of a scraping cut. This rolling of the tool will also throw the chips from the operator.
Then lift the handle slowly, forcing the cutting edge deep enough into the wood to remove all or nearly all of the corners, at the end of the work which is being turned. This cut is begun about 3/4" from the dead center end. Work back another 3/4", moving toward the live center and make a second cut, and so on until the entire length of the cylinder is gone over. This method of removing corners should always be followed to- avoid any possibility of breaking a large sliver from the stock, with consequent danger to the worker.
The tool may then be worked from one end to the other, getting a fairly-smooth, regular surface, slightly above the diameter required. However, do not begin on the very edge of the cylinder end. It is better to begin about 2" from one end and work to the other, and then reverse and work back.
The tool should also be held at a slight angle to the axis of the cylinder, with the cutting point always in advance of the handle.


FIG.4.

2. THE SIZING CUT (SMALL GOUGE).
Set the calipers to the required diameter of the cylinder.
With a small gouge held in the right hand scrape groves about 1" apart, holding the calipers in the left hand perpendicular to the cylinder and measuring the cuts as they are made. The scraping should continue unitil the calipers will pass easily over the cylinder. It will be well while scraping to work the handle of the gouge a little from side to side so that the nose has more clearance. This will prevent the piece which is being turned from chattering or vibrating.
The calipers will be slightly sprung by coming in contact with the revolving stock but this error in diameter will be removed by the finishing cut which removes these marks from the finished cylinder.


FIG. 5.

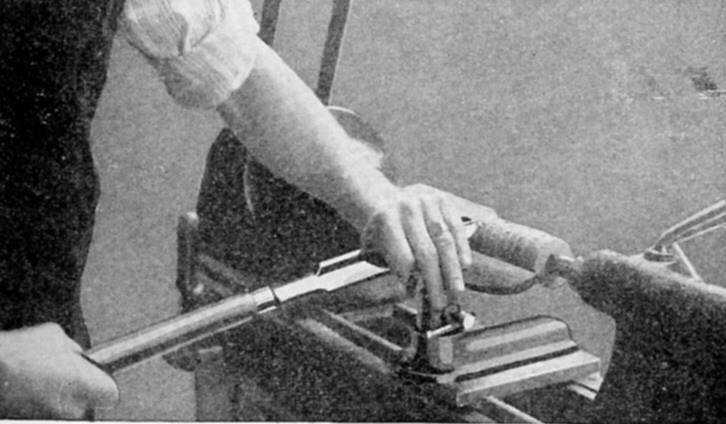
3. THE SMOOTHING CUT (LARGE SKEW).
FIG. 6. Lay the skew chisel on the rest with the cutting edge above the cylinder and at an angle of about 60 to the surface.
Slowly draw the chisel back and at the same time raise the handle until the chisel begins to cut about 3/4" to 3/8' from the heel. The first cut is begun from 1"' to 2" from either end and is pushed toward the near end. Then begin at the first starting point and cut toward the other end. One should never start at the end to make a cut as there is danger that the chisel will catch and cause the wood to split or that the chisel will be torn from the hands.
The first cut takes off the bumps and rings left by the gouge, and takes the stock down so one can just see where teh scraping to size was done. Then take the last cut and remove all traces of these, leavinf the cylinder perfectly smooth and of the required diameter at each end. Test the cylinder for accuracy with a straight edge.

 
FIG. 6.


Lesson 4 : Tool Process in Spindle Turning: 4-6.