Basic RV & Camping Skills
If you are new to RVing (even more so if you are new to camping in general), there are a lot of skills and knowledge that will make you experiences, especially your early ones, much better. I hope to impart a lot of that knowledge in this section.
First, at the risk of sounding like my parents, or an old teacher, ‘READ YOUR MANUAL‘. Really. Even if you have been camping for years. Technology in RVs changes with new models. I see soooooo many people asking questions, on various RV group pages, about something not working (at least not how they thought it works) when it is obvious they have no idea how the item truly does work. The manual may be a tedious read but contains a ton of info.
Subjects:
Listed in the order they appear (below).
Driving your RV
Backing Up
Leveling your RV
The Dreaded BLACK TANK
Campground courtesies
Wild Animals
Boondocking
Pop-up Trailers
Driving your RV
The primary factor here is the huge size of your new vehicle. Whether its a motor home, trailer or fifth wheel – your combined vehicle is now much longer, much taller, and much heavier.
Driving a motor home is similar to driving any big vehicle while towing a fifth wheel or trailer is quite different.
Height Restrictions.
One critical piece of knowledge that you must be aware of, and keep keenly in mind, is height clearance (and don’t forget about the AC unit and items on top). Know the full height of your vehicle and plan for it. There are phone apps available that will provide you with info on bridge clearances and such but none are perfect so this is a new driving skill you must master to the point you automatically watch out for clearance signs and unmarked obstacles. Keep your eyes open or you may end up with a huge repair bill, or even worse.
Cross Winds
The next is dealing with highway cross winds. Your vehicle’s side area is almost certainly now at least twice as big if not 3-4 times so. That’s like putting up the main sail on a sailing boat to catch the wind. Understand that you need to pull over at a rest stop, or other safe place, when the winds whip across the highway enough to make you end up driving white knuckled. Just pull over!
The effects of cross winds are typically less with fifth wheel units due to the way they connect to the pick-up. Trailers (towed) are another issue. Factors that influence how much it affects your driving are the size of the trailer and the weights of it and your TV (tow vehicle).
The longer the trailer, the greater force it will exercise against your TV. The weight of the trailer compared to the weight of your TV is very important. Think of it like holding the hand of your kids. When they are young and much smaller than you are, you have very good control over keeping them in line but when they get older and as big (or even bigger) than you, they have more control over pulling you out of line.
The greatest aide in controlling this is a good anti-sway system on the trailer hitch. It also does wonders to minimize the ‘push’ you get when semi’s blow past you.
City Streets
This is a subject of great concern if you ever find yourself on a detour that sends you through tight city streets.
If the right turn is very tight, you could end up with your RV going up on the curb or even hitting a sign or signal post on the corner if you do not know what to do.
The only way you can prepare for this is to practice. Once you have your RV and have mastered driving it on the highway and backing up into tight spots then you can tackle the tight corners of the city.
I suggest that you first find a large – empty parking lot to start with. You can pick up a some traffic cones at a hardware store (or any easy to see items) to simulate a sharp turn. Place them near a curb to represent the space you would have in turning across two small lanes.
You need to learn to use, and trust, your side mirrors for turns. This is paramount. They will let you see where your rig is tracking.
The biggest challenge is making a right-hand turn but even left turns can surprise you. Depending on your rig, you may find that it tracks (drifts) into oncoming traffic as you turn left. It depends on when you actually start turning your towing vehicle.
For right turns, you want to wait for cross traffic to clear so that you can swing wide over into the lane of oncoming traffic. You will not be able to make the turn and stay in your own lane. Simply swinging out and to the left before turning is not enough.
Stop a little back from the corner. When traffic clears, start swing out to the left then turn into the far lane and come back into your lane.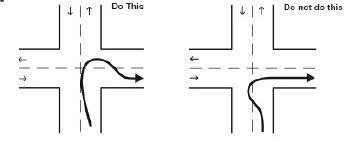
Now, find a few residential streets with sharp corners but wider roads for practicing. Just be very careful to not hit any parked cars.
Once you feel good with these, find a small old town to practice in that is rather inactive in case you get stuck and have to back out of a dire situation
Don’t put this off. You never know when you might be forced off the highway due to an accident and end up in streets you would most certainly avoid normally.
The Unexpected
Sometimes even the best GPS or phone travel apps fall short. It is a VERY good idea to call the campground you are about to head to before leaving to ask about any special instructions on getting to the place.
One guy followed his gps only to be routed to road construction and almost had to turn back. He literally had only a few inches clearance through this mess.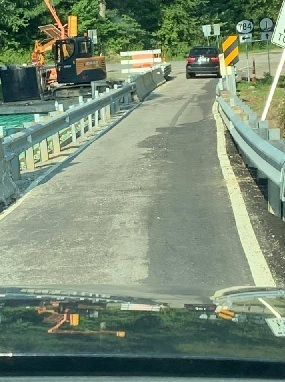
When they got to the campground, the owner said they should have taken the next exit from the interstate. I have also heard people rating campgrounds say that entering the place from one direction is difficult while it’s easy from the other direction.
Backing Up
If you have no experience with backing up a trailer of any kind then this will be a new, and quite likely frustrating, experience. Even if you have had a boat or utility trailer to deal with, this will be a new experience.
The first thing to understand is that it all works backwards. To make the trailer go to the right – you have turn the steering wheel to the left! I have been backing up trailers nearly my whole driving life so this comes pretty naturally to me. However, a piece of guidance I have heard is to place your hand on the bottom of the steering wheel. Push right to go right now because that means you are turning the wheel to the left (but you don’t have to be concerned with all that). My only problem with that is that you sometimes need to turn the wheel very far and might get confused.
Experiment backing your rig up in a large, roomy parking lot and use whatever makes you comfortable.
Eventually, you will get very good at it. I have only about 10″ of combined clearance (split side-to-side) and have to make an “S” curve move and I can now do it in one fairly quick and easy move.
Leveling Your RV
There are 2 factors to leveling your RV. 1 : side-to-side level. 2 : Front-to-back level.
Front-to-back level is from the tongue of the RV to the back bumper.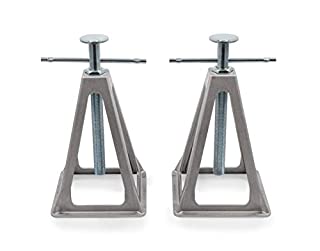
Pretty well all RVs come with stabilizers. Most are a scissor-jack style but electric and hydraulic version are also available. These can be as sophisticated as a system that also automatically senses and levels your RV but these are expensive/intricate/heavy systems and primarily used on those very large class A motorhomes. The scissor-jack is typically permanently attached to the bottom of the RV frame but some smaller/older units use standalone jacks.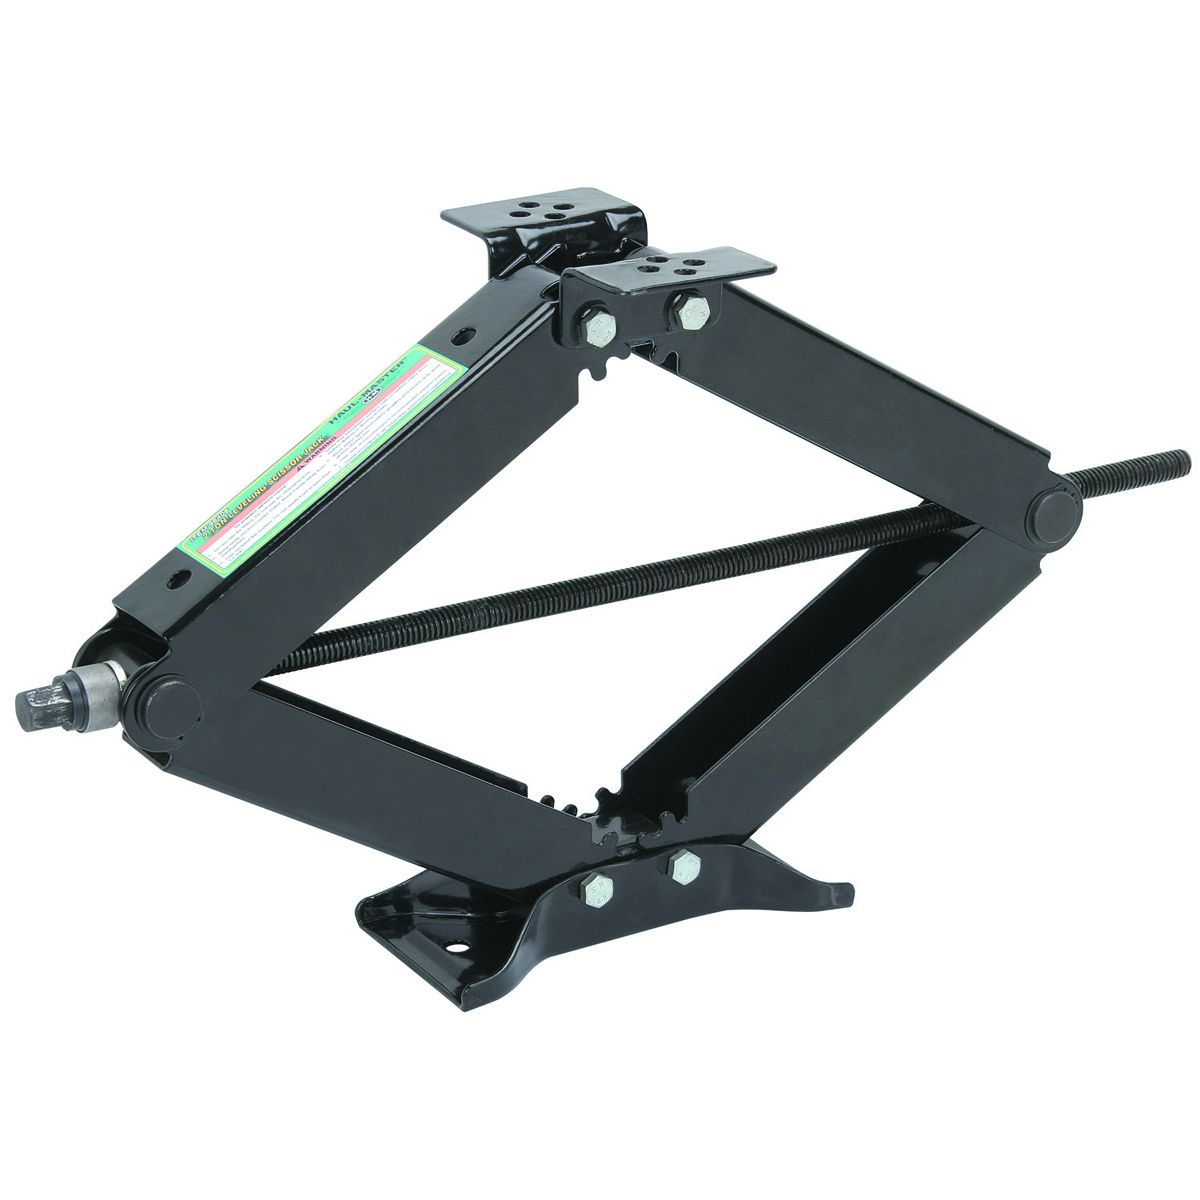
However, these stabilizer jacks are NOT intended to level your RV but rather to stabilize it and minimize wobble/shaking when you move around inside your unit. You can make MINOR adjustments to the leveling but don’t think of the stabilizers as part of your leveling system.
Front-to-back leveling is accomplished using the tongue jack.
Side-to-side leveling is accomplished by raising the wheels of the ‘lower’ side up even with the higher side. This is done with some form of leveling ‘blocks’. You can purchase wedge shaped blocks (the best choice) or stackable blocks. Some use scrap wood stacked up but I would avoid this at all costs.
The 2 items you need for leveling are a level indicator device/system and leveling blocks/devices (you have to use something under the wheels of the ‘low’ to raise it up).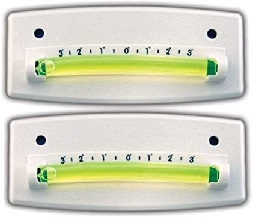
There is a multitude of options for a level indicator device/system. You can go from using a basic carpenter’s bubble level to Bluetooth versions. The most common is an RV bubble level – just like a carpenter’s level where the air bubble travels to the high side (air goes to the top in liquids). Short of using a carpenter’s level, the others mount directly to you RV.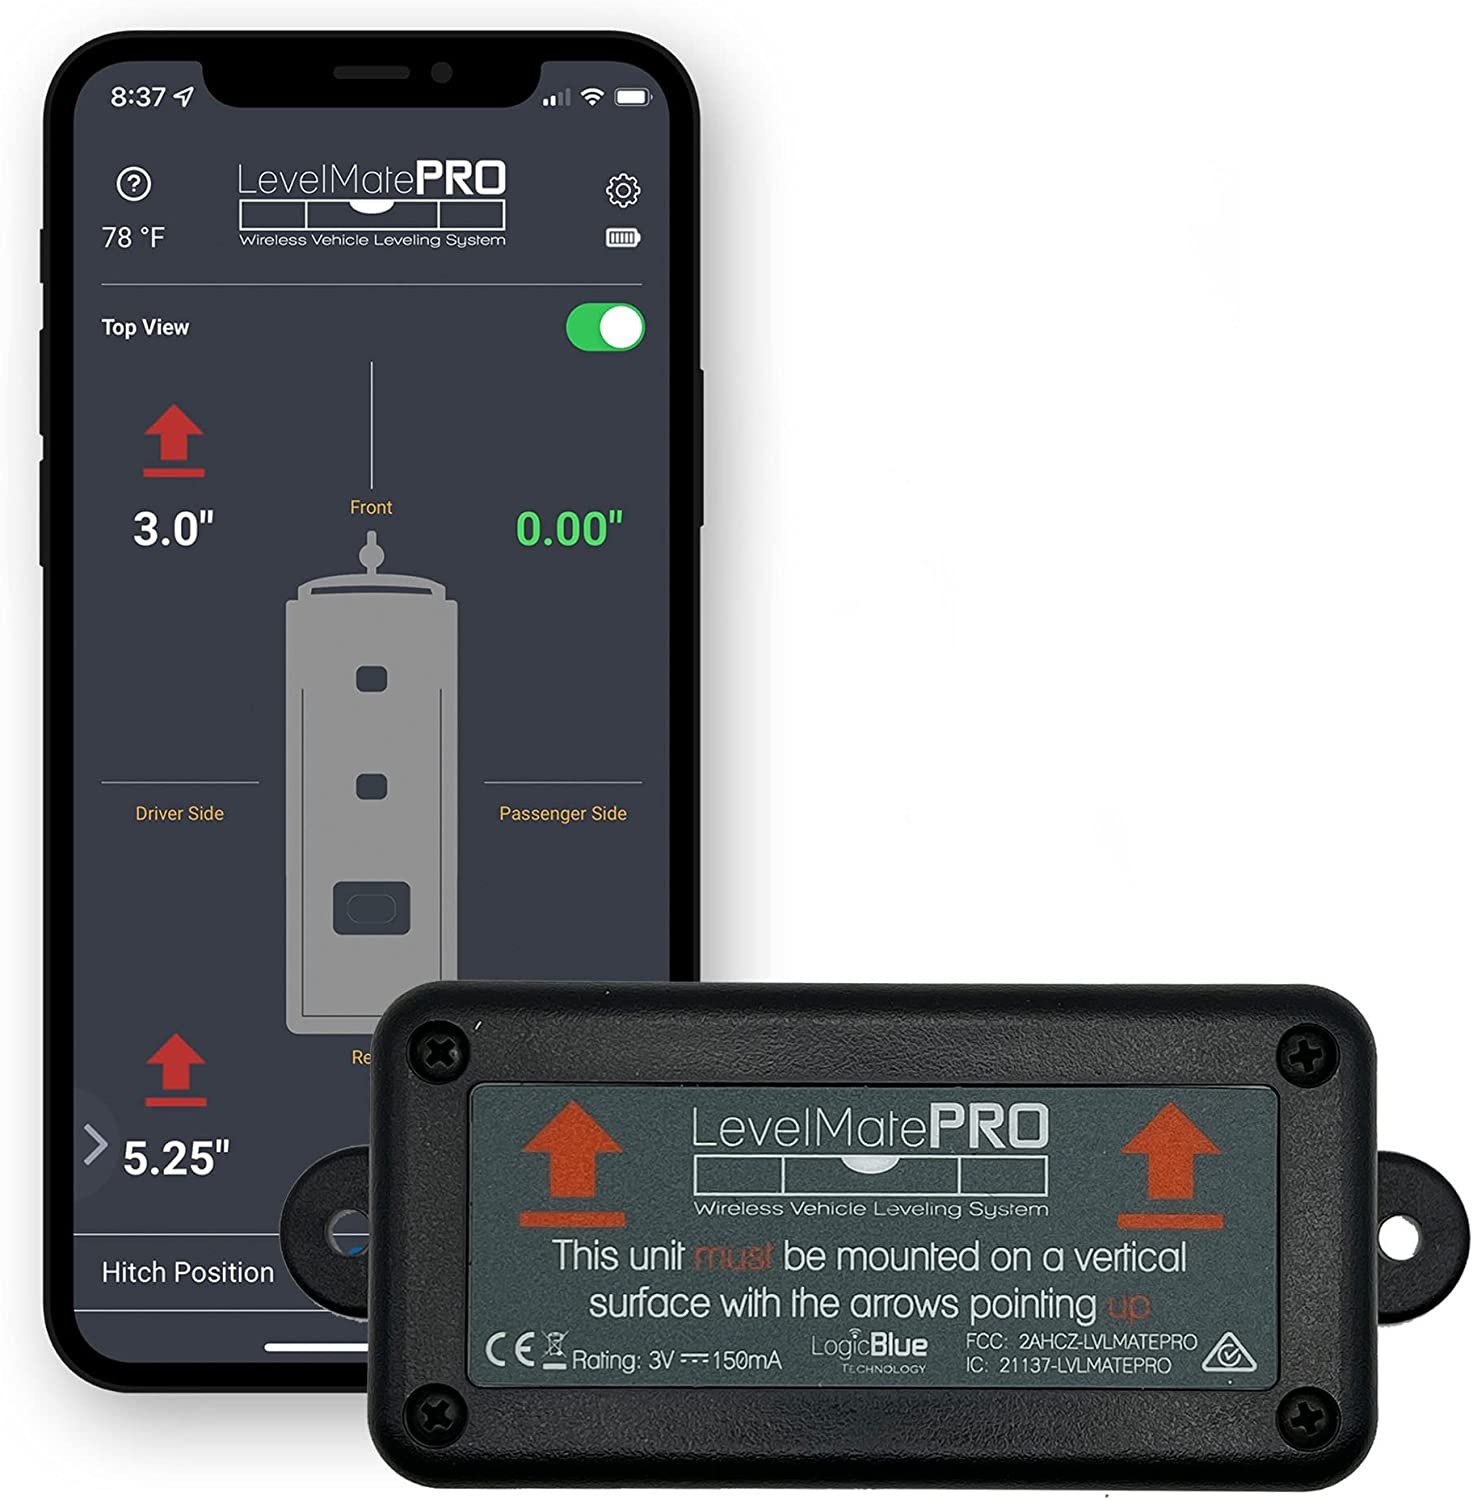
If you travel alone, a Bluetooth version is certainly the choice. Units , such as the LevelMatePRO, use a phone app so you can see when your RV is level, or not. No need to keep jumping in and out of your tow vehicle (TV), over and over, to keep looking to see if you are level yet. There are also extra-large bubble levels that attach to the front of you RV that you can see in the back-up cam of your TV (if you have a back-up cam). If you do not travel alone, the other person can watch the level and tell you the status.
You must install the level indicator device/system at home before your first trip out.
Park your RV on as level an area as you can find. Go to an empty parking lot if needed. Even the street in front of your house likely tilts noticeably to the side for drainage.
Level your RV using a carpenter’s level (or at least a phone app). Use the longest carpenter’s level you can that still fits. The process to level here is the same as later when you are camping but using the installed leveling indicators.
Level side-to-side.
Place the carpenter’s level in the middle of the floor aligned side-to-side. (First time only if installing a level indicator device/system.)
Determine which side is lower (the bubble will go to the high side – not the low side).
Use your leveling blocks place the RV as close to perfectly level as you can.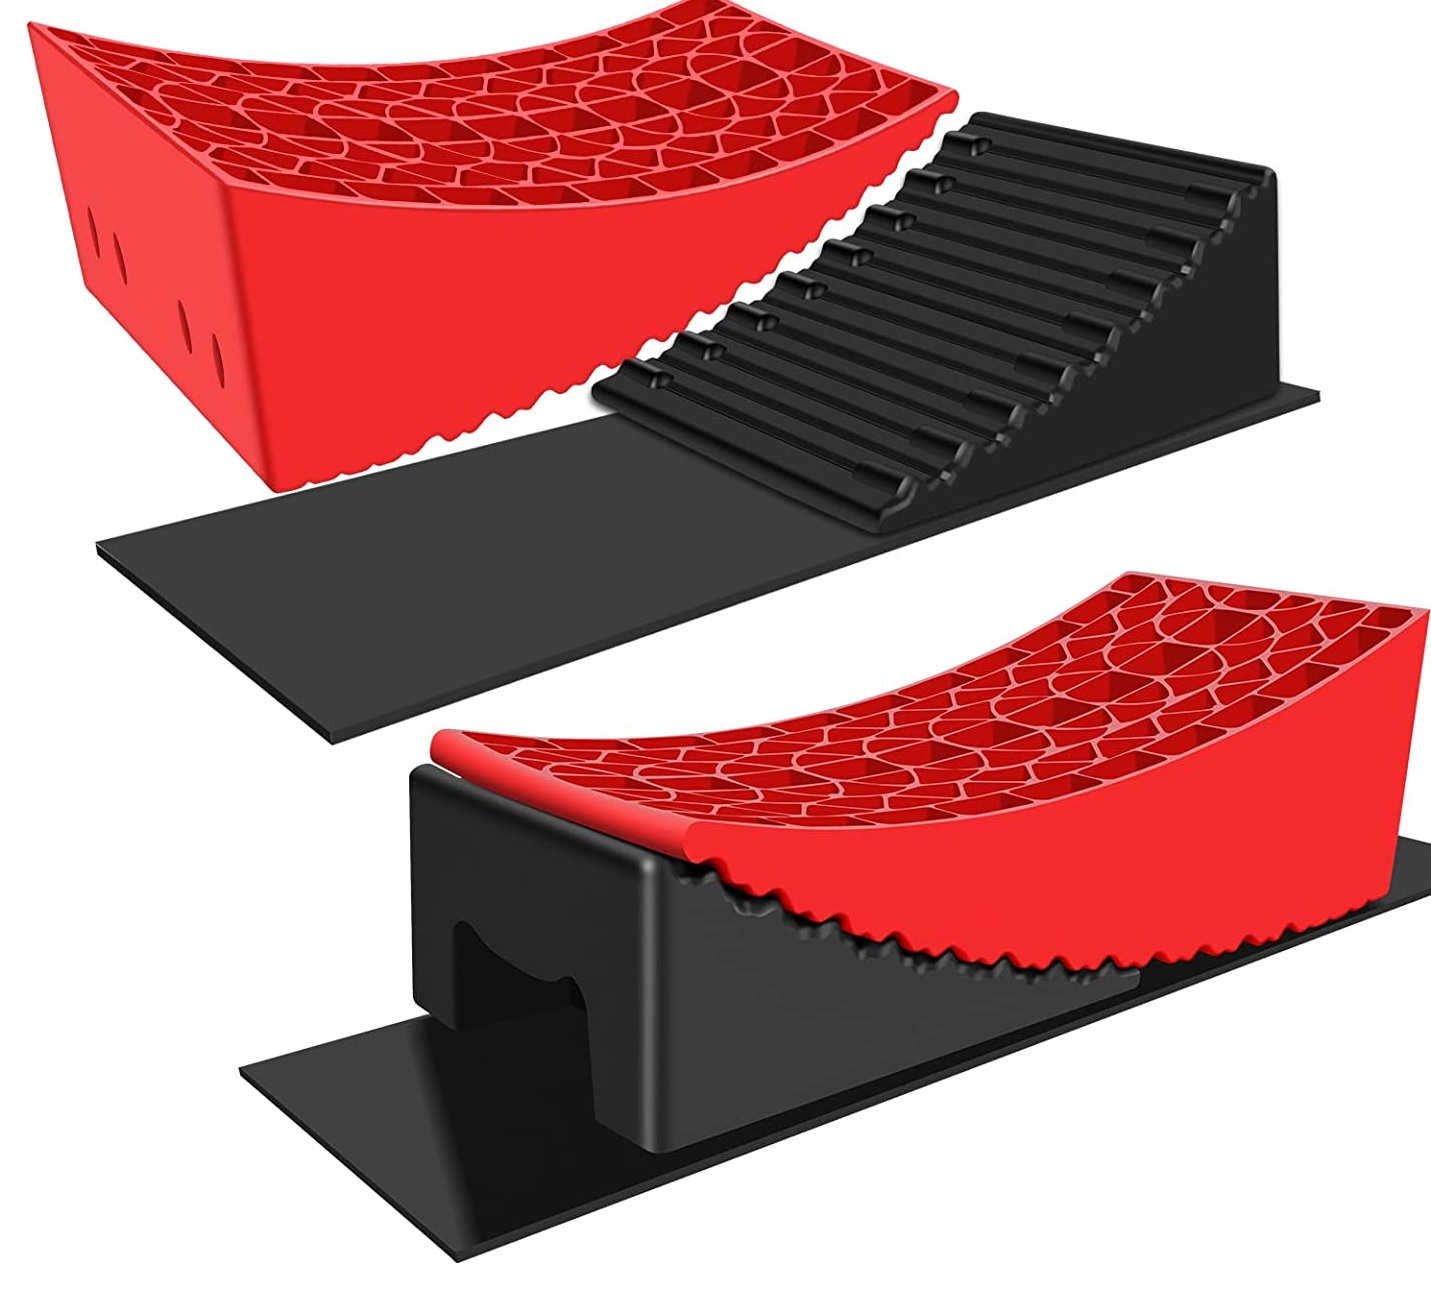
Using the wedge blocks:
Place the large wedges (red in pic above) under the front of both wheels on the lower side.
Pull up onto the wedge until the RV is level. Hint: go just a tiny bit too far as the RV will settle back a bit in the next step.
Push the smaller wedges tightly under the point of the inserted big wedge – or at least the opposite side of each wheel.
Place the TV in neutral, not park, and let the RV settle onto the system.
If it is not perfectly level, try again.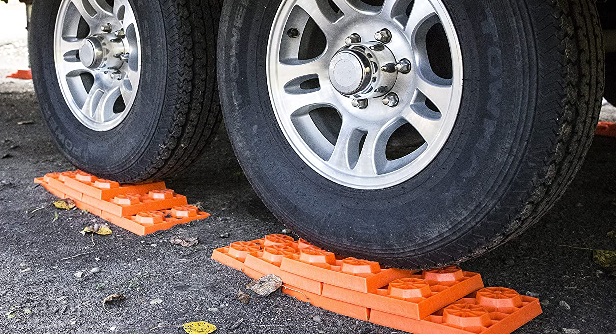
Using the stackable blocks (or wood planks):
Place the one block in front of, and wedged in as far as possible, both wheels on the lower side.
Pull up onto the blocks.
Check the level.
If it is not perfectly level, try again.
If it was closer before adding this block, back off and remove them.
If it is still pretty far off, make a pyramid using three blocks for each wheel.
Note: you may not get a perfect level with the block so add or remove them for the closest you can obtain.
Move the level and check by placing it across the tongue and the bumper. You may also want to check for level on the counter tops. If they are not all the same, choose which one you trust but most go with either the frame/bumper or the floor as installation of cabinets and counters in RVs is not always the most precise work. Adjust the level if needed.
Place the TV in park and chock ALL the wheels securely.
Level front-to-back.
Place the carpenter’s level in the middle of the floor aligned front-to-back. (First time only if installing a level indicator device/system.)
Determine which end is lower (the bubble will go to the high side – not the low side).
Simply use the tongue jack to raise or lower the tongue. You will have to unhitch your TV if you need to lower the tongue (or if you need to raise it a lot).
Fine tune the leveling.
You can use the stabilizers to fine tune the leveling – especially if you used the stackable blocks and they did not yield a perfectly level condition but do so carefully.
Once you have your unit truly level, attach the bubble level(s), inside or outside, or Bluetooth sensor as indicated in the installation directions. The bubbles/sensor must be installed perfectly level and indicate perfect level once installed while the RV is known to be level.
Here are the steps for leveling after your level indicator device/system is installed:
Using the wedge blocks:
Level side-to-side.
- Determine which side is lower with your level indicator device/system (the bubble will go to the high side).
- Place the large wedges under the front of both wheels on the lower side.
- Pull up onto the wedge until the RV is level. Hint: go just a tiny bit too far as the RV will settle back a bit in the next step.
- Push the smaller wedges under the point of the inserted big wedge – or at leas the opposite side of each wheel.
- Place the TV in neutral, not park, and let the RV settle onto the system
- If it is not perfectly level, try again.
Place the TV in park and chock ALL the wheels securely. Unhitch your TV now.
Level front-to-back.
- Determine which end is lower (the bubble will go to the high side – not the low side).
- Simply use the tongue jack to raise or lower the tongue.
Lower the stabilizers firmly (check when in place for multiple days, if not on concrete, as they may settle.
Using the stackable blocks (or wood planks):
Level side-to-side.
Determine which side is lower with your level indicator device/system (the bubble will go to the high side). Also guess at how many blocks you think you might need to stack up. This is just a guess to start out with. I have had to pull up on the pyramid and extend it even higher.
- Place the one block in front of, and wedged in as far as possible, both wheels on the lower side.
- Pull up onto the blocks.
- Check the level.
- If it is not perfectly level, try again.
- If it was closer before adding this block, back off and remove them.
- If it is still pretty far off, make a pyramid using three blocks for each wheel.
- Note: you may not get a perfect level with the block so add or remove them for the closest you can obtain.
Place the TV in park and chock ALL the wheels securely. Unhitch your TV now.
Level front-to-back.
- Determine which end is lower (the bubble will go to the high side – not the low side).
- Simply use the tongue jack to raise or lower the tongue.
Lower the stabilizers firmly (check when in place for multiple days, if not on concrete, as they may settle. You can use the stabilizers to fine tune the leveling – especially if you used the stackable blocks and they did not yield a perfectly level condition but do so carefully.
Helpful note:
The process of pulling onto the leveling blocks changes where your RV is located in relation to the campground hookups. Before you start leveling, determine about where you want you RV to end up AFTER pulling up onto the blocks and adjust your starting position accordingly. You can either pull forward or back onto the blocks as needed.
Black Tank Maintenance
If you have ever watched the movie RV (with Robin Williams) you know the fears some RVers carry about the dreaded black tank – especially flushing it.
The fear is that the flush system might clog and then suddenly gush open dousing you in nasty waste head-to-toe. Having the right tools/parts and a little common sense will male sure that never happens.
Some basic do’s and dont’s are:
- DO NOT place anything in the toilet other than toilet paper and human waste. NEVER place napkins, wipes, diapers or feminine products in your RV toilet. That is a time bomb just waiting to go off.
- Use plenty of water when you flush your toilet. Water is your friend in the black tank. You don’t want things getting thick and sticky in there.
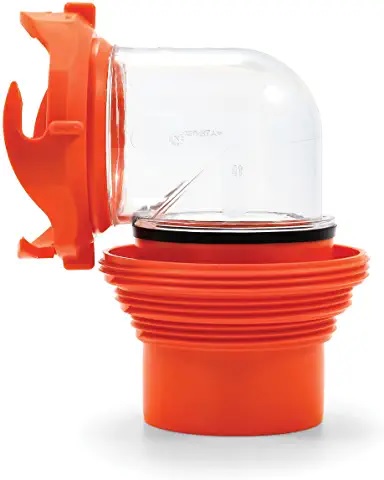
- Make sure you have a clear fitting for each end of you drain hose. A clear elbow should be connected to the RV fitting to allow you to see what is going on while flushing. A clear elbow at the other end lets you see that the whole system is running well.
- Always put a dose of RV holding tank chemicals (bio-pack) in the tank before using it. These work to dissolve, loosen up, and break up the toilet paper and human wastes. That is the basic secret to a clog free operation.

- Always flush the blank tank FIRST – before you flush the grey water tank.
- Never let the black tank set completely empty unless you have completed an extensive winterization flush/cleaning first.
There are a lot of ideas regarding the value of special toilet papers for RVs. What it truly comes down to is that thicker TP takes longer to dissolve. Yes, cheap TP is more black tank friendly. You need to decide your balance between the two factors. Personally, we use good TP and have never had a real clog from that. Needless to say, this also means that how much TP you use each time is an issue. Don’t use half a roll to wipe yourself (I laterally know of somebody who only gets about 4-6 wipes from a roll !).
A great help with flushing the system is if you have a Black Tank flushing system. This works very much like the top spray arm in your dishwasher.
Another great item is a tank wand / sprayer that you can inset into the tank through the toilet.
Unless you are storing your RV for an extended period, the following directions will keep things running smoothly. If you ARE storing it for an extended period (such as winter) perform the extensive winterization flush/cleaning described later.
If possible, allow your black tank to fill at least half way before flushing it. You need enough water to flow freely, forcibly and fast enough to wash everything away. If you do find that your drain valve is clogged and normal flushing will not clear it, see the special guidance below for that. The most likely reason for this is that something inappropriate was placed down the toilet or fell in.
Flushing the black tank :
- Make sure your drain hoses and all fitting are secure.
- Open the black tank drain valve. This should be the large black pull handle.
- Allow the system to drain while watching the clear elbow to see that it is flowing freely.
- If you have a blank tank flush system turn it on. CAUTION – If the system stops draining well, or completely, monitor the water level in the black tank and turn the flushing system off to make sure it does not fill up completely – or even worse, OVERFLOW.
- If the waste slows down to a trickle before the tank is empty, or stops, let the flush system start filling the tank (or add water through the toilet – flushing works). If this does not move things along quickly, close the valve and fill the tank nearly full. Again, be careful to monitor the water level in the black tank and turn the flushing system off/quit adding water to make sure it does not fill up completely over OVERFLOW. Once the tank is full, stop filling the tank and open the valve. It should provide enough pressure to dislodge whatever was in the way. Be patient as it may take a few minutes to do this.
- Allow the tank to drain completely. It should be simply clear water draining at the end.
- If you do not get clear water at the end, fill the tank with water again and repeat the flush. You may even need to do this several times.
- Once you are sure the tank has drained completely, shut the black tank drain valve and open your grey tank drain.
- Allow the grey tank to drain. This will wash all of the residue from the black tank through, and out of, your hoses.
- Insert a new bio-pack into the tank along with several gallons of water – even if you are hitting the road. If traveling, this will slosh around in the tank and wash it even cleaner.
- If you experience abnormally bad odors, you can also add some scented clothes fabric softener. I have found that Downy Crystals work well.

- Some people like to add ice cubes into the black tank after a flush and before hitting the road. The ice bounces around and scrapes solid residue off while traveling.
Winterizing the black tank :
This may also just be for extended storage.
You certainly do not want there to be ANY waste setting in the blank tank for any extended periods as it will thicken, or hardened, and become extremely difficult to remove.
Always perform an extensive and thorough flush before long storage.
- The process is the same as as above except you do NOT want to leave water in the tanks if it will be sitting in a freezing environment. Otherwise, make sure the tank is washed sparkling clean before storing – you can even and a bio-pack and water if you are sure there is no chance of freezing.
- For freezing conditions, clean the tank super well then pour some RV/Marine antifreeze through the toilet. This will assure than ANY water left in the nooks and crannies does not freeze and burst anything.
A Clogged Black Tank ! ! ! :
So, you somehow managed to end up with a major clog and your blank tank will not drain easily. I bet the kids caused this . . . .
If something ended up in the tank that should not be there, it can be a super challenge to dislodge it. Also, it will likely end up at the valve and clog it again before you manage to completely empty the tank.
If the tank clogged due to normal waste (toilet paper/human waste), try using your tank wand/sprayer to dislodge the clog. You may just need to stop using the toilet (use the shower house) long enough for the bio-pack chemicals to better break the clog down. You NEVER want to disconnect the drain hose to poke into the tank unless that is the only option left. Don’t even try closing the valve to poke around as it is unlikely you will manage to completely close the valve.
A clever option that works quite well is to ‘backwash’ with the drain hose. This requires two people. First, close the black water valve (the best that you can). Now, create a trap in the flexible drain hose (a low spot) as closed to the campground connection as possible. Open the grey water tank and allow it to fill the drain hose. Run water into your sink drains (to fill the hose) if the tank is empty. 
Once the hose is full, close the grey tank valve then lift the hose up about 4 feet above the ground. Have the other person open the black tank and use the weight of the water in the hose to push the clog back up into the tank. This should open the drain and remedy the issue. If the clog is due to a foreign object in the tank, or a really stubborn clog, you may have to keep repeating this to drain the tank completely.
If you are positive it is just a normal clog, try giving it time then trying flushing later. If you are hitting the road and heading to another location, leave the tank full if you can. Driving should slosh things around and clear the problem. If the weight of a full tank is an issue, look for a dump station you can stop at a little down the road. I have an app on my phone in case I ever need to find one.
If the clog is from a foreign object in the tank, try the same techniques for a normal clog (other than adding water or using the tank flush system – you don’t want any more water in there if it comes down to the final steps. I once had the tip of a cheap RV toilet wand come off and blow into the tank. I was lucky that the tank was already flushed!
It just wont budge. DO NOT add any more water at this point. If nothing has worked and you are now determined to clear the clog, understand that you are entering potentially hazardous territory. Some campground have serious rules on black water mishaps. At best, you need to be ready to resolve any spills you may create.
Be sure you are wearing gloves and whatever protective clothing you have. At least a plastic poncho. Also, make sure you have a garden hose and sprayer ready to wash yourself down.
If you decide to pull the hose and poke into the drain, do it with 2 people – one to handle the connection (and to be ready to reconnect as quickly as possible) and the other to poke.
The safest approach is to make one quick poke and quickly push the hose back on. Repeat as needed. Also, realize the item will likely wash into the drain again and clog it again.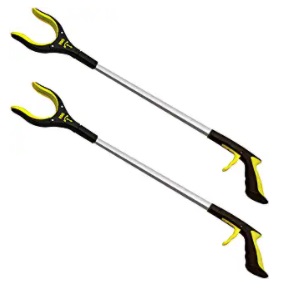
Once you have managed to drain the tank, you can hopefully see what is in there. You may need to use your wand to rinse it over to the drain. Getting it out can be tricky. One of those grabber/reacher claw tools works well. Once the foreign object is removed, finish rinsing the tank in the normal method.
Good luck.
Campground courtesy
- Keep the noise down. Playing a radio or TV too loud is one of the most obnoxious things I have experienced. Don’t be THAT person.
- NEVER cut trough another person’s campsite – not even cutting the corner. Tell you kids this too and follow up on it – don’t just trust that they do what you say. We have even had groups of kids riding their bikes through our site at a KOA. This can be an enormous irritant. We got stuck with the first site in the park – right where the entrance road split 3 ways. That meant everyone coming and going to the park facilities and activities had to pass our site. Luckily, it was not a continuous problem but one kid on a bike nearly slammed into me as I walked around the end of trailer.
- Pets : Keep your pets on a leash. I don’t care how well (you think) your dog minds you, keep it leashed. Many campgrounds have rules that aggressive dogs will be evicted from the grounds. Also, excessive barking or howling is a great way to become the most unwelcome visitors in the place. ALWAYS clean up after your pet. ALWAYS!
- Never go off and leave a burning campfire unaccompanied – even in a fire pit. Not even for ‘just a couple of minutes’. I have known of people being evicted for this.
- Drive slowly through the campground. Obey the 5mph speed limit. You never know when a kid can leap out into the road from the bushes.
- Set up camp quietly. Instead of chasing ambulances, divorce lawyers should just hang around campgrounds. All too often, you hear frustrated drivers shrieking at spouses as they painfully attempt to back-in their motorhome or trailer. If you can’t be mellow, do what I’ve heard of : have your significant other check out the restrooms while you park the RV solo.
- Watch the language. In family-filled campgrounds, we’ve heard fellow campers screaming enough profanities to make a sailor blush. I realize that profanities have become the national norm, but they are inappropriate in public places and make the perpetrators sound like degenerates.
- Just Follow the rules. Most campgrounds post rules that management hopes campers will follow. They include things such as don’t wash dishes, clothes or your dog in the restroom sinks. Don’t drain gray water on the lawn, and keep quiet during quiet hours. Following those rules ensures a more enjoyable experience for all.
- Minimize generator noise. Nobody wants to wake up to the sound of an industrial-strength generator blasting through the woods five campsites away. If you need to use a portable generator, check out the much quieter units. Shelter your unit as far from neighboring sites as possible and only run it during posted generator hours. Better yet, do like we do and use solar panels when possible.
- Tone down the lights. Campers come in two broad categories: those of us who like to sit in the dark and stare at the stars, and those who use strings of decorative lights to turn their campsites into mini-versions of Las Vegas. It’s bad enough when they burn all evening, but please turn them off when you head to bed.
- Clean up after yourself. We frequently find trash left in campfire pits and soap wrappers, shampoo containers and even discarded dainties in campground showers. Restroom sinks frequently look like someone tried to wash a cat in them. It takes very little effort to take trash to the dumpster, dispose of used toiletries, and wipe down sinks for the next camper. It is, after all, the courteous thing to do.
- Don’t do your dishes in the campground bathroom. It’s nauseating to see scraps of others’ dinners while I’m brushing your teeth to get ready for bed. Accept that dishes are going to be “camping clean” until you get home. Wipe dishes clean with paper towel or bring biodegradable soap and give dishes a quick rinse at your campsite. Scatter water across as wide of an area as you can and as far away from lakes, streams and other bodies of water as possible.
Woodland Friends
You are heading into the home of many a fine furry (wild) friend. You should understand how to get along with residents of the woods.
Depending on where you camp, you might just have geese or birds as visitors to your site but a wolf, raccoon or even a bear might lumber through at times.
The main idea to follow is never leave food out. NEVER! It’s like ringing the dinner bell. If the kids are in a tent next to the RV, make sure none of them are sneaking snacks into the tent. Even a few crumbs can entice a raccoon or skunk inside and their claws make short work of the tent fabric.
Even take care inside your RV. The best prevention to keep out mice, chipmunks or even bigger critters is cleanliness. A bunch of crumbs left on the sink counter can result in an ant invasion easily. Use plastic containers to store your opened/loose food items or place them in the fridge. We use 2 sonic pest repellers in our trailer and we have NEVER had any problems with critters or bugs. One is used inside while I place the second one outside when we are camping. While a sonic device may not keep them from ever entering, it makes sure they do not stay around.
 Skunks – Scavengers. They are basically harmless as long as you do not scare them. This means your pets too! While camping in Cades Cove in the Smoky Mts, the campsites were frequented by many skunks but they were fine since no one pissed them off. Again, leaving food out, or in a tent, is an absolute invitation to skunks and this can lead to unpleasant encounters. If you, or your pet, gets sprayed, I can personally vouch that a diluted mixture of tomato juice works extremely well. Our dog managed to encounter a skunk and left with eau-de Pepe Le Pew. I washed her head down with 50/50 tomato juice and water and the smell was gone.
Bears – Many places have bears wandering through the campgrounds. I have been tent camping and heard bears trying to get into the bear-proof trash cans less than 10 feet away. My food was locked up in the car so they did not come any closer. DO NOT try to get close with (or play with) bear cubs.
Mama bear is not far away and she will rip you apart to protect her cubs so make sure you are not between mom and her cubs. Raccoons – mischievous little devils, with nasty teeth. They will get into anything your leave accessible. They also are carriers of rabies so leave them alone.
  Opossums – another big time scavenger. Even though them MIGHT ‘play possum’, a mother will protect her babies with a vengeance and she has a big set of nasty dirty sharp teeth to use for that. They are nasty critters and typically reek of the smell of rotted flesh and filth. Just give them space.
 Ground squirrels (chipmunks) – ‘little rats with furry tails’. They are fun to watch but they will squeeze through the smallest openings to get into your RV – and they are good at it. I have had them get into my tent and take off with wash cloths, clothing, and anything that might make for a better nest.
These are the animals you are most likely to encounter that you need to understand in order to avoid less-than-pleasant encounters with. You will hear and see birds that you likely have never encountered, maybe deer or elk, possibly a fox or wolf but they will pretty well always stay clear of you. Not to say that if you insist on trying to chase them down or get too close that they can’t put some real hurt on you.
I saw a recent movie clip of a touron (tourist moron) in Yellowstone that went up to pet a bison and ended up doing fantastic feats in the air.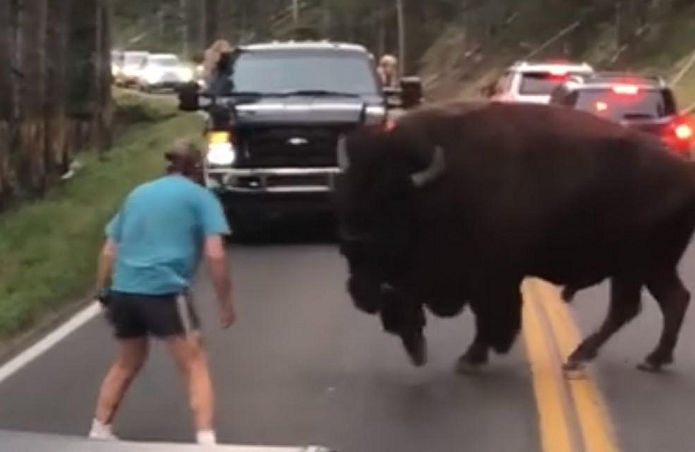
Don’t be that touron. We are visiting their home and nature is already pressed to it’s limits.
Don’t wreck it. Don’t litter : take out everything you take in.
Don’t go marring trees or pulling up plants.
Leave no signs that you were there
Boondocking
If you don’t know what boondocking is; I’d explain it as going out in the middle of nowhere with absolutely nothing there in the way of facilities or hookups.
This can be the most rewarding camping ever if you are the type of people that can let go of modern conveniences – especially (maybe) cell reception.
I have never boondocked with our RV (yet) but did a lot of tent boondocking. It simply means you have to be completely self sufficient.
Power and water are the two main issues.
Power
Your RV operates on both AC and DC power. 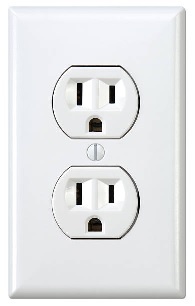 AC power (Alternating Current) is what you have in your house. Also know as 110/220VAC. When you plug into ‘shore power’ at a park, this is AC power. Your air conditioner, microwave, television and everything you plug into the outlets run on AC power. Your hot water heater and fridge likely can run on either AC power or LP gas.
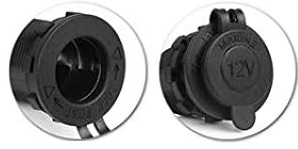 DC power (Direct Current) is what you have in your truck/car and comes from batteries. Also known as 12VDC (12 Volts DC). These plugs are the old cigarette lighter style. Your RV lights, vent fans, fresh water pump, stereo, slide-out, power jacks (and probably not much more) typically run on the DC power.
If you are not going to be using your AC nor heating water (or running your fridge) with electric you may be able to get by on just your 12VDC battery supply. Disconnect your TV (tow vehicle) from the RV so that it does not drain the battery in it. You can always hook the wiring back up and run your engine to recharge the RV battery if necessary.
However, a small power generator (less than 2000w) is great if you do not run the big three (above) but you need a bigger one if you want to run appliances (2000w – 4000w.) Check your documentation (or the labels on each device) to see what the wattage is and get a generator at least 20% higher than what you ever intend to use. If you think you may run all three than it needs to be bigger than the wattage of all three.
Another option is solar power. That means you will have to make sure you add extra (high capacity) batteries and a power inverter (not converter).
A power converter turns AC power (like in your house) into 12v DC power (like in your car). The power converter runs when you are connected to shore power to supply 12VDC and recharges the batteries.
A power inverter turns the 12VDC power from your batteries (like in your truck/car) into 120VAC power (like in your home). It takes a LOT of batteries to generate much power with a power inverter. Since solar panels provide DC power, it has to be saved in batteries as the solar systems cannot generate power during the night and are unlikely big enough to power everything in your RV at once. You will likely have to run one large appliance at a time.
Water
You have to be aware of, and understand, the capacities of your tanks. You have a fresh water tank (holds the good clean water you take with you) and 2 waste tanks: black for toilets and grey for sinks and showers. Since your waste tanks should be larger than the fresh water tank, it is unlikely you will fill them.
When boondocking, he critical capacity is the fresh tank. Once it empties, you have to go someplace to fill up or do without water. It is illegal to dump grey water nearly everywhere and then only if you use earth-friendly soaps and all.
You truly have to learn to be very stingy with your water usage,
This means NEVER leave the water running if you can turn it off. Taking shower uses vastly more water than anything else. The two of us fill the grey tank in 24hrs when connected to full hookups and mostly from showers. Wash in the sink or with a tub, instead of showering, as much as possible. Take a dip in the lake or creek instead. If you must shower while boondocking, turn the water on just long enough to wet your hair – turn it off – wash your hair – turn the water on and quickly rinse your hair and wet your body – turn the water off – scrub your body – turn the water on and quickly rinse off. You may get 4-5 days before you fill the grey tank.
Wash dishes in a tub with earth friendly detergent. Wash them all, throw out the wash water (far from the RV), then rinse them in the tub in clean water and throw out the rinse water.
Communications
You may have a decent cell phone signal and maybe none. A cell booster can make a marginal signal good but will not give you a good connection if the signal is too weak. It simply amplifies a bad signal in that case.
A satellite dish is your best answer – provided you have a clear view toward the horizon (not surrounded by tall trees). You can get Cable/internet services through satellite dish providers.
Most people know, and live by, certain courtesies that are expected when you are camping in a campground. Do whatever if you are boondocking but follow these rules when others are around.
Most campers (whether in an RV, tent camping or in a cabin), are rather lay back friendly people but even the most mellow fellow can be irritated by a rude camp family. There is so much fun and good time to be had that only a fool presses on thinking only of themselves.
Pop-Up Campers
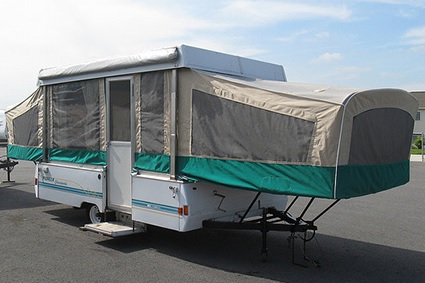
Pop-up campers offer the use of a trailer for camping while keeping the weight low enough that a lot of family vehicles can still tow it safely. They do not offer all the comforts of full sized RVs but do provide a lot. At the least, they provide a better sleeping solution and indoor space for bad weather. Many offer Air Conditioning and even LP gas heaters.
Larger versions can include cooking facilities, sinks, refrigerators and even toilets. At the least, you can always carry along a camping porta-potty. Since half of the space disappears when folded up, storage exists but is extremely limited. A car top carrier is a great accessory for pop-up camping.
Keep in mind that you are still camping in a tent-like vehicle and many of the same rules/ideas apply. See my section on Basic Camping – No RV for more info. While you are a solid base, the middle is still just a canvas tent and offers no more safety from wildlife than a tent.
You may still be new to towing something so be sure to check out the many other areas of our blog about RVing/camping.
The other sections of this blog cover a lot about larger RVs. Check the LINKS TO EACH SECTION for a list of everything posted here.
