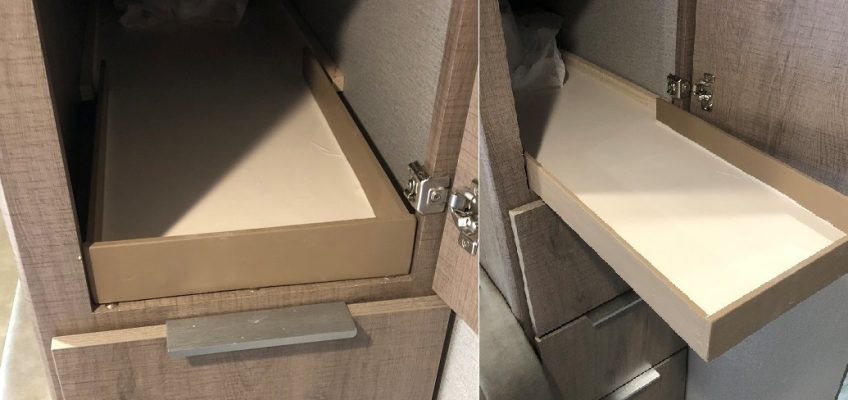
Hack #9 Pantry slide outs.
The pantry next to the dinette is clearly a place for the ‘Land That Time Forgot’ as it comes.
Weighing in at and incredible 34 inches deep, it’s too far for even my long arms to reach to the back.
Having recently remolded my house (all by myself) which included an extreme kitchen re-do, I was quite familiar with options for pantries.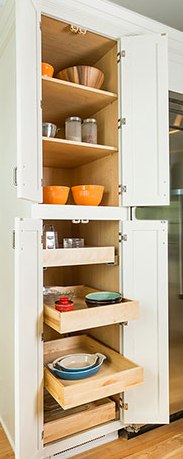
However, even this is only 24 inches deep and they start at well over $50 per shelf. I failed to find any 34 inches deep. Another item of interest was the gap that would exist on either side of the drawer/shelf.
I found some slides long enough but decided to take a less expensive path and use good old fashioned wood slides like in old dressers and such.
I decided to go with 50/50 extension. My design is actually incredibly simply. The main note I pass on is to keep the rails well waxed. You can always use an old candle for this.
The slide-out rides on a thin strips. These need to be a hard wood like maple (best) – or at least a harder pine like fir. The upper strip (prevents tipping when pulled out) is wide enough to basically close the gaps on either side and prevent small items from dropping through.
Also, I added a ‘fence’ to the back to prevent items from sneaking to lower levels when you pull the drawer out.
* * * * * N O T E * * * * * I later added a third pull out shelf. I cover this at the end.
The larger back automatically serves as a stop so the drawer only pulls out about half way.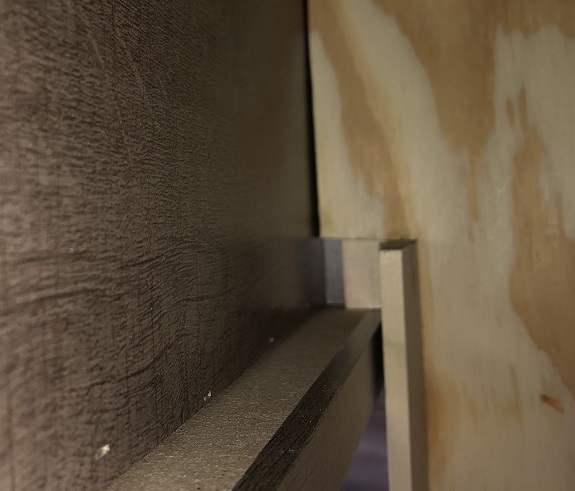
For each pull-out:
Simply cut a shelf from ¼” plywood. Use a high grade selection. Cut 34″ long (or the depth of your pantry) and 12¾” wide (or the inside width of your unit).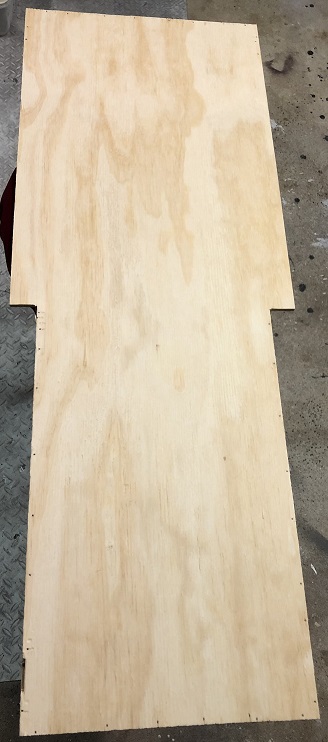
Cut an equal amount off both sides of the front half to end up with a 10-3/8″ width (or 1/8 less than the width of your opening). Use wood putty to fill any gaps in the end grain of the plywood (the sides). Sand the sides to a smooth finish and seal them with a durable clear wood finish (or paint if you are painting the whole shelf).

Add a lip along the sides and front. It can be as low or high as you wish. I simply wanted to make sure nothing slides off so I went with a 1½” lip. I cut ½” by 1½” hobby boards then glued and nailed them along the sides and front.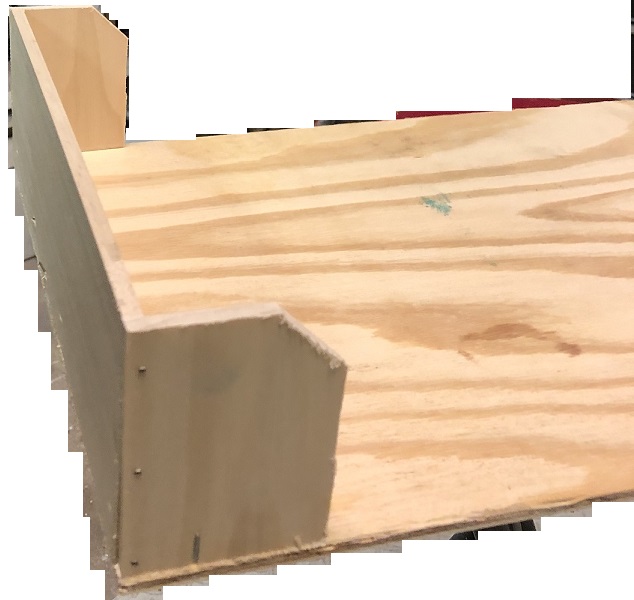
Add a ‘fence’ to the back. Cut the fence from scrap stock and attach it to the back of the shelf – located on top of the shelf – not to the edge. If you wish to paint or stain the drawers, do so now.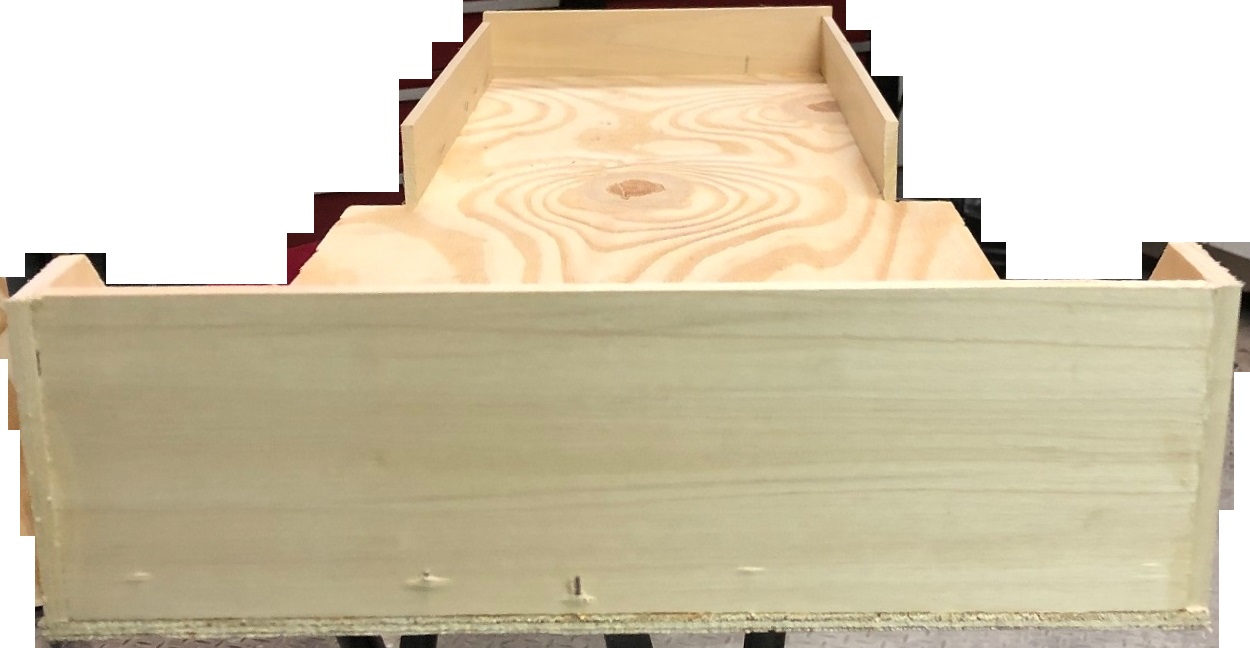
Measure the exact depth of the lip at the front of the opening. Cut 2 strips of ¾” hard wood planking at this width and 33″ long (for the lower slides) and 2 strips ½” wide and 33″ long (for the upper guides). 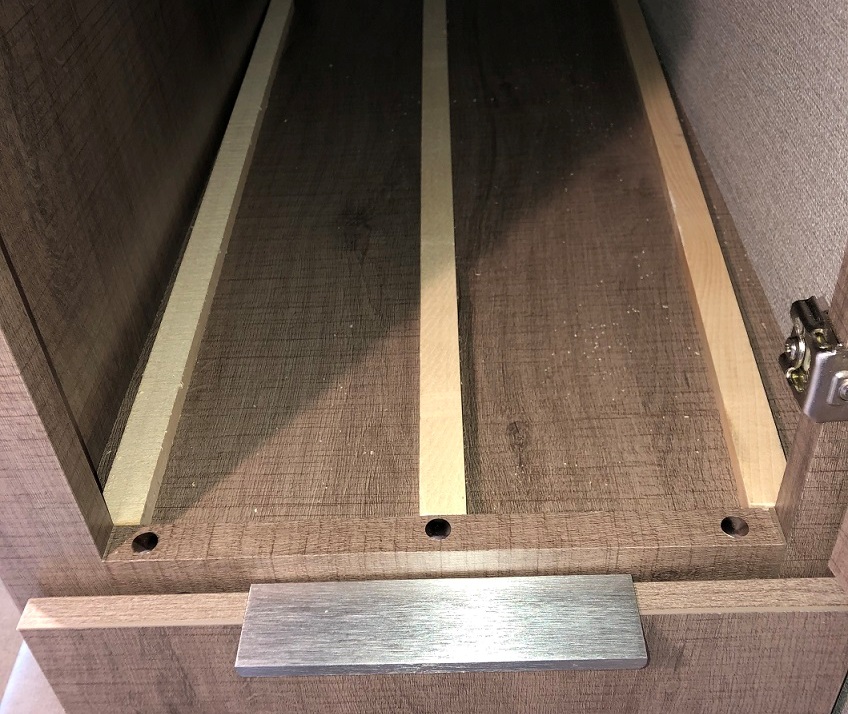
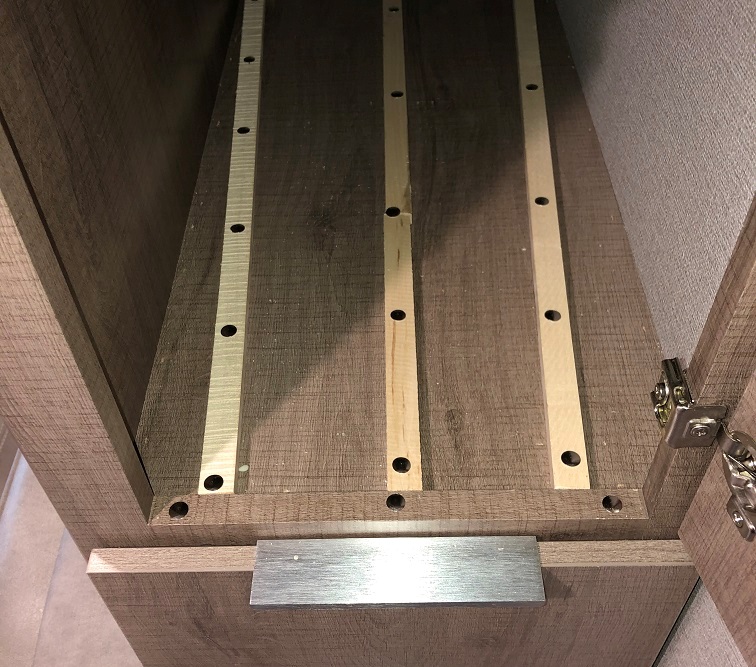
Attach two lower slides to the bottom and against the inside walls of the pantry and one down the center. The guides mount turned to be even with the front lip. Nail (small brads) and glue them to the bottom (with either a good wood glue or Gorrilla glue). Place numerous thumb tacks into the top of the guides. These provide a smooth gliding surface.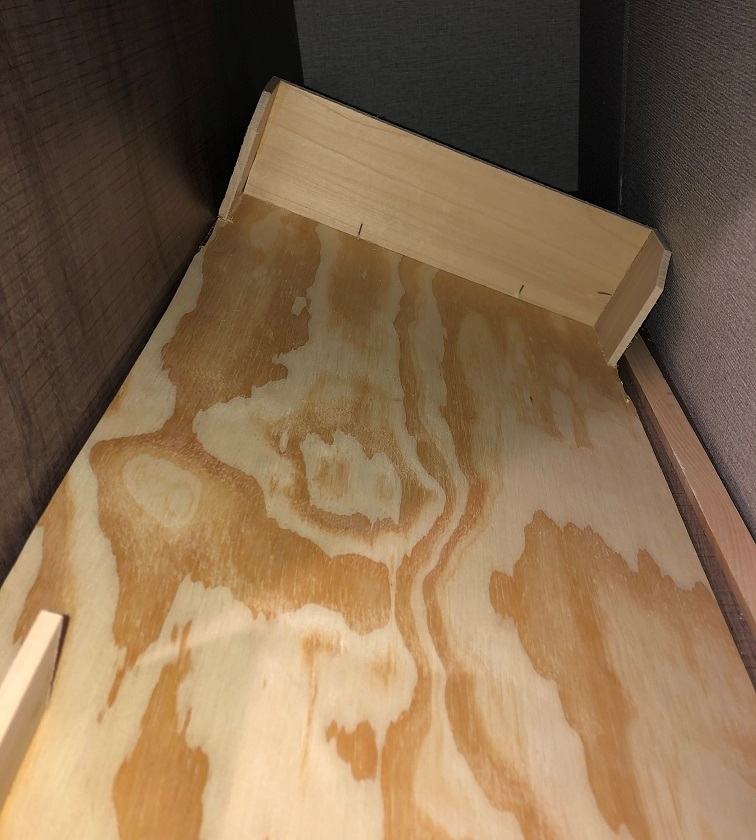
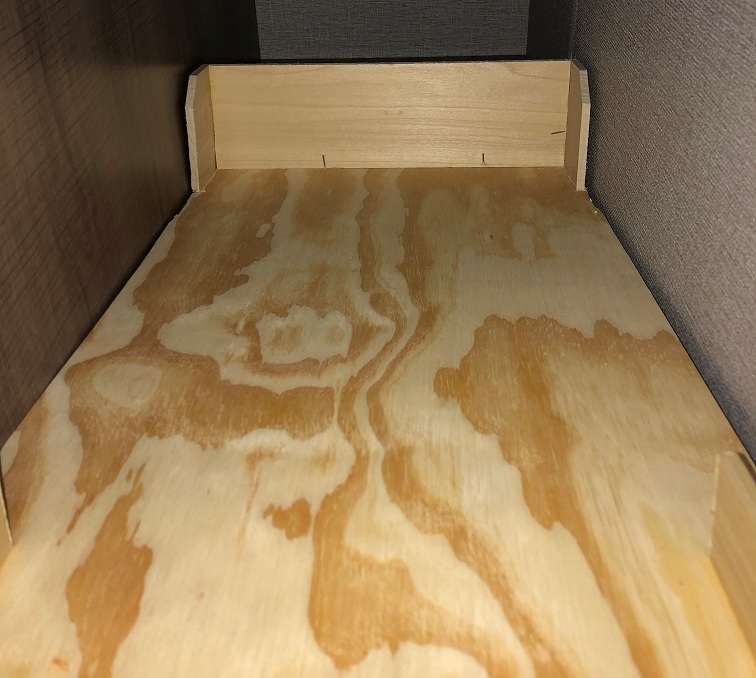
If you wish to paint the exposed surfaces do so now. We painted the lips but simply used contact paper on the main area.
Once the glue has dried well, wax the top of the bottom guide well but avoid getting wax where the upper guide goes. Wax the side edges of the drawer and insert it by tilting it as it goes in.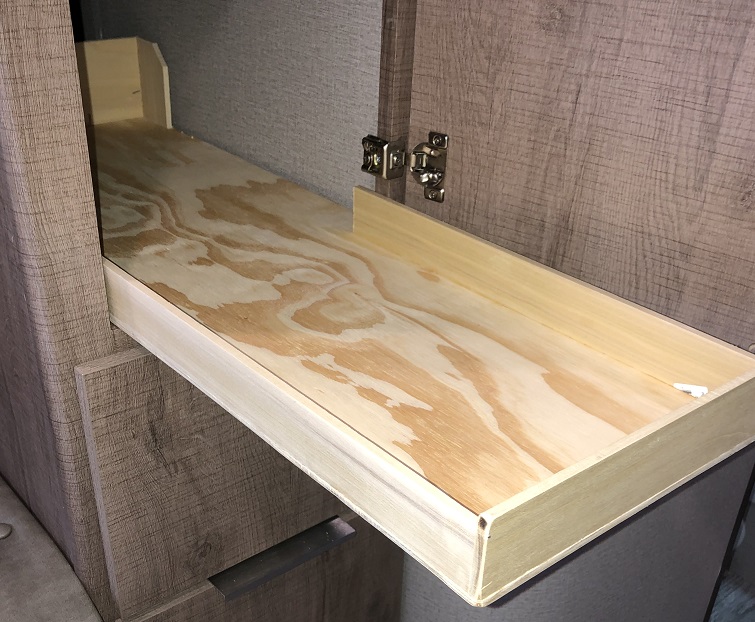
Wax the surface of the upper slides that will face down and contact the drawer. Be careful to not get wax on the side that will be glued to the side of the pantry.
Attach the upper slides to the inside walls of the pantry. You must leave a small space between the slide and the drawer. You can insert items, such as very thin washers, to provide this spacing while installing the guides. The guides mount with the dimensions ¾” tall and 1″ wide. Make sure the smooth sides are horizontal for one to rub against the top of the drawer as it slides. Nail and glue them to the wall (with either a good wood glue or Gorilla glue). You can use masking tape to help hold them in place while you nail/screw them in. You can definitely use a helper on this step. You can also use a small amount of super glue, with an accelerator, to tack them in place.
Use very small brads/finishing nails (no more than 1″ long) to nail the left side in from the outside (the dining table area).
Use 1¼” – 1½” nails to secure the right side in place. An air powered brad nailer is a wonder for this. 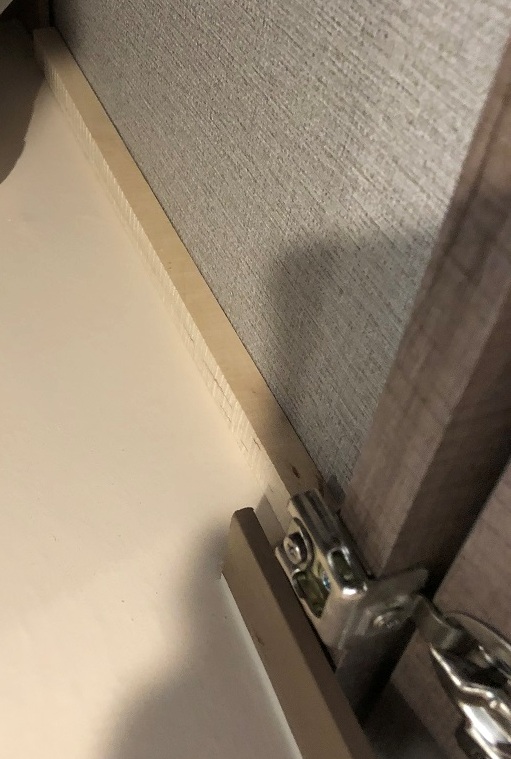
Once the glue has dried well, pull the drawer out as far as it goes. Slide it in and out looking for smooth action. Wax all the runners more if needed.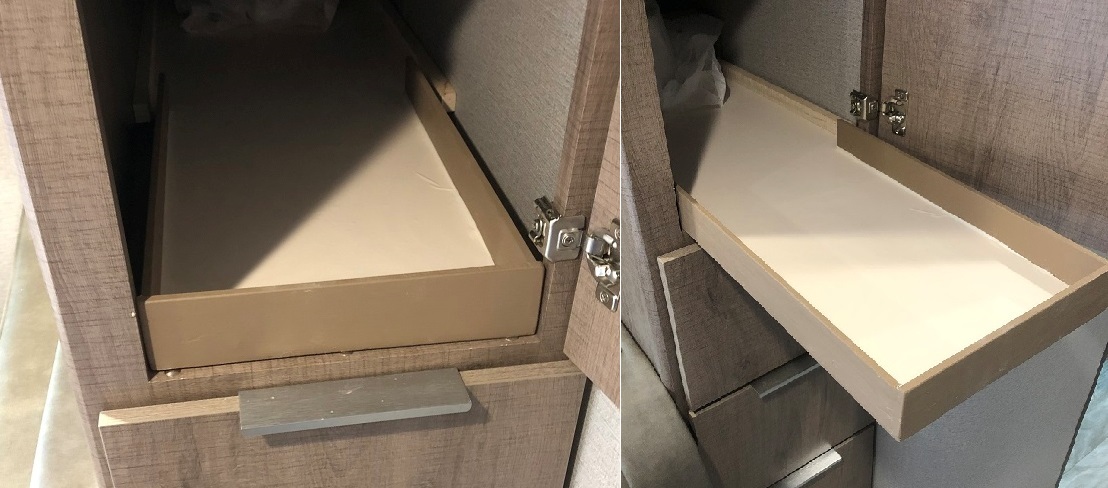
Load it up and enjoy easier access to the storage in the pantry and Happy Camping.
Trim paint : Valspar Milk chocolate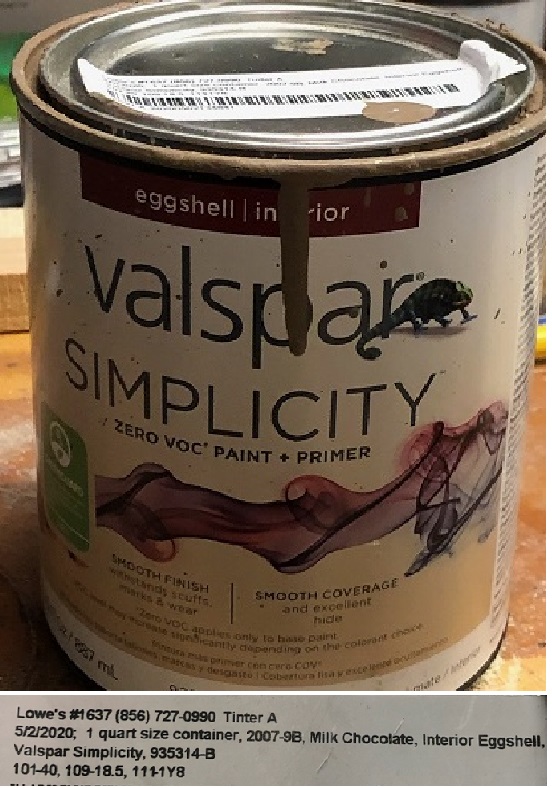
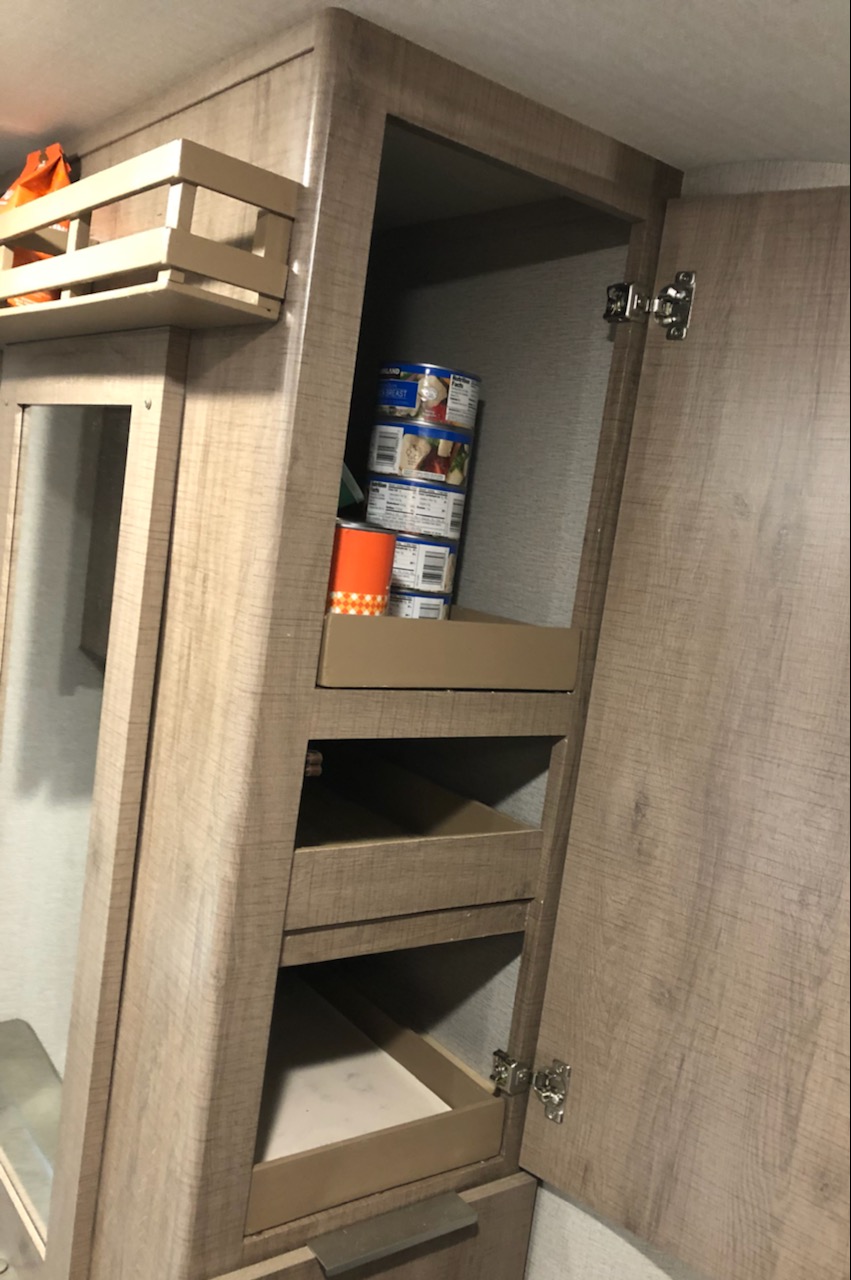
The third shelf:
We later realized that we should place all the tall items on a single shelf and add a third, shorter height, pull out to accommodate more for when we take longer trips.
First, this task is MUCH easier if you do this when you do the first 2.
You construct the pull-out just as the other ones (above). However, you need to add a new fixed shelf for it to rest on.
Cut a piece of ½ inch stock, or particle board, to the exact dimensions of the inside – fitting inside the lip of the front frame (you will be adding a matching frame piece to the front later.
Cut two ¾ by ¾ supports for each side. You can cut another for the back wall if you have a way to reach all the way back and attach it. I skipped this as the weight will be on the slide – not the shelf.
An issue to avoid is ending up with too little space to insert the slide later. To avoid that, insert the shelf and slide then use scraps of wood blocking to hold these up against the top and out of your way while you install the shelf supports.
Position the supports to locate the new shelf at the height you want then glue and attach them. You can use screws in the right side and align them with the ones under the factory installed top shelf. You should drill holes for these to prevent cracking the supports. I used my nail gun to attached the left support.
Since wood glue does not work great on the paneling, I used super glue. It holds rather well.
Run a bead of wood glue along the tops of the supports then let the shelf and pull-out down onto them.
Measure the EXACT width of the opening at the shelf. Cut a piece of ½ inch thick stock 1½ wide and to the width you just measured. Also cut a piece of paneling to the same dimensions.
I save all paneling I cut out for mods to use for doors or trim like this. You can always replace the plywood under the dinette seats and take that paneling for use in visible areas.
Glue and nail these to the front of the new fixed shelf aligning the top of them with the top of the fixed shelf (to allow the slide to work). Touch up the edges with paint if desired.
Attach upper slides as described above to keep the slide from tilting when pulled out.
