|
Spiral Turning
DOUBLE GROOVE SPIRAL . STRAIGHT SHAFT
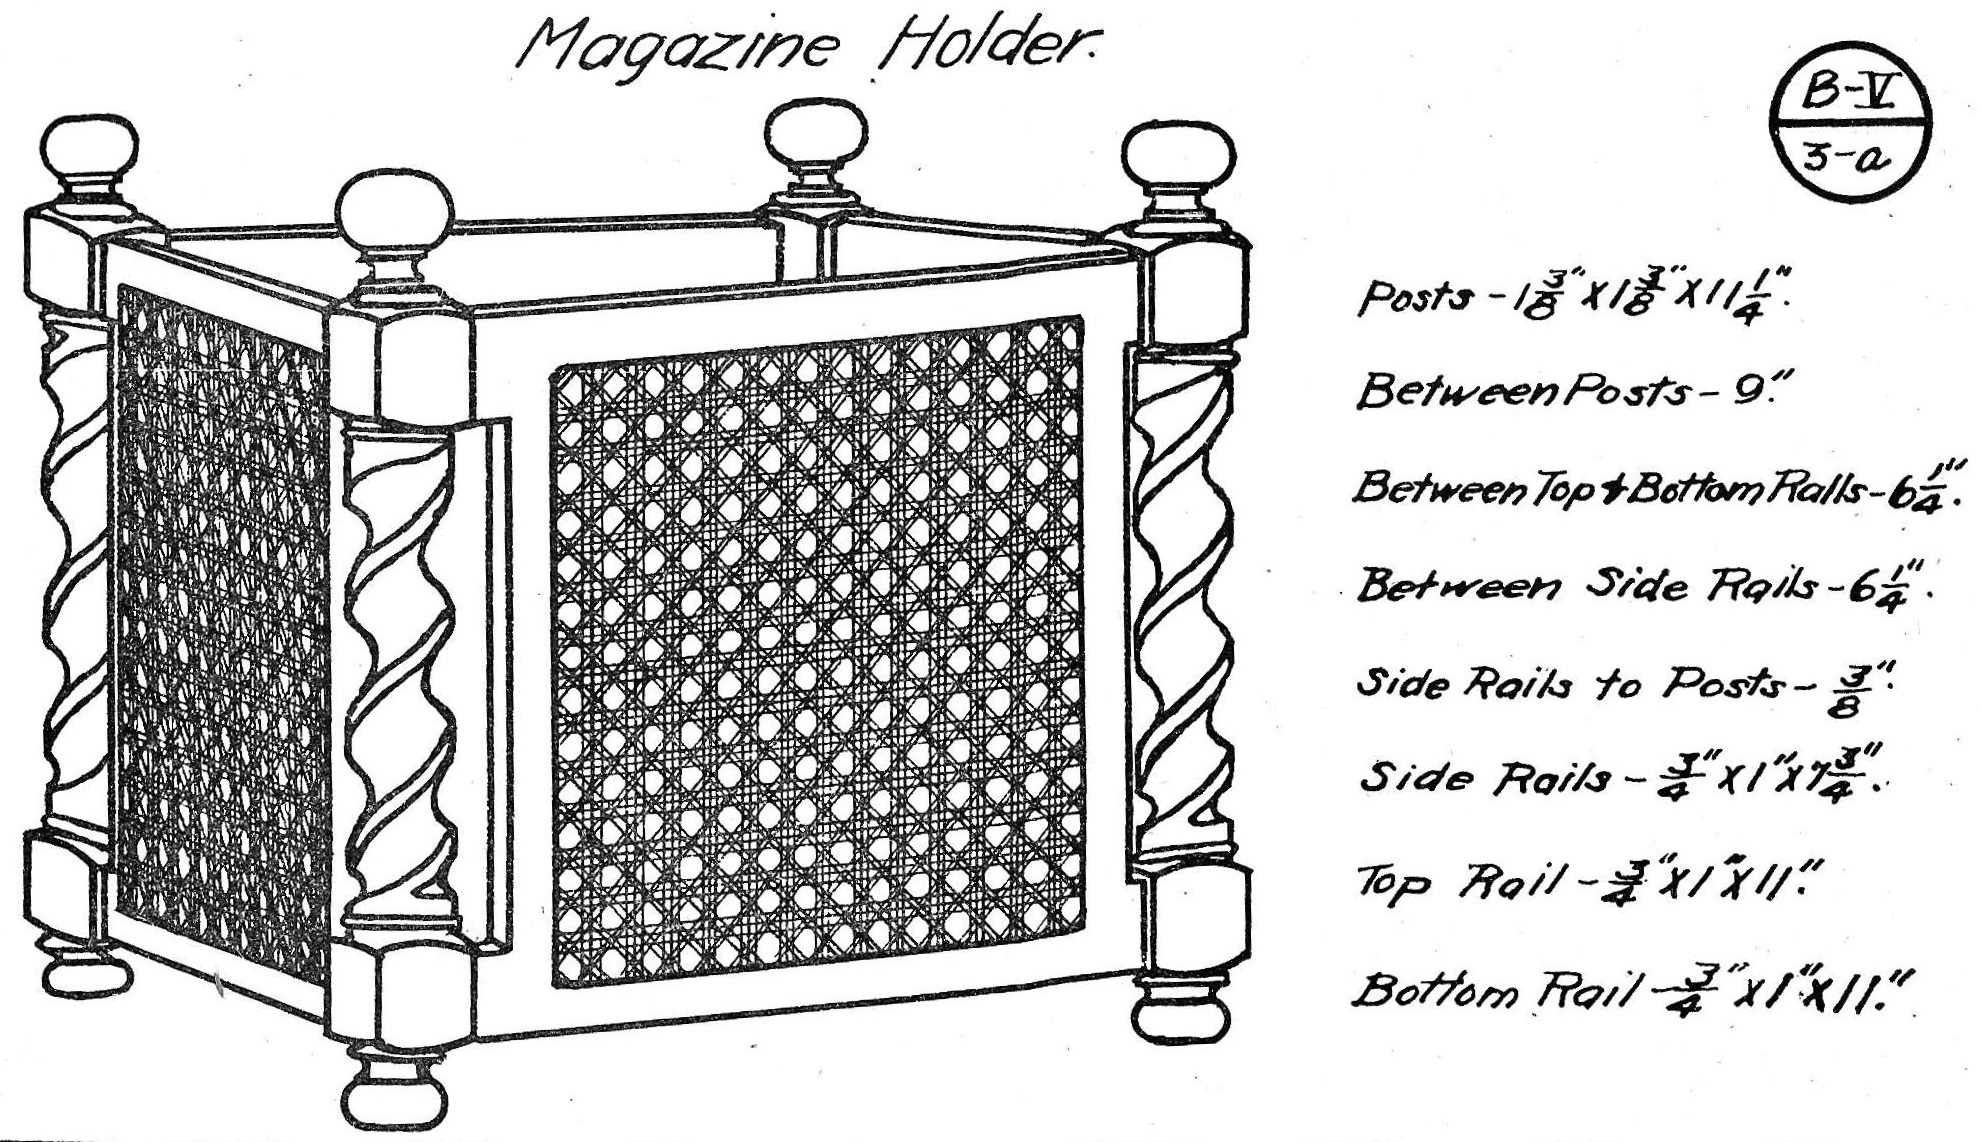
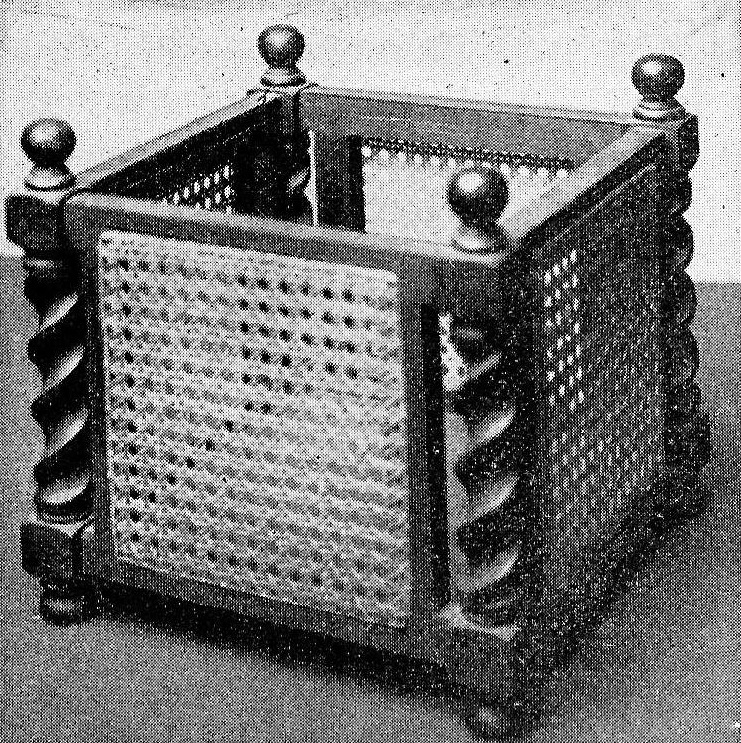
To work out the double‘ groove spiral for the magazine holder illustrated, proceed as follows:
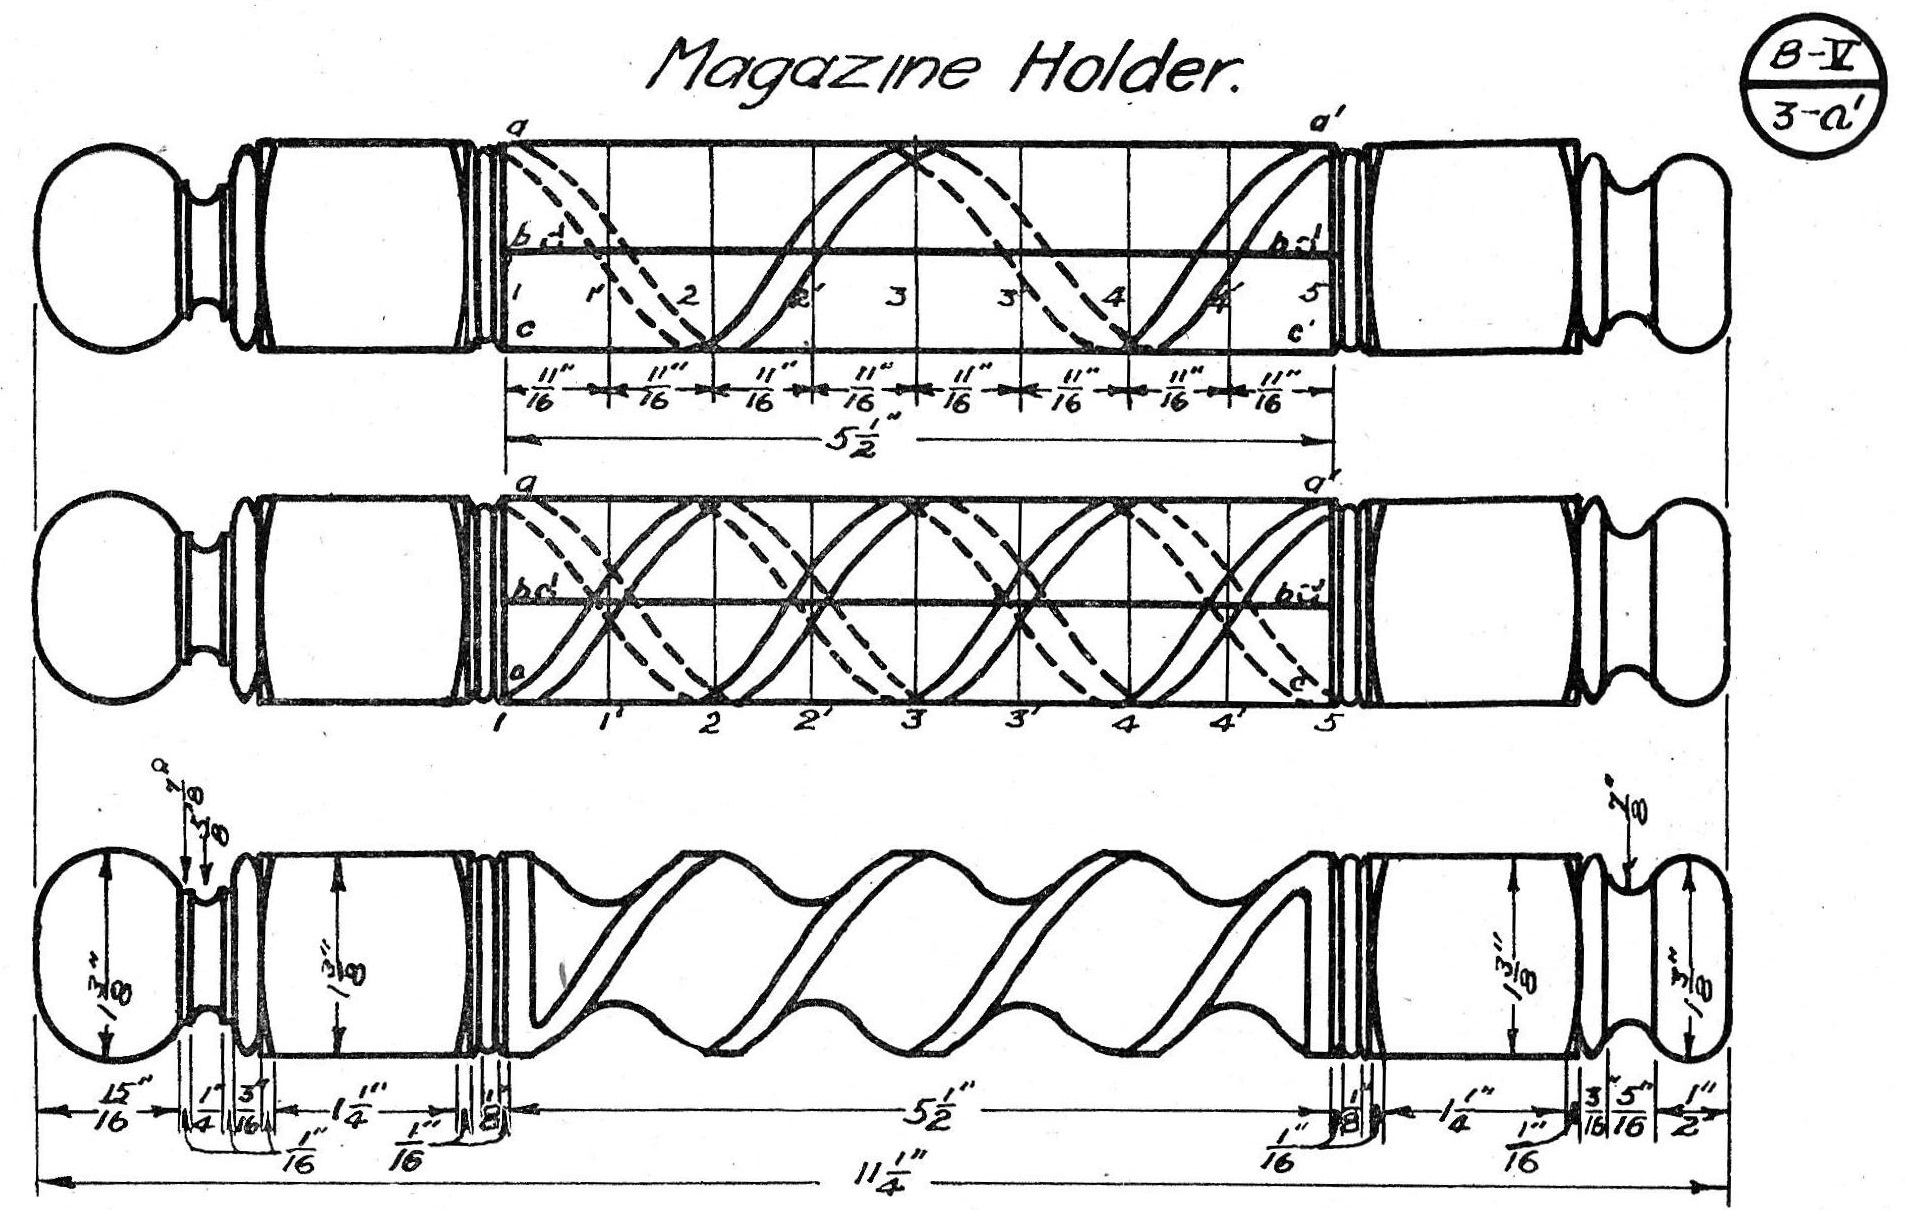
1. Square up the stock to 1-3/8”. Center carefully and turn the design on both ends as shown in the upper diagram (Plate B-V-3-a’). Turn the cylinder between the top and bottom, making it 5½” long and 1-3/8” in diameter.
2. Divide the cylinder into two equal parts. Each part represents one revolution of the spiral.
3. Divide each half into four equal parts as shown in the top and center diagrams (Plate B-V-3-a’), 1-1’, and so on. The proportion of the distance between these circles should be one-half the diameter of the cylinder.
|
4. Draw lines A-A, B-B, C-C, and D-D, parallel to the axis of the cylinder 90° apart.
5. With a band 3/16” wide of any substantial material (preferably a narrow strip of tin or a watch main spring) begin on the line A-A at circle 1, and connect circle 1’ at line B-B, and then connect circle 2 at C-C, and so on until the spiral is made the entire length. Mark on both sides of the 3/ 16" band so as to keep the spiral parallel.
6. Next begin at the line C-C where circle 1 crosses it and connect from here to 1’ at B-B. Proceed as in Step 5, as shown in the center diagram.
7. Now erase the extreme ends of the spiral near circles 1 and 5, and deviate from the original spiral and follow the circles in a more parallel direction so as to allow the spiral to begin and end gradually and not too abruptly. Refer to the lower diagram for this.
8. Cut out portions of wood between the bands previously marked around, as shown in the lower figure. The wood should be cut out with a knife so as to leave the corners sharp on the narrow bands. The portion cut out should be a semi-circle and can be sanded by making a spindle a little smaller than the distance between the bands and fastening sandpaper on the spindle. Place in the lathe and hold the spiral on the sandpaper cylinder at an angle so that the spiral will fit. Turn gradually and the sandpaper will smooth up the portion between the bands and true it up. At the ends where the grooves are smaller, use a smaller stick around which sandpaper has been wound and work out by hand.
9. It is well to cut straight down, about 1/32" deep, along the lines marking out the narrow bands. Then the wood will not be so likely to split while removing the stock which forms the grooves between the bands. 10. Cut out the mortises in the square portions which have been left at both ends. Make the frame work for the sides and cane. Glue together and polish.
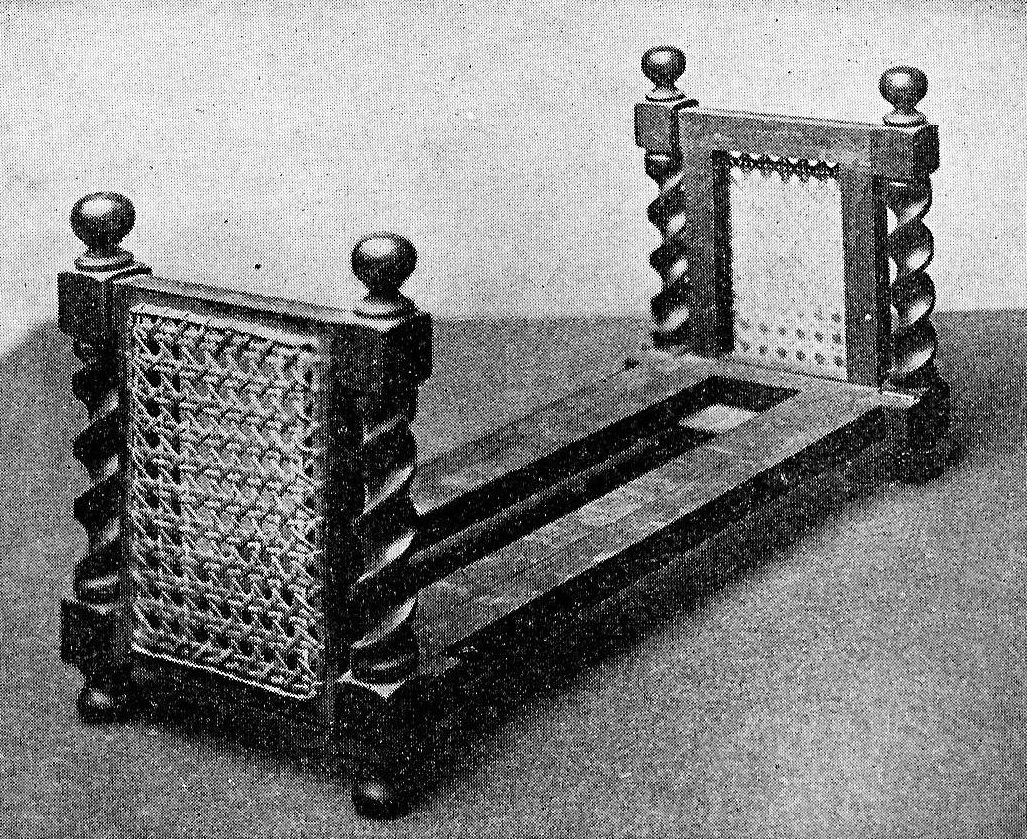
Note :—By making the posts smaller and using the same construction for a side a nice looking book stall may be made. The proportions for the posts are the same as mentioned in Step 3.

|


