TheWoodcrafter.net
The Woodcrafter Page
Copyright © 2004.
My Basic Projects
The Retro Section
Jr. Woodcrafter
My Work
Detailed Plans
About
Lathe Work
Safety
Hints
Pic Gallery
Links
Search
Home
Birdhouses
Guest Book
Contact Us

The Woodcrafter Page© 2004 - all rights reserved.
 
Ad space available here.


Garden or Porch Chair
Here is the original article from the
July - August 1956 Deltagram
ROCKWELL MANUFACTURING COMPANY - A DELTACRAFT PULICATION


Click for larger picture.
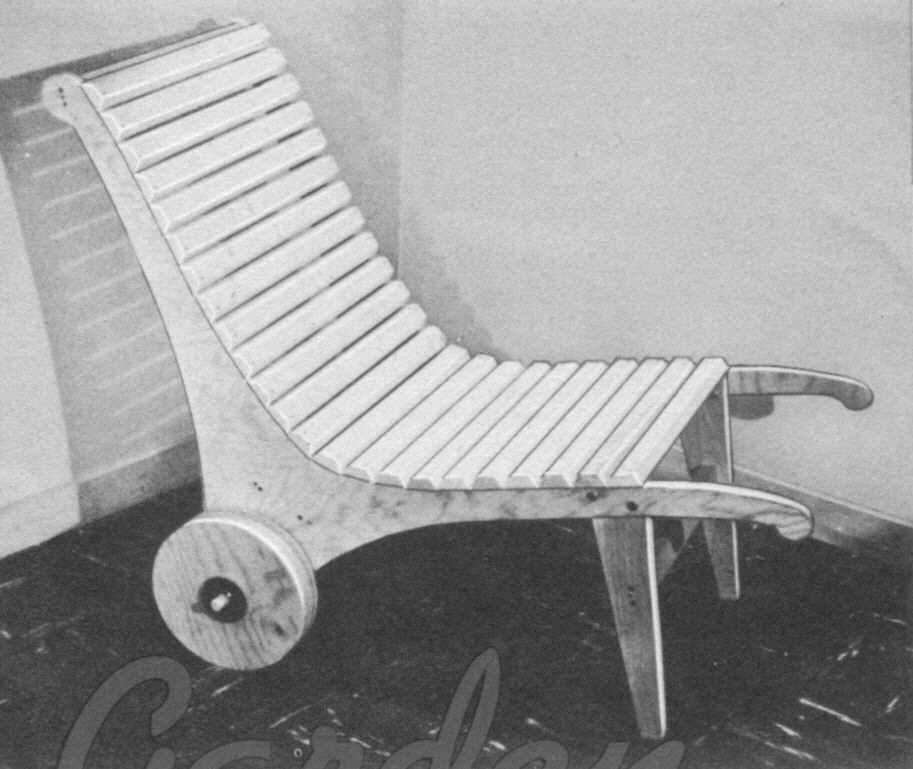
Photo #1

Here is a garden or patio furnishing that you will enjoy building. The sides are plywood, supported in back by with, surfaced wheels that will not dig into the law. The curved back has a contour for restful seating. For added comfort, a 2 inch thick pad can be used.

Lay out the pattern of the sides "A" onto some brown wrapping paper using the squares method as indicated in the drawing, Fig, 1. Cut out the paper template then lay out the pattern on a piece of plywood 36 x 48 inches. If layed out as shown (Fig. 4), you will have enough stock left to make the laminated wheels. By changing the position of the blade chuck on the scroll saw, you can cut the side sections apart for easier handling (see photo No. 2). Should you have any irregularities after cutting, they can be easily smoothed by sanding the edges on the drill press using the #830 sanding drum (photo No 3).
Next, cut tapered legs "B" from 1-1/8 inch thick stock (for all solid stock use redwood, cypress, or cedar) see dimension on drawing. Cut all stretches "K", "J", and "H" from 1-1/8 inch thick stock. Bolt the legs to the sides with ¼ x 2¼ inch carriage bolts. The stretchers are screw fastened to the sides with #10 x 2½ inch screws.


Click for larger picture.
Photo #3
Any irregularity in the curved sections can be easily smoothed down with the Cat. No. 830 3-inch sanding drum on the drill press.


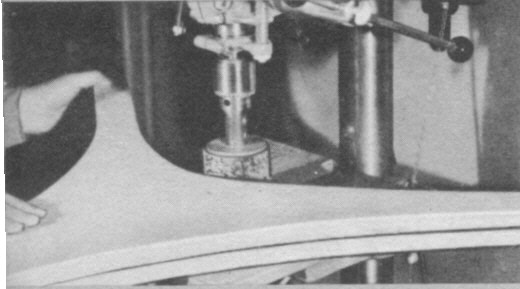
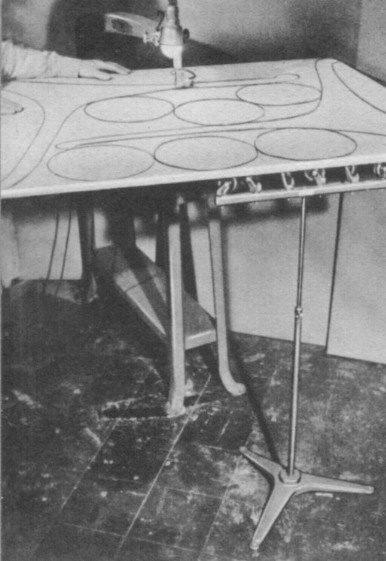
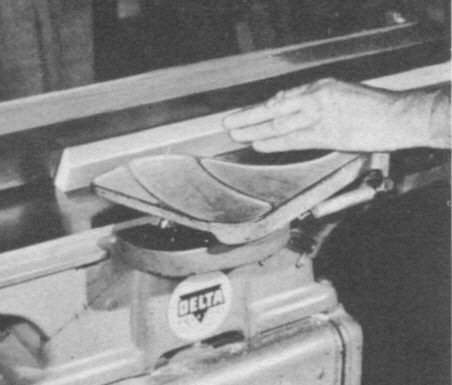
The wheels are made of three ¾ inch plywood stock glued together with waterproof glue. These are assembled to the chair as shown in the drawing. Note the ¼ inch tempered pressedwood washers on each side of the wheel. The ¼ inch hardwood dowels hold the wheels in place.
The slats "G"' are beveled on the jointer (photo No, 4) and screw fastened to the sides with #6 x 1¾ brass flat head wood screws. Rosin coated 7 P common nails could be used instead of the screws. Be sure to drill pilot holes in the slats when using nails, use a 3/32 inch drill.

Break all sharp carriers with garnet paper. Apply one or two costs of a wood preservative before applying out-side print. Paraffin applied to the axle on which the wheel turns and to the pressedwood washers will make the wheels turn more freely.

Click for larger picture.
Photo #2
By changing position of the upper and lower chuck on the scroll saw, the panel can be cut apart for easier handling. Note the new Delta Universal Support, Cat. No. 49-375, being used to support the panel while cutting.

Click for larger picture.
Photo #4
By adjusting the jointer fence to 30°, the sides are bevel jointed as shown above.

BILL OF MATERIALS
Garden Chair
No. of pieces Name Size
2 (A) Sides (Waterproof Plywood) ¾ x 40 x 42
2 (B) Front Legs 1-1/8 x 3½ x 16
1 (K) Front Leg Stretcher 1-1/8 x 1¾ x 17¼
1 (H) Back Stretcher 1-1/8 x 5 x 19¾
1 (J) Top Stretcher 1-1/8 x 2 x 19¾
24 (G) Seat Slats 5/8 x 1¾ x 21
6 (C) Wheels (waterproof Plywood) ¾ x 10 x 10
1 (D) Axle ¾ Diam x 29-5/8
4 (E) Spacing Collars (Pressed Wood) ¼ x 3 x 3
4 (F) Dowel Pins ¼ Diam x 1½
6 Carriage Bolts ¼ x 2¼
8 Flat Head Wood Screws (Brass) No. 10 x 2½
4 Flat Head Wood Screws (Brass) No. 10 x 2
Click for larger picture.
Drawing #1
Right-click here to download the drawing as an Adobe Acrobat (pdf) file.
* * * * Click on the drawings above to download a higher resolution picture. * * * *

*********** WARNING***********
Read my page on safety before building this item.